
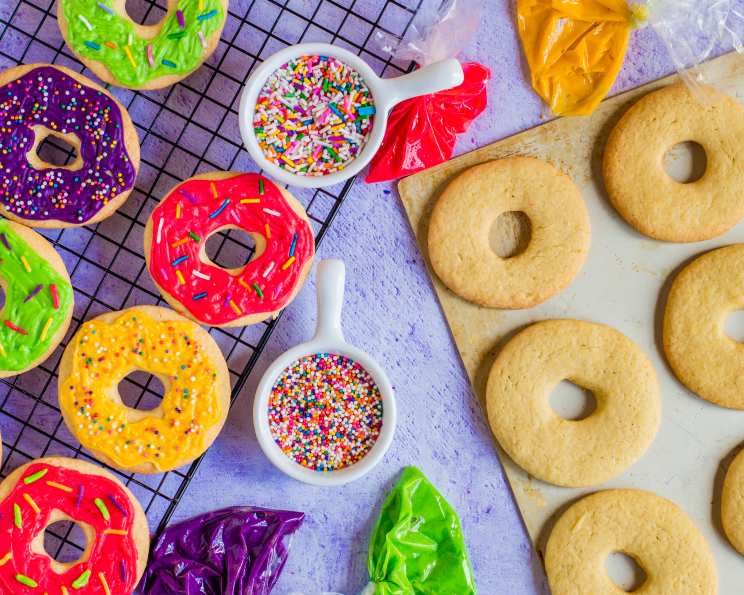
Granny’s Sugar Cookies: A Timeless Classic
The aroma still hits me sometimes, a phantom limb of childhood holidays. It’s the sweet, buttery scent of these very sugar cookies, baking in my grandmother’s warm kitchen. I remember standing on a wobbly stool, flour dusting my nose, as she patiently guided my clumsy hands to roll out the dough and press down cookie cutters. Each perfectly imperfect star and snowman was destined for a coating of colorful frosting and a generous shower of sprinkles – pure, unadulterated joy on a plate. This recipe isn’t just about making cookies; it’s about recreating a memory.
Recipe Overview
- Prep Time: 30 minutes
- Cook Time: 10-12 minutes
- Total Time: 1 hour (includes chilling)
- Yields: Approximately 84 cookies
- Dietary Type: Not specified
Ingredients
- 1 1/2 cups sugar
- 1 1/2 cups butter, softened (no substitutes)
- 2 large eggs
- 2 tablespoons vanilla extract
- 4 cups all-purpose flour
- 1 teaspoon salt
- 1 teaspoon baking soda
- 1 teaspoon cream of tartar
Frosting:
- 1 1/2 cups powdered sugar
- 3 tablespoons butter, softened
- 1 tablespoon vanilla extract
- Various food coloring
- Colored sprinkles
Equipment Needed
- Mixing bowl
- Electric mixer
- Measuring cups and spoons
- Plastic wrap
- Rolling pin
- Cookie cutters
- Baking sheets
- Wire racks
Instructions
-
In a large mixing bowl, cream together the sugar and softened butter until the mixture is light and fluffy. This step is crucial for achieving that melt-in-your-mouth texture, so don’t rush it. Use an electric mixer for the best results, scraping down the sides of the bowl occasionally to ensure everything is evenly incorporated.
-
Add the eggs, one at a time, to the creamed mixture, followed by the vanilla extract. Beat well after each addition, making sure the eggs are fully incorporated. This prevents any curdling and ensures a smooth batter.
-
In a separate bowl, stir together the dry ingredients: flour, salt, baking soda, and cream of tartar. Whisking these ingredients together ensures they are evenly distributed throughout the dough, resulting in a consistent bake.
-
Gradually add the dry ingredients to the creamed mixture, mixing on low speed until just combined. Be careful not to overmix the dough, as this can develop the gluten in the flour and result in tough cookies. Stop mixing as soon as the flour is incorporated.
-
Cover the dough with plastic wrap and chill in the refrigerator for at least 30 minutes. This chilling period allows the gluten to relax, making the dough easier to roll out and preventing the cookies from spreading too much during baking. You can chill it for longer, even overnight, if that suits your schedule.
-
Preheat your oven to 350°F (175°C).
-
On a lightly floured surface, roll out the chilled dough to a 1/4-inch thickness. Use a rolling pin and apply even pressure to ensure a uniform thickness. If the dough sticks to the surface or the rolling pin, add a little more flour.
-
Cut out the cookies using various shaped cookie cutters. Dip the cookie cutters in flour before each cut to prevent sticking. Re-roll any scraps of dough to minimize waste.
-
Carefully transfer the cut-out cookies to an ungreased cookie sheet. Leave a little space between each cookie to allow for even baking.
-
Bake in the preheated oven for 10-12 minutes, or until the edges are lightly golden brown. Keep a close eye on the cookies, as they can burn easily. The exact baking time may vary depending on your oven.
-
Cool the cookies on the baking sheet for a few minutes before transferring them to wire racks to cool completely. This prevents them from breaking while they are still warm and soft.
-
Prepare the frosting: In a bowl, mix together the powdered sugar, softened butter, and vanilla extract. Add milk, one tablespoon at a time, until you reach the desired consistency. If you want a thinner frosting, add more milk. If you want a thicker frosting, add more powdered sugar.
-
Divide the frosting into separate bowls and add food coloring to each bowl to obtain your desired colors.
-
Spread the frosting over the cooled cookies and decorate with colored sprinkles. Let the frosting set completely before storing the cookies.
Expert Tips & Tricks
- Creaming butter and sugar: Make sure your butter is properly softened, but not melted. It should be soft enough to leave a slight indentation when you press it with your finger. This step is crucial for creating a light and airy texture.
- Chilling the dough: Don’t skip the chilling step! Chilling the dough prevents the cookies from spreading too much in the oven and also makes it easier to roll out.
- Preventing sticking: Dust your work surface and cookie cutters with flour to prevent the dough from sticking.
- Baking evenly: Use a baking sheet that is light in color for more even baking. Dark baking sheets can cause the bottoms of the cookies to burn.
- Cookie thickness: For uniformly baked cookies, ensure the rolled-out dough is of even thickness.
Serving & Storage Suggestions
Serve these classic sugar cookies at room temperature. They are perfect for holidays, parties, or as a sweet treat any time of day. Store the cooled and frosted cookies in an airtight container at room temperature for up to 5 days. For longer storage, you can freeze the un-frosted cookies for up to 3 months. Thaw them completely before frosting. Layer the cookies between sheets of parchment paper to prevent them from sticking together.
Nutritional Information
| Nutrient | Amount per Serving | % Daily Value |
|---|---|---|
| Calories | 79.7 kcal | N/A |
| Calories from Fat | 34 g | 44% |
| Total Fat | 3.9 g | 5% |
| Saturated Fat | 2.4 g | 11% |
| Cholesterol | 14.2 mg | 4% |
| Sodium | 77.2 mg | 3% |
| Total Carbohydrate | 10.3 g | 3% |
| Dietary Fiber | 0.2 g | 0% |
| Sugars | 5.7 g | N/A |
| Protein | 0.8 g | 1% |
Variations & Substitutions
- Lemon Sugar Cookies: Add 1 tablespoon of lemon zest to the dough for a bright, citrusy flavor.
- Chocolate Sugar Cookies: Add 1/4 cup of unsweetened cocoa powder to the dry ingredients for a chocolate version.
- Almond Extract: Substitute almond extract for the vanilla extract for a nutty flavor.
- Gluten-Free Sugar Cookies: Use a gluten-free all-purpose flour blend in place of regular flour. You may need to adjust the amount of liquid slightly.
FAQs (Frequently Asked Questions)
Q: Why are my sugar cookies spreading too much in the oven?
A: The most common reason is that the dough wasn’t chilled long enough. Make sure to chill the dough for at least 30 minutes before rolling it out. Also, make sure your oven temperature is accurate.
Q: Can I make the dough ahead of time?
A: Yes! The dough can be made ahead of time and stored in the refrigerator for up to 2 days. Just wrap it tightly in plastic wrap.
Q: My frosting is too thick. What should I do?
A: Add a little milk, one tablespoon at a time, until you reach your desired consistency.
Q: Can I freeze these cookies?
A: Yes, you can freeze the un-frosted cookies for up to 3 months. Thaw them completely before frosting.
Q: What can I use instead of cream of tartar?
A: If you don’t have cream of tartar, you can substitute it with an equal amount of lemon juice or white vinegar. However, the cookies may have a slightly different flavor and texture.
Final Thoughts
These Granny’s Sugar Cookies are more than just a recipe; they’re a connection to the past, a way to share love and create new memories. So, gather your ingredients, invite your loved ones, and embark on this sweet baking adventure. Don’t be afraid to get creative with the frosting and sprinkles – let your imagination run wild! And please, share your creations and feedback; knowing you’re enjoying a little piece of my grandmother’s kitchen warms my heart.