
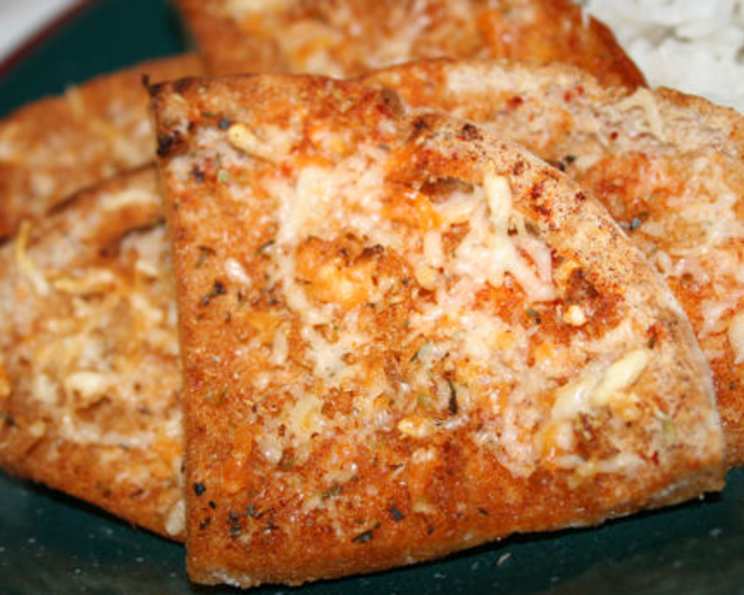
Healthier Garlic Bread: A Guilt-Free Delight
My grandmother, bless her heart, made the best garlic bread. It was dripping with butter, piled high on a crusty baguette, and utterly irresistible. But, after one or two slices, I’d feel sluggish and regretful. This recipe captures the essence of that classic comfort food but transforms it into a lighter, healthier snack, perfect for satisfying those cravings without the heavy feeling. It’s a testament to the fact that you can enjoy familiar favorites without sacrificing your well-being.
Recipe Overview
- Prep Time: 5 minutes
- Cook Time: 2-3 minutes
- Total Time: 8 minutes
- Servings: 4
- Yield: 8 pieces
- Dietary Type: Vegetarian
Ingredients
- 2 (4-inch) whole wheat pita bread
- 2 teaspoons olive oil
- 1 large garlic clove, peeled and halved
- 4 teaspoons grated parmesan cheese
- 1/8 teaspoon salt
- 1/2 teaspoon paprika
- 1/2 teaspoon dried oregano
Equipment Needed
- Broiler
- Knife
- Cookie sheet
Instructions
-
Preheat your broiler. Make sure the rack is positioned about 6 inches from the heating element. Keeping a close watch is essential, as broilers can vary in intensity.
-
Carefully cut a slit on both sides of each pita bread. Gently pry open (or cut) the pita so that you have 2 circles from each pita. This creates a thinner surface area, which will crisp up nicely under the broiler.
-
Lightly brush the rough side of each pita circle with olive oil. This will help the spices adhere and contribute to the golden-brown color.
-
Rub each pita circle generously with the cut side of the garlic clove. This infuses the pita with a wonderful, pungent garlic flavor. Don’t be shy; the more you rub, the more garlic flavor you’ll get.
-
Cut each pita circle into quarters. This creates bite-sized pieces that are perfect for snacking or serving as a side dish.
-
Arrange the pita pieces on a cookie sheet in a single layer. This ensures that each piece is evenly exposed to the broiler’s heat.
-
Sprinkle the parmesan cheese, salt, paprika, and oregano evenly over the pita pieces. Feel free to adjust the amount of seasoning to your liking.
-
Place the cookie sheet 6 inches from the broiler and broil for 2-3 minutes, or until the pita pieces are golden brown and crispy. Watch them very carefully while broiling, as they can quickly go from perfectly finished to burnt. It’s a matter of seconds!
Expert Tips & Tricks
- Garlic Infusion: For an even more intense garlic flavor, try mincing the garlic and mixing it with the olive oil before brushing it on the pita. You can also let the garlic infuse the oil for a few hours before using it.
- Cheese Variations: While parmesan is classic, you can experiment with other hard cheeses like Pecorino Romano or Asiago. For a creamier texture, try a sprinkle of fresh mozzarella during the last minute of broiling.
- Spice it Up: Add a pinch of red pepper flakes for a little heat. A dash of garlic powder can also boost the garlic flavor, even if you use fresh garlic.
- Doneness Check: The pita should be crisp and golden brown, but not burnt. If the edges are browning too quickly, move the cookie sheet further away from the broiler.
Serving & Storage Suggestions
Serve your healthier garlic bread immediately while it’s warm and crispy. It’s fantastic as an appetizer, a side dish with pasta or soup, or even as a snack on its own.
To store leftovers, let the garlic bread cool completely and then store it in an airtight container at room temperature. It will stay crispy for a day or two. To reheat, you can briefly broil the pieces again (watch them carefully!) or toast them in a toaster oven. While refrigeration is possible, it’s not recommended, as the moisture will make the pita bread soggy.
Nutritional Information
| Nutrient | Amount per Serving | % Daily Value |
|---|---|---|
| Calories | 67 kcal | N/A |
| Calories from Fat | 28 kcal | 42% |
| Total Fat | 3.1 g | 4% |
| Saturated Fat | 0.7 g | 3% |
| Cholesterol | 1.5 mg | 0% |
| Sodium | 172.9 mg | 7% |
| Total Carbohydrate | 8.3 g | 2% |
| Dietary Fiber | 1.2 g | 4% |
| Sugars | 0.2 g | 0% |
| Protein | 2.1 g | 4% |
Variations & Substitutions
- Gluten-Free: Use gluten-free pita bread for a gluten-free version. Be sure to check the ingredient list carefully, as some gluten-free products may contain added sugars or starches.
- Vegan: Omit the parmesan cheese and use a vegan parmesan alternative, or nutritional yeast, for a cheesy flavor.
- Herb Garden: Experiment with different herbs. Fresh basil, parsley, or thyme would all be delicious additions. Sprinkle them on after broiling for the best flavor.
- Mediterranean Twist: Add a sprinkle of crumbled feta cheese and a drizzle of balsamic glaze after broiling.
- Spicy Garlic Bread: Mix a pinch of red pepper flakes into the olive oil before brushing it on the pita.
FAQs (Frequently Asked Questions)
Q: Can I use regular bread instead of pita bread?
A: While pita bread is recommended for its thinness and crispness, you can use other types of bread. Cut baguette slices or English muffins into thin pieces and adjust the broiling time accordingly.
Q: Can I make this ahead of time?
A: You can prepare the pita bread by brushing it with olive oil, rubbing it with garlic, and sprinkling it with seasonings ahead of time. Store it in an airtight container at room temperature and broil it just before serving.
Q: Can I use garlic powder instead of fresh garlic?
A: Yes, you can substitute garlic powder for fresh garlic. Sprinkle about 1/2 teaspoon of garlic powder over the pita pieces along with the other seasonings. However, fresh garlic provides a more robust and authentic flavor.
Q: How do I prevent the garlic bread from burning under the broiler?
A: Keep a close watch on the pita bread while it’s under the broiler, as it can burn quickly. Position the rack further away from the heat source if needed, and reduce the broiling time.
Q: Can I freeze this garlic bread?
A: Freezing is not recommended as it can affect the texture of the pita bread. It’s best enjoyed fresh or within a day or two.
Final Thoughts
This healthier garlic bread recipe is a fantastic way to enjoy a beloved comfort food without the guilt. Its quick preparation and simple ingredients make it a perfect choice for a weeknight snack or a last-minute appetizer. So, give it a try, experiment with your favorite flavors, and let me know what you think! I’m confident that this recipe will become a staple in your kitchen. Pair it with a light pasta dish or a hearty soup for a complete and satisfying meal. Enjoy!