
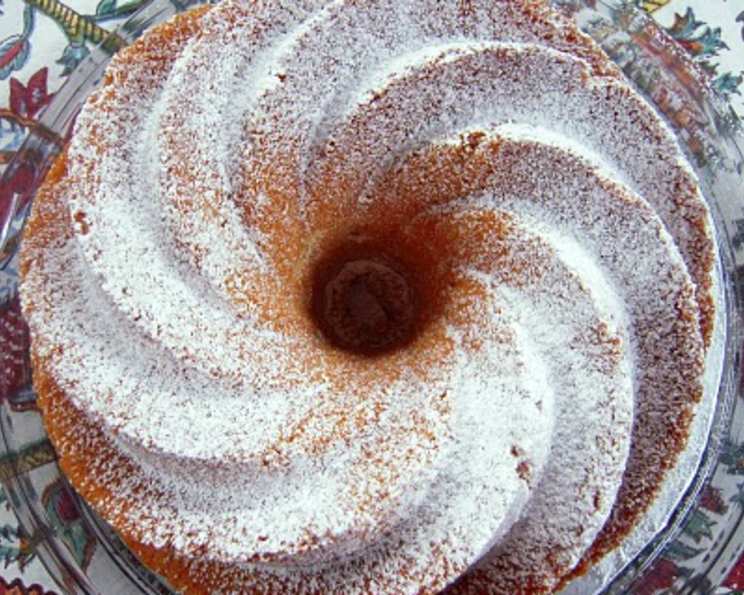
Heritage Bundt Cake: A Timeless Classic
The aroma of a freshly baked Bundt cake transports me straight back to my grandmother’s kitchen. Her Bundt pan, a deeply etched beauty passed down through generations, was her secret weapon for effortless elegance. I can still picture the golden-brown cake, glistening with a simple glaze, taking center stage on her Sunday afternoon tea table. It wasn’t just dessert; it was a symbol of warmth, family, and the simple joys of life – a legacy I now strive to recreate in my own kitchen.
Recipe Overview
- Prep Time: 20 minutes
- Cook Time: 55-60 minutes
- Total Time: 1 hour 15-20 minutes
- Servings: 16
- Yields: 1 cake
- Dietary Type: Not specified
Ingredients
- 2 3⁄4 cups all-purpose flour
- 1 1⁄2 teaspoons baking powder
- 3⁄4 teaspoon salt
- 1 cup unsalted butter (equals 16 tablespoons or 2 sticks), at room temperature
- 1 1⁄2 cups granulated sugar
- 4 eggs, lightly beaten, at room temperature
- 1 teaspoon vanilla extract
- 1 cup milk, at room temperature
- Confectioners’ sugar (for dusting)
Equipment Needed
- Bundt pan
- Electric mixer (stand or hand mixer)
- Mixing bowls
- Measuring cups and spoons
- Sifter (or fine-mesh sieve)
- Waxed paper
- Wire rack
- Toothpick
Instructions
- Ensure all ingredients, particularly the butter, eggs, and milk, are at room temperature. This is crucial for proper emulsification and a tender crumb.
- Position a rack in the lower third of the oven and preheat to 325°F (165°C). Baking in the lower third helps prevent the top from browning too quickly.
- Thoroughly grease and flour the Bundt pan. Pay close attention to all the crevices. To ensure even coverage, use a pastry brush to get into every nook and cranny. Tap out any excess flour to prevent a white coating on the baked cake.
- Over a sheet of waxed paper, sift together the flour, baking powder, and salt. This step aerates the dry ingredients, resulting in a lighter and more evenly textured cake. Set aside the sifted mixture.
- In the bowl of an electric mixer fitted with the flat beater (paddle attachment), beat the butter on medium speed until creamy and smooth, about 30 seconds. This ensures the butter is properly softened and ready to incorporate air.
- Add the granulated sugar to the creamed butter and continue beating until light and fluffy, about 5 minutes. Stop the mixer occasionally to scrape down the sides of the bowl, ensuring all the sugar is fully incorporated. This step is essential for creating air pockets that contribute to the cake’s light texture.
- Add the eggs a little at a time, beating well after each addition. Beating well after each addition prevents the mixture from curdling and ensures a smooth batter.
- Beat in the vanilla extract just until incorporated, about 1 minute. Overmixing at this stage can develop gluten and result in a tougher cake.
- Reduce the mixer speed to low and add the flour mixture in 3 additions, alternating with the milk, beginning and ending with the flour. Beat each addition just until incorporated. Stop the mixer occasionally to scrape down the sides of the bowl. This alternating addition method prevents the gluten in the flour from developing too much, resulting in a tender cake. It also helps to keep the batter emulsified.
- Spoon the batter into the prepared pan, spreading the batter so the sides are higher than the center. This helps the cake bake evenly and prevents a sunken center.
- Bake until the cake begins to pull away from the sides of the pan and a toothpick inserted into the center comes out clean, 55 to 60 minutes. The baking time may vary depending on your oven, so keep a close eye on it towards the end.
- Transfer the pan to a wire rack and let cool for 15 minutes. This allows the cake to set slightly before inverting, which reduces the risk of it breaking.
- Gently tap the pan on a work surface to loosen the cake. Set the rack over a sheet of waxed paper, invert the pan onto the rack, and lift off the pan. If the cake doesn’t release immediately, try tapping the pan a few more times or using a thin spatula to gently loosen the edges.
- Let the cake cool completely, at least 2 hours, before serving. This allows the cake to fully set and prevents it from being too crumbly when cut.
- Dust with confectioners’ sugar just before serving. This adds a touch of sweetness and visual appeal.
Expert Tips & Tricks
- Room Temperature is Key: Emphasize the importance of room temperature ingredients. Cold ingredients can cause the butter to seize and the batter to curdle.
- Precise Measuring: Baking is a science, so accurate measurements are essential. Use measuring cups and spoons specifically designed for baking, and level off dry ingredients with a straight edge.
- Don’t Overmix: Overmixing develops gluten, which can result in a tough cake. Mix only until the ingredients are just combined.
- Oven Calibration: Ovens can vary in temperature, so it’s a good idea to calibrate your oven regularly to ensure accurate baking. An oven thermometer can be helpful for this.
- Bundt Pan Prep: If you’re having trouble getting your cake to release from the Bundt pan, try using a baking spray that contains flour, or grease and flour the pan very thoroughly. You can also try chilling the pan in the freezer for a few minutes before pouring in the batter.
Serving & Storage Suggestions
This Heritage Bundt Cake is delightful served on its own, simply dusted with confectioners’ sugar. For a more decadent treat, consider serving it with a scoop of vanilla ice cream, a dollop of whipped cream, or a drizzle of chocolate sauce. Leftover cake can be stored at room temperature in an airtight container for up to 3 days, or in the refrigerator for up to a week. For longer storage, wrap the cake tightly in plastic wrap and freeze for up to 2 months. Thaw the cake in the refrigerator overnight before serving. To refresh a slightly dry cake, you can warm it in the oven at 300°F for a few minutes.
Nutritional Information
| Nutrient | Amount per Serving | % Daily Value |
|---|---|---|
| Calories | 281.6 kcal | N/A |
| Calories from Fat | 121 g | 43% |
| Total Fat | 13.5 g | 20% |
| Saturated Fat | 8.1 g | 40% |
| Cholesterol | 85.5 mg | 28% |
| Sodium | 170 mg | 7% |
| Total Carbohydrate | 36.1 g | 12% |
| Dietary Fiber | 0.6 g | 2% |
| Sugars | 18.9 g | 75% |
| Protein | 4.4 g | 8% |
Note: Nutritional information is an estimate and may vary based on specific ingredients and preparation methods.
Variations & Substitutions
- Lemon Zest: Add the zest of one lemon to the batter for a bright, citrusy flavor.
- Chocolate Chips: Fold in 1 cup of chocolate chips for a chocolatey twist.
- Nuts: Add 1 cup of chopped nuts (such as walnuts or pecans) for added texture and flavor.
- Spices: Enhance the flavor with a pinch of cinnamon, nutmeg, or cardamom.
- Gluten-Free: Substitute the all-purpose flour with a gluten-free blend for a gluten-free version. Be sure to use a blend specifically formulated for baking.
- Dairy-Free: Replace the unsalted butter with a plant-based butter alternative and the milk with a non-dairy milk such as almond, soy, or oat milk.
FAQs (Frequently Asked Questions)
Q: Why is it important to grease and flour the Bundt pan so thoroughly?
A: The intricate design of Bundt pans makes it crucial to ensure every surface is coated, preventing the cake from sticking and ensuring a clean release.
Q: Can I use salted butter instead of unsalted butter?
A: While you can, it’s best to use unsalted butter and control the amount of salt added to the recipe. This allows for better flavor control. If using salted butter, reduce the amount of salt in the recipe by half.
Q: How do I prevent the cake from sinking in the middle?
A: Make sure to spread the batter higher on the sides of the pan than in the center. Also, avoid opening the oven door frequently during baking, as this can cause temperature fluctuations that lead to sinking.
Q: What if my cake is browning too quickly?
A: If the cake is browning too quickly, tent it loosely with aluminum foil to shield it from the heat.
Q: Can I make this cake ahead of time?
A: Yes, this cake can be made a day or two ahead of time. Store it at room temperature in an airtight container.
Final Thoughts
This Heritage Bundt Cake recipe is more than just a baking project; it’s an invitation to create memories and connect with tradition. I encourage you to gather your ingredients, preheat your oven, and embark on this culinary journey. Whether you’re a seasoned baker or a kitchen novice, the simple elegance of this cake is sure to impress. Don’t be afraid to experiment with variations and make it your own. And most importantly, enjoy the process and share your creations with loved ones. Let the aroma of this timeless classic fill your home with warmth and joy!