
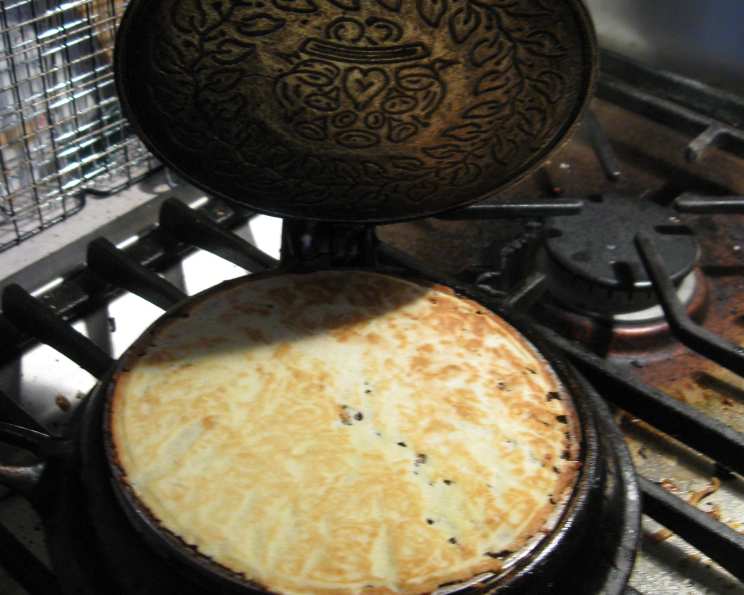
Scandinavian Christmas Crispy Krumkake
The scent of cardamom and warm butter hangs heavy in the air, a memory etched in my childhood. Every December, my grandmother’s kitchen transformed into a krumkake factory, the rhythmic clack of the iron a festive soundtrack. I remember being mesmerized as she deftly rolled the hot, paper-thin cookies around a wooden cone, creating delicate, edible trumpets. These weren’t just cookies; they were edible vessels of holiday tradition, each bite transporting me back to those cozy, laughter-filled afternoons.
Recipe Overview
- Prep Time: 30 minutes
- Cook Time: 20-30 minutes (depending on batch size)
- Total Time: 50-60 minutes
- Yields: Approximately 2 dozens
- Dietary Type: Not specified (contains dairy and eggs)
Ingredients
- 1 cup sugar
- 1/2 cup softened butter
- 2 eggs
- 1 cup milk
- 1 1/2 cups all-purpose flour
- Water, if necessary
- Shortening, oil, or melted butter for greasing the krumkake iron
Equipment Needed
- Medium bowl
- Electric mixer (optional, but recommended)
- Krumkake iron (a specialized iron for making krumkake)
- Range top burner
- Small bowl or dish for shortening/oil/butter
- Pastry brush
- Knife or thin spatula
- Cooling rack
- Cone-shaped krumkake roller (often comes with the iron, or you can use a wooden dowel)
- Airtight containers for storage
Instructions
-
In a medium bowl, cream together the 1 cup of sugar and 1/2 cup of softened butter. Use an electric mixer for best results, creaming until the mixture is light and fluffy. This process incorporates air, which is crucial for a tender krumkake.
-
Beat in the 2 eggs, one at a time, until the mixture is light and lemon-colored. Ensure each egg is fully incorporated before adding the next.
-
Beat in the 1 cup of milk and 1 1/2 cups of all-purpose flour until just blended and smooth. Avoid overmixing, which can develop the gluten in the flour and result in a tougher cookie.
-
Let the batter stand for 30 minutes. This allows the flour to fully hydrate, resulting in a more cohesive batter.
-
While the batter rests, preheat the krumkake iron over medium heat on top of the range. The ideal temperature is reached when a drop of water sizzles when dropped onto the iron’s surface. Start with medium heat and adjust as needed to prevent burning.
-
Open the iron and lightly brush the inside of both the top and bottom plates with shortening, oil, or melted butter. This prevents the krumkake from sticking and ensures easy removal. Re-grease before each cookie.
-
Spoon approximately 1 tablespoon of batter onto the center of the hot iron. The amount of batter may need to be adjusted depending on the size of your krumkake iron.
-
Close the iron firmly and bake for about 1 minute on each side, or until the cookie is lightly browned. The exact baking time will vary depending on your stove and krumkake iron, so keep a close watch.
-
Insert the tip of a knife or thin spatula under the edge of the cookie to carefully remove it from the iron. Be gentle, as the cookie will be very delicate at this stage.
-
Working quickly, roll the hot cookie into a cigar or cone shape around a cone-shaped krumkake roller. It is important to shape the krumkake while it is still hot and pliable.
-
Place the rolled krumkake on a cooling rack to cool completely. As the cookies cool, they will become crisp.
-
Repeat steps 6-11 with the remaining batter.
-
As you work, you may notice that the batter thickens. Add water, a tablespoon at a time, as necessary to thin it to the consistency of thick cream. This will ensure that the cookies remain thin and crisp.
-
Store the baked cookies in airtight containers to maintain their crispness.
Expert Tips & Tricks
- Temperature Control: Achieving the correct temperature for your krumkake iron is key. If the iron is too hot, the cookies will burn before they cook through. If it’s too cold, they won’t crisp properly. Start with medium heat and adjust as needed.
- Even Cooking: For even cooking, flip the iron halfway through each side’s cooking time.
- Rolling Technique: Practice makes perfect when it comes to rolling. Work quickly and confidently, but be gentle to avoid tearing the delicate cookie.
- Batter Consistency: Don’t be afraid to adjust the batter with a little water as you go. The goal is a consistency similar to heavy cream.
- Flavor Enhancements: Add a pinch of cardamom or a teaspoon of vanilla extract to the batter for extra flavor.
- Prevent Sticking: Make sure to generously grease the krumkake iron before each cookie to avoid sticking.
- Troubleshooting Burnt Cookies: If your krumkake is burning before its cooked inside, try lowering the heat setting on the burner. You might also want to try lifting the iron slightly during cooking to lower the direct heat on the batter.
Serving & Storage Suggestions
Serve your crispy krumkake alongside other Scandinavian treats like rosettes, sandbakkels, or lefse for a truly authentic holiday spread. They are delicious on their own, or you can fill them with whipped cream, lingonberry jam, or a dollop of cloudberry preserves.
Store cooled krumkake in airtight containers at room temperature. Properly stored, they will last for up to a week. For longer storage, you can freeze them for several months. Place them in a freezer-safe container, separating layers with parchment paper to prevent sticking. Thaw at room temperature before serving. Do not microwave to reheat, as this will cause them to soften.
Nutritional Information
| Nutrient | Amount per Serving (approx. 2 cookies) | % Daily Value* |
|---|---|---|
| Calories | 107 kcal | 5% |
| Total Fat | 5.3 g | 7% |
| Saturated Fat | 3.2 g | 16% |
| Cholesterol | 29 mg | 10% |
| Sodium | 38 mg | 2% |
| Total Carbohydrate | 14.8 g | 5% |
| Dietary Fiber | 0.2 g | 1% |
| Sugars | 8.4 g | – |
| Protein | 1.7 g | 3% |
*Percent Daily Values are based on a 2,000 calorie diet. Your daily values may be higher or lower depending on your calorie needs.
Variations & Substitutions
- Gluten-Free Krumkake: Substitute a gluten-free all-purpose flour blend for the regular flour. Be sure to use a blend that contains xanthan gum for binding.
- Dairy-Free Krumkake: Replace the butter with a vegan butter substitute and the milk with almond, soy, or oat milk.
- Lemon Krumkake: Add the zest of one lemon to the batter for a bright, citrusy flavor.
- Spice Variations: Experiment with different spices like nutmeg, ginger, or cinnamon to customize the flavor profile.
- Chocolate Krumkake: Add 2 tablespoons of cocoa powder to the batter for a chocolatey twist. You may need to adjust the liquid to maintain the correct consistency.
FAQs (Frequently Asked Questions)
Q: My krumkake sticks to the iron. What am I doing wrong?
A: The most likely culprit is not greasing the iron sufficiently. Make sure to lightly brush the inside of both plates with shortening, oil, or melted butter before each cookie.
Q: How do I know when the krumkake iron is hot enough?
A: The ideal temperature is reached when a drop of water sizzles immediately when dropped onto the surface of the iron. If the water evaporates instantly, the iron is too hot.
Q: My krumkake is burning on the outside but still soft inside. What should I do?
A: Lower the heat on your stovetop. You can also try lifting the iron slightly during cooking to reduce the direct heat on the batter.
Q: Can I make the batter ahead of time?
A: While it is best to use the batter soon after it is made, you can prepare it up to 24 hours in advance. Store it covered in the refrigerator. Let it come to room temperature before using and stir well.
Q: My krumkake is not crisping up. What is the problem?
A: The batter might be too thick. Add water, a tablespoon at a time, until the batter reaches a consistency similar to heavy cream. Also, ensure the cookies are cooling completely on a wire rack to allow air circulation.
Final Thoughts
Now that you’re armed with this detailed guide, I encourage you to embrace the tradition and create your own batch of Scandinavian Christmas Crispy Krumkake. Don’t be intimidated by the specialized equipment; the reward of sharing these delicate, delicious cookies with loved ones is well worth the effort. Perhaps serve them alongside a cup of steaming gløgg or a creamy eggnog for the ultimate holiday indulgence. And don’t hesitate to experiment with variations and substitutions to make this recipe your own. Happy baking, and God Jul!