
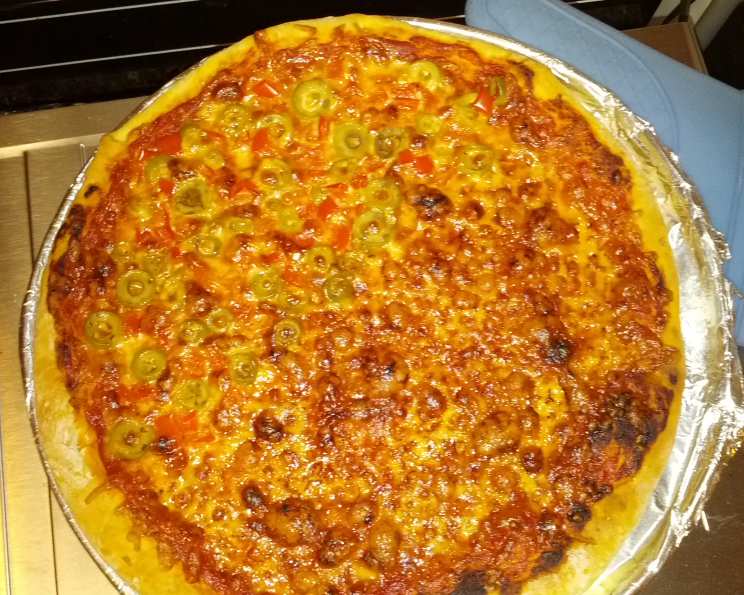
Super Fast and Easy Pizza Dough/Crust: Your Weeknight Pizza Savior
Pizza night was always a big deal in our house growing up. I can still picture my mom, flour dusting her apron, expertly tossing dough with a flourish that always seemed just out of my reach. The aroma of baking pizza, a comforting blend of warm bread, oregano, and melting cheese, filled the air, signaling that a fun, family-filled evening was about to begin. While I cherish those memories of her all-day pizza preparations, life now demands speed and efficiency, which is why I’m so excited to share this unbelievably fast and easy pizza dough recipe.
Recipe Overview
- Prep Time: 15 minutes
- Cook Time: 20-30 minutes
- Total Time: 35-45 minutes
- Servings: 6
- Yield: 1 14-inch pizza or 2 12-inch pizzas
- Dietary Type: Vegetarian (easily adaptable to vegan – see variations)
Ingredients
- 3 – 3 ½ cups flour, divided
- 1 (1/4 ounce) package fast-rising yeast (about 2 1/4 tsp)
- ¾ teaspoon salt
- 1 cup very warm water (about 120°F)
- 2 tablespoons olive oil
- 2 teaspoons oregano (optional) or 2 teaspoons rosemary (optional)
- 1 minced garlic clove (optional)
- Cornmeal for dusting (optional)
Equipment Needed
- Large mixing bowl
- Measuring cups and spoons
- Lightly floured surface
- 1 14-inch pizza pan or 2 12-inch round pizza pans
- Rolling pin (optional)
Instructions
- In a large bowl, combine 2 cups of the flour, the package of fast-rising yeast, and ¾ teaspoon of salt. If you’re using them, add the oregano or rosemary, and the minced garlic at this stage, blending the dry spices well with the flour mixture. This ensures even distribution of flavors in your final crust.
- Stir in the 1 cup of very warm water and the 2 tablespoons of olive oil to the dry ingredients. Mix well with a spoon or your hands until a shaggy dough begins to form. The water should feel comfortably warm to the touch, not scalding, to activate the yeast effectively.
- Gradually add enough of the remaining flour (up to 1 ½ cups) to the bowl, mixing it in until a soft dough forms. You may not need all the flour, so add it slowly and assess the dough’s consistency. The dough should be slightly sticky but manageable.
- Turn the dough out onto a lightly floured surface. Knead the dough until it becomes smooth and elastic, about 5 minutes. This develops the gluten, giving the pizza crust its structure and chewiness. If the dough is too sticky, add a little more flour, a tablespoon at a time.
- Cover the kneaded dough with a clean kitchen towel or plastic wrap and let it rest for about 10 minutes. This short resting period allows the gluten to relax, making it easier to roll out. While the dough rests, prepare your pizza pans.
- Lightly oil one 14-inch pizza pan or two 12-inch round pizza pans. This prevents the crust from sticking. For extra crispness and flavor, sprinkle the oiled pans with a thin layer of cornmeal.
- Form the dough into a smooth ball (or two balls if making two pizzas). On a lightly floured surface, use a rolling pin (or your hands) to roll out the dough to fit the prepared pan(s). Gently transfer the rolled-out dough to the pan(s), pressing it evenly into the bottom and up the sides.
- Top the prepared pizza crust(s) with your favorite sauce and toppings. Don’t overload the crust with too many toppings, as this can make it soggy. A good balance of sauce, cheese, and toppings is key.
- Bake in a preheated oven at 400°F (200°C) for 20 to 30 minutes, or until the crust is golden brown and the cheese is melted and bubbly. The exact baking time will depend on your oven and the thickness of your crust, so keep a close eye on it. A perfectly baked crust should be firm to the touch and golden brown underneath.
Expert Tips & Tricks
- Yeast Activation: Make sure your water is the right temperature (around 120°F). Too cold, and the yeast won’t activate; too hot, and you’ll kill it.
- Kneading Time: Don’t skimp on the kneading! This is crucial for developing the gluten and creating a chewy crust.
- Pre-baking the Crust: For a crispier crust, pre-bake the dough for 5-7 minutes before adding toppings. This helps prevent a soggy bottom, especially if you’re using a lot of wet ingredients like fresh tomatoes or mushrooms.
- Dough Consistency: The dough should be soft and slightly sticky, but not so sticky that it’s unmanageable. Adjust the amount of flour accordingly.
- Flavor Infusion: Brush the baked crust with garlic-infused olive oil after it comes out of the oven for an extra layer of flavor.
Serving & Storage Suggestions
Serve your freshly baked pizza immediately for the best flavor and texture. Garnish with fresh basil leaves or a sprinkle of red pepper flakes for an extra touch.
Storage: Leftover pizza can be stored in the refrigerator for up to 3-4 days. Wrap it tightly in plastic wrap or place it in an airtight container.
Reheating: Reheat pizza in a preheated oven at 350°F (175°C) for 5-10 minutes, or until heated through. You can also reheat it in a skillet over medium heat, covered, for a crispy crust. Microwaving is an option for speed, but it can make the crust a bit soggy.
Freezing: To freeze leftover pizza, let it cool completely, then wrap it tightly in plastic wrap and then in aluminum foil. It can be stored in the freezer for up to 2-3 months. To reheat, thaw overnight in the refrigerator, then bake as directed above.
Nutritional Information
(Approximate values per slice, assuming 6 slices per pizza and standard toppings)
| Nutrient | Amount per Serving | % Daily Value |
|---|---|---|
| Calories | 350 kcal | 18% |
| Total Fat | 15g | 23% |
| Saturated Fat | 6g | 30% |
| Cholesterol | 30mg | 10% |
| Sodium | 600mg | 26% |
| Total Carbohydrate | 40g | 13% |
| Dietary Fiber | 2g | 8% |
| Sugars | 4g | – |
| Protein | 15g | 30% |
Variations & Substitutions
- Whole Wheat Crust: Substitute 1 cup of the all-purpose flour with 1 cup of whole wheat flour for a nuttier flavor and added fiber.
- Gluten-Free Crust: Use a gluten-free all-purpose flour blend designed for baking. You may need to adjust the amount of liquid depending on the blend.
- Vegan Pizza: Omit the cheese or use a plant-based cheese alternative. There are many delicious vegan cheeses available made from nuts, soy, or other plant-based ingredients.
- Cornmeal Crust: Replace ½ cup of the flour with ½ cup of cornmeal for a slightly gritty texture and corn flavor.
- Herb Crust: Add dried Italian herbs, garlic powder, or onion powder to the dough for extra flavor.
- Sweet Pizza: Use the dough to make a dessert pizza with fruit, chocolate, and a sweet glaze.
- Garlic Knots: Instead of making a pizza, cut the dough into strips, tie them into knots, brush with garlic butter, and bake for delicious garlic knots.
FAQs (Frequently Asked Questions)
Q: Can I use active dry yeast instead of fast-rising yeast?
A: Yes, but you’ll need to proof the active dry yeast first. Dissolve it in the warm water with a teaspoon of sugar and let it sit for 5-10 minutes until foamy before adding it to the flour. You will also need to increase the rise time to at least 30 minutes.
Q: My dough is too sticky. What should I do?
A: Add a little more flour, one tablespoon at a time, until the dough is easier to handle. Be careful not to add too much, or the crust will be tough.
Q: Can I make the dough ahead of time?
A: Yes, you can make the dough ahead of time and store it in the refrigerator for up to 24 hours. Wrap it tightly in plastic wrap. Let it come to room temperature for about 30 minutes before rolling it out.
Q: My crust is browning too quickly. What can I do?
A: Tent the pizza with aluminum foil to prevent it from browning too much before the toppings are cooked.
Q: Can I freeze the dough after it has risen?
A: Yes, you can freeze the dough after the initial 10-minute rest. Wrap it tightly in plastic wrap and then in a freezer bag. Thaw it in the refrigerator overnight before using.
Final Thoughts
This Super Fast and Easy Pizza Dough/Crust recipe is a game-changer for busy weeknights. It’s simple, quick, and yields a delicious homemade pizza that’s far superior to store-bought options. Don’t be afraid to experiment with different toppings and variations to create your own signature pizza. Gather your family, fire up the oven, and get ready to enjoy a slice of homemade happiness. I can’t wait to hear about your pizza creations – please share your feedback and topping combinations!