
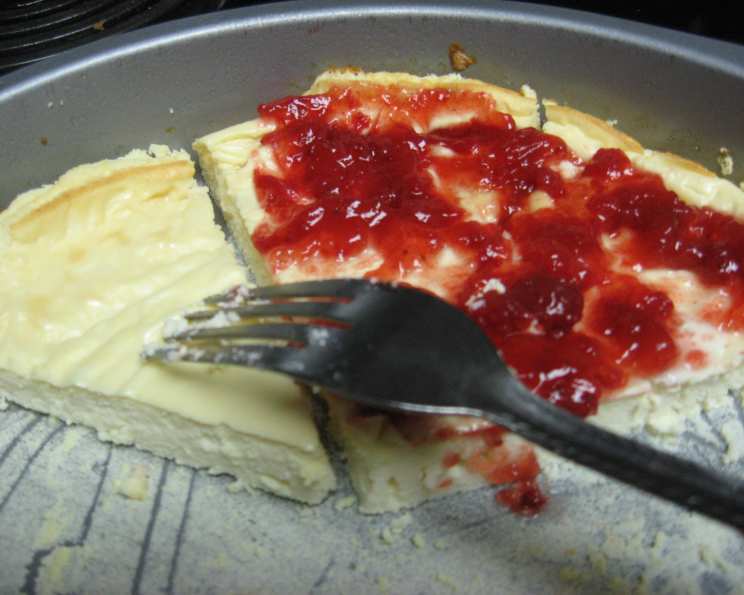
High-Protein No-Guilt Skinny Cheesecake
I’ll never forget my first attempt at a “healthy” cheesecake. It was back in culinary school, and I was determined to create a dessert that satisfied my sweet tooth without derailing my fitness goals. The result? A dense, rubbery disaster that tasted vaguely of sadness. It was a learning experience, to say the least! But it fueled my passion to find the perfect balance – a cheesecake that’s creamy, delicious, and packed with protein, allowing you to indulge without any guilt. This recipe is the culmination of that quest, and I’m thrilled to share it with you.
Recipe Overview
- Prep Time: 10 minutes
- Cook Time: 30-40 minutes
- Total Time: At least 1 hour + chilling
- Servings: 6-8
- Yield: 1 pie
- Dietary Type: High-Protein, Reduced Sugar
Ingredients
- 2 cups low-fat cottage cheese
- 2 eggs
- 1/2 cup low-fat sour cream
- 1/2 cup vanilla whey powder (Any brand of protein powder will do)
- 1/4 cup Splenda granular or 1/4 cup other sugar substitute
- 1 lemon, juice and rind of, grated fresh
- 1 teaspoon vanilla extract
Equipment Needed
- Blender
- Sprayed pie pan
- Oven
- Flat baking pan
Instructions
-
Begin by preheating your oven to 375°F (190°C). This ensures even cooking and prevents the cheesecake from cracking.
-
Now, it’s time to create the creamy filling. In a blender, combine the low-fat cottage cheese, eggs, low-fat sour cream, vanilla whey powder, Splenda (or your preferred sugar substitute), the juice and rind of one lemon, and vanilla extract.
-
Blend all the ingredients together until the mixture is incredibly smooth. This is crucial for achieving that perfect cheesecake texture. If your blender struggles, you may need to scrape down the sides a few times to ensure everything is fully incorporated.
-
Once the mixture is beautifully smooth, pour it into a sprayed pie pan. Using a non-stick cooking spray is essential to prevent the cheesecake from sticking and makes for easy removal later on.
-
Position the pie pan on the top rack of your preheated oven. Simultaneously, place a flat baking pan filled with water on the bottom rack. This creates a water bath that helps to keep the cheesecake moist and prevent cracking. This step is especially important for maintaining the creamy texture.
-
Bake for 30-40 minutes. The baking time can vary slightly depending on your oven. Keep a close eye on the cheesecake and check for doneness. It should be set around the edges but still have a slight wobble in the center.
-
Remove the cheesecake from the oven and allow it to cool completely at room temperature. This is a crucial step. Do not be tempted to cut into it while it is warm!
-
After it has cooled, chill the cheesecake well in the refrigerator before serving. This allows the flavors to meld and the cheesecake to fully set, resulting in the best possible texture and taste. I recommend chilling it for at least 4 hours, or even overnight, for optimal results.
Expert Tips & Tricks
- The key to a smooth cheesecake is a high-powered blender. If you don’t have one, you may want to strain the cottage cheese through a fine-mesh sieve before blending to remove excess liquid and ensure a smoother texture.
- Don’t overbake the cheesecake. A slight wobble in the center is a good sign. It will continue to set as it cools. Overbaking will result in a dry, cracked cheesecake.
- For an extra burst of flavor, consider adding a teaspoon of lemon zest to the filling.
- To prevent the top from browning too quickly, you can loosely tent the cheesecake with foil during the last 15 minutes of baking.
- If you don’t have Splenda, you can use another sugar substitute like stevia or erythritol. Just be sure to adjust the amount according to the sweetener’s instructions, as their sweetness levels can vary.
- For a richer flavor, use full-fat sour cream, but keep in mind this will alter the nutritional information.
Serving & Storage Suggestions
Serve your Skinny Cheesecake chilled, straight from the refrigerator. Garnish with fresh berries like raspberries, blueberries, or strawberries for a pop of color and added antioxidants. A light dusting of powdered sugar or a drizzle of sugar-free chocolate syrup can also add a touch of elegance.
Leftovers can be stored in an airtight container in the refrigerator for up to 3-4 days. While you can freeze the cheesecake, it’s not recommended as it can alter the texture. However, if you must freeze it, wrap it tightly in plastic wrap and then foil, and consume within 1-2 months. Thaw overnight in the refrigerator before serving.
Nutritional Information
| Nutrient | Amount per Serving (estimated) | % Daily Value (estimated) |
|---|---|---|
| Calories | ~137 kcal | ~7% |
| Total Fat | ~5g | ~6% |
| Saturated Fat | ~2g | ~10% |
| Cholesterol | ~30mg | ~10% |
| Sodium | ~175mg | ~7% |
| Total Carbohydrate | ~4g | ~1% |
| Dietary Fiber | ~0g | ~0% |
| Sugars | ~2g | ~N/A |
| Protein | ~14g | ~28% |
Note: Nutritional information is an estimate and may vary based on specific ingredient brands and portion sizes.
Variations & Substitutions
- Gluten-Free: This recipe is naturally gluten-free, so no substitutions are needed!
- Dairy-Free: Substituting the cottage cheese and sour cream in this recipe is tricky because of the impact on texture. It’s best to seek out dedicated dairy-free cheesecake recipes that have been developed specifically for those ingredients.
- Chocolate Cheesecake: Add 2 tablespoons of unsweetened cocoa powder to the filling for a chocolatey twist.
- Berry Swirl: Gently swirl a sugar-free berry jam or compote into the filling before baking for a beautiful and flavorful variation.
- Key Lime Cheesecake: Substitute the lemon juice and zest with lime juice and zest for a tropical twist.
FAQs (Frequently Asked Questions)
Q: Can I use a different protein powder?
A: Yes, you can use any flavor of whey protein powder or even a plant-based protein powder. However, vanilla is recommended as it complements the other flavors well. Be mindful that different protein powders may affect the texture slightly.
Q: Why is a water bath important?
A: A water bath creates a humid environment that helps to keep the cheesecake moist and prevents cracking. It also ensures more even cooking.
Q: How do I know when the cheesecake is done?
A: The cheesecake is done when the edges are set, but the center still has a slight wobble. It will continue to set as it cools.
Q: Can I make this cheesecake ahead of time?
A: Absolutely! In fact, it’s best to make it a day ahead of time to allow the flavors to meld and the cheesecake to fully set.
Q: What if my cheesecake cracks?
A: Cracking can be caused by overbaking or temperature fluctuations. While a water bath helps to prevent it, if it does happen, don’t worry! It won’t affect the taste. You can also cover the cracks with whipped cream or berries.
Final Thoughts
I hope this High-Protein No-Guilt Skinny Cheesecake becomes a staple in your dessert repertoire. It’s a delicious and satisfying way to indulge your sweet tooth without compromising your health goals. Don’t be afraid to experiment with different flavors and variations to create your own signature cheesecake. And please, let me know what you think! I love hearing your feedback and seeing your creations. Pair it with a cup of herbal tea or a glass of chilled almond milk for the perfect guilt-free treat. Happy baking!