
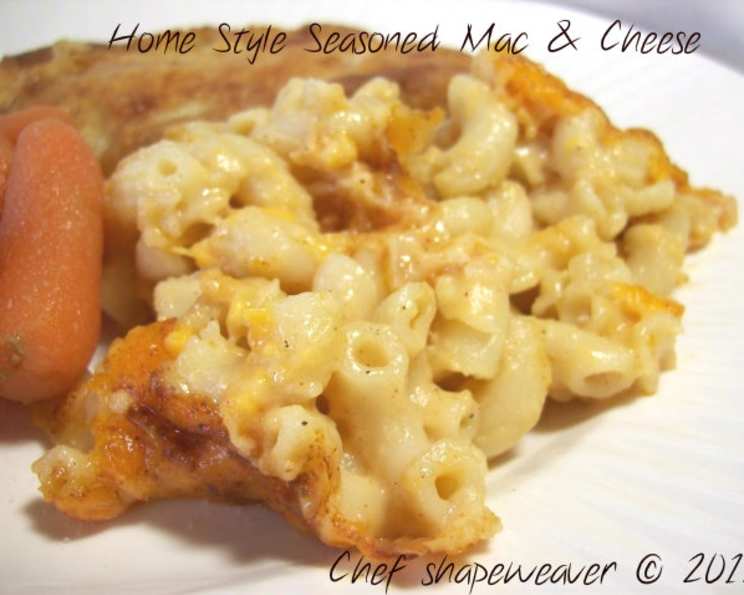
Home Style Seasoned Mac & Cheese
The scent of baked mac and cheese? Instantly, I’m transported back to my grandmother’s kitchen. I remember the comforting warmth radiating from the oven, the bubbling cheese threatening to spill over the sides of the dish, and the anticipation of that first, perfect bite. It wasn’t just food; it was love baked into every single noodle.
Recipe Overview
- Prep Time: 15 minutes
- Cook Time: 35 minutes
- Total Time: 50 minutes
- Servings: 6
- Dietary Type: Vegetarian
Ingredients
- 1 1⁄4 cups elbow macaroni
- 3 tablespoons margarine or 3 tablespoons butter
- 1⁄8 cup finely chopped sweet onion (can use same amount of green onion if desired)
- 3 tablespoons all-purpose flour
- 1 1⁄2 – 2 cups milk
- 1 teaspoon ground mustard (can use prepared mustard instead)
- 1⁄2 teaspoon cayenne pepper
- 3⁄4 teaspoon smoked paprika
- 1⁄2 teaspoon salt (add more if desired)
- 1⁄2 teaspoon pepper (add more if desired)
- 6 ounces shredded colby-monterey jack cheese, divided
Equipment Needed
- Medium size saucepan
- 11 x 7 inch baking pan
- Cooking spray
- Stirring utensils
Instructions
-
Begin by cooking the elbow macaroni according to the package directions. Once cooked, drain the pasta and set it aside. We want it ready to incorporate into the creamy sauce.
-
In a medium-size saucepan, melt the margarine or butter over medium heat. Add the finely chopped sweet onion (or green onion, if you prefer).
-
Cook the onions until they have softened and become translucent. This usually takes about 3-5 minutes. Softening the onions brings out their sweetness and mellows their bite.
-
Add the all-purpose flour to the saucepan and cook, stirring constantly, until lightly browned. This creates a roux, which will thicken our cheese sauce. Be careful not to burn the flour; a light golden color is what we’re aiming for.
-
Turn the heat to low. Gradually add the milk, a little at a time, stirring continuously to prevent lumps from forming. Continue adding milk until the sauce reaches your desired thickness. Remember, you might need slightly more milk depending on how thick you prefer your mac and cheese. Don’t rush this step! Slow and steady wins the sauce.
-
Remove the sauce from the heat. This is a crucial step to prevent the cheese from becoming oily or stringy.
-
Add 4 1/2 ounces of the shredded colby-monterey jack cheese to the sauce, a little at a time, stirring until completely melted and smooth. Adding the cheese gradually is key to preventing it from becoming stringy or clumpy.
-
Add the ground mustard, cayenne pepper, smoked paprika, salt, and pepper to the sauce. Mix well to ensure all the seasonings are evenly distributed. Taste and adjust the seasonings to your liking. This is where you can really customize the flavor to suit your preferences.
-
Add the cooked pasta to the seasoned sauce and stir until the pasta is thoroughly coated. Make sure every noodle is covered in that delicious cheese sauce!
-
Pour the pasta and sauce mixture into an 11 x 7 inch baking pan that has been prepared with cooking spray. This will prevent the mac and cheese from sticking to the pan during baking.
-
Sprinkle the remaining cheese (1 1/2 ounces) evenly over the top of the mac and cheese. If desired, sprinkle additional smoked paprika for extra color and flavor.
-
Bake in a preheated oven at 350 degrees Fahrenheit for 35 minutes, or until the top is golden brown and bubbly. Keep a close eye on it towards the end of the baking time to prevent burning.
Expert Tips & Tricks
- For an extra creamy sauce, consider using a combination of milk and heavy cream.
- If you prefer a sharper cheese flavor, substitute some of the colby-monterey jack cheese with cheddar cheese.
- To prevent a skin from forming on the sauce while it’s cooling, press a piece of plastic wrap directly onto the surface of the sauce.
- Prepare the mac and cheese ahead of time and store it in the refrigerator until ready to bake. You may need to add a little extra milk to the sauce before baking if it has thickened too much.
- If your mac and cheese is too thick, add a little more milk until it reaches your desired consistency.
- If your mac and cheese is too thin, simmer it on the stovetop for a few minutes to allow the sauce to thicken.
Serving & Storage Suggestions
Serve the Home Style Seasoned Mac & Cheese hot, straight from the oven. Garnish with a sprinkle of fresh parsley or chives for a pop of color. It pairs perfectly with a side salad, roasted vegetables, or grilled chicken.
Leftovers can be stored in an airtight container in the refrigerator for up to 3-4 days. To reheat, microwave individual portions or bake the entire dish in a preheated oven at 350 degrees Fahrenheit until heated through. You may need to add a little milk or water to prevent it from drying out. Freezing is not recommended as the texture of the cheese sauce may change.
Nutritional Information
| Nutrient | Amount per Serving | % Daily Value |
|---|---|---|
| Calories | 294.8 kcal | N/A |
| Calories from Fat | 153 g | 52% |
| Total Fat | 17.1 g | 26% |
| Saturated Fat | 8.1 g | 40% |
| Cholesterol | 33.8 mg | 11% |
| Sodium | 444.2 mg | 18% |
| Total Carbohydrate | 23 g | 7% |
| Dietary Fiber | 1.1 g | 4% |
| Sugars | 0.9 g | 3% |
| Protein | 12.4 g | 24% |
Variations & Substitutions
- For a gluten-free version, use gluten-free elbow macaroni and a gluten-free all-purpose flour blend.
- Add cooked bacon, ham, or sausage for a meatier mac and cheese.
- Stir in roasted vegetables, such as broccoli, cauliflower, or bell peppers, for added nutrients and flavor.
- Use different types of cheese, such as cheddar, Gruyere, or pepper jack, to customize the flavor profile.
- Add a breadcrumb topping for extra crunch. Combine breadcrumbs with melted butter and sprinkle over the top of the mac and cheese before baking.
FAQs (Frequently Asked Questions)
Q: Can I use pre-shredded cheese, or is it better to shred my own?
A: While pre-shredded cheese is convenient, it often contains cellulose, which can prevent it from melting as smoothly. Shredding your own cheese is recommended for the best results.
Q: Can I make this mac and cheese in a slow cooker?
A: Yes, you can! Combine all the ingredients in a slow cooker and cook on low for 2-3 hours, or until the cheese is melted and the sauce is creamy.
Q: How can I prevent my mac and cheese from drying out during baking?
A: Cover the baking dish with foil during the first half of the baking time to prevent the cheese from drying out. Remove the foil during the last half of the baking time to allow the top to brown.
Q: Can I add a crispy topping to this mac and cheese?
A: Absolutely! A breadcrumb topping adds a delightful crunch. Simply mix breadcrumbs with melted butter and sprinkle over the top before baking.
Q: What’s the best way to reheat leftover mac and cheese?
A: Reheat in the microwave with a splash of milk to keep it creamy, or bake in the oven covered with foil until warmed through.
Final Thoughts
I sincerely hope you’ll give this Home Style Seasoned Mac & Cheese a try. It’s more than just a recipe; it’s a taste of home, a warm hug on a plate. Feel free to experiment with the seasonings and cheese to create your own signature version. And if you do, please share your feedback – I’d love to hear how it turns out! Pair it with a crisp green salad and a glass of your favorite beverage for a complete and comforting meal.