
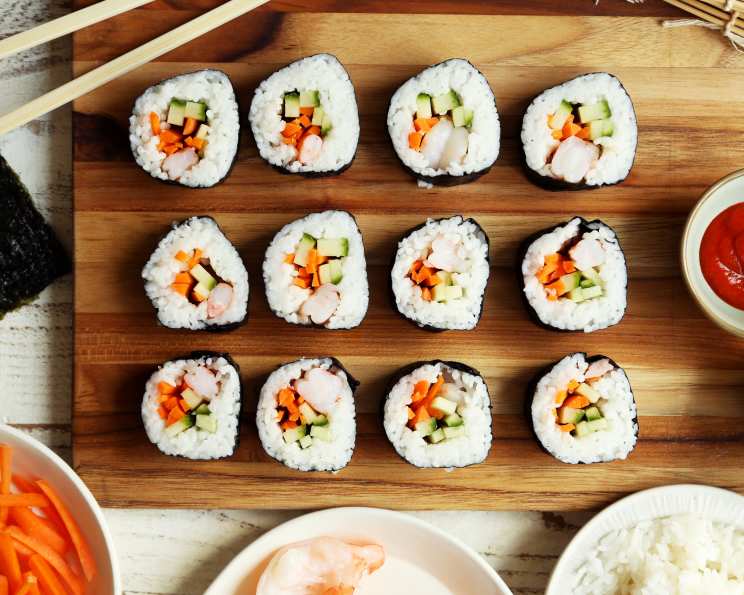
Mastering the Art of Sushi Rolling: A Culinary Adventure
My first experience with sushi wasn’t in a fancy restaurant, but rather a small, bustling kitchen filled with the aroma of toasted seaweed and vinegared rice. My grandmother, a woman of incredible culinary wisdom, patiently guided me through each step, her hands moving with a grace that only years of practice could bestow. I remember the initial frustration of sticky rice clinging to everything, the slightly clumsy attempts at rolling, and finally, the immense satisfaction of creating something beautiful and delicious. That day sparked a lifelong love affair with sushi, and I’m excited to share what I’ve learned with you.
Recipe Overview:
- Prep Time: 10 minutes
- Yields: 1 roll
- Dietary Type: Can be adapted to be Gluten-Free, Vegetarian, or Pescatarian
Ingredients:
- 1 sheet nori
- 1 cup prepared sushi rice
- Your choice of vegetables (such as cucumber, avocado, carrot, green onion)
- Your choice of fish (raw or tempura)
- Spicy mayonnaise (or any other sauce you like with your sushi)
- Smelt roe (Masago) (optional)
- Toasted sesame seeds (optional)
- Soy sauce (optional)
- Wasabi (optional)
- Pickled ginger (optional)
- Eel sauce (Sweet Eel Sauce) (optional, for drizzling)
Equipment Needed:
- Bamboo sushi rolling mat
- Saran wrap
- Sharp knife
Instructions:
-
Begin by preparing any sauces you intend to use on your sushi rolls. Having them ready beforehand will streamline the assembly process.
-
Prepare your chosen vegetables by cutting them into long, thin strips, approximately 1/4 inch in thickness. I find European cucumbers (seeds removed), carrots, avocados, and green onions work particularly well.
-
If you’re using tempura shrimp, plan on using two large shrimp per roll. Arrange them end-to-end within the roll for even distribution.
-
For tempura soft-shell crab rolls, use one crab per roll. Position the crab so that its claws extend slightly from each end of the roll for a visually appealing presentation.
-
If you’re crafting a Rainbow Roll or other sushi featuring raw fish on top, slice the fish into pieces about 1/4 inch thick and approximately 1 inch wide.
-
If you’re including tuna or salmon inside the rolls, cut the fish into small chunks.
-
Lay your bamboo sushi rolling mat on your work surface.
-
Cover the mat with a sheet of saran wrap. This prevents the rice from sticking to the mat and makes cleanup much easier.
-
Place a sheet of nori on the saran wrap, with the shiny side facing down. The rough side is more receptive to the rice.
-
Dip your hands in water. This is crucial to prevent the rice from sticking excessively to your hands.
-
Grab approximately 3/4 to 1 cup of cooked sushi rice and place it on the nori sheet. If you prefer less rice, use 3/4 cup; if you like a bit more, use about 1 cup. Avoid using so much rice that the roll becomes difficult to close.
-
Bring the rice up to about 1 inch from the far end of the nori sheet. Leaving this small strip of nori exposed will help seal the roll.
-
Spread the rice evenly across the nori sheet with your hands, re-wetting them as needed to prevent sticking.
-
Gently press the rice down to help it adhere to the nori sheet.
-
Place your chosen fillings in a horizontal line across the center of the rice. Be mindful not to overfill the roll, as this can make it difficult to close.
-
Drizzle any sauce you wish to include, such as spicy mayonnaise, over the fillings.
-
For rolls where the rice is on the outside, place the rice on the nori sheet as before, then carefully flip the nori sheet over so that the rice is in contact with the saran wrap. Arrange your fillings in a horizontal line across the center of the nori.
-
If adding sliced fish on top (for example, in a Rainbow Roll), arrange the slices vertically, slightly overlapping each other, across the length of the roll.
-
Using your fingers, lift the edge of the nori sheet closest to you, covering the ingredients.
-
Bring the mat up and over the top of the ingredients. Begin rolling the sushi tightly to form a neatly packed cylinder, similar to a fat cigar.
-
Squeeze firmly to ensure the sushi roll is tightly packed, but be careful not to apply excessive pressure, as this could break the roll.
-
Unroll the mat, revealing your finished sushi roll.
-
Cut the sushi roll into 1 1/2-inch rounds using a sharp, damp knife. It’s essential to re-moisten the knife after each cut to ensure clean slices. I typically cut the roll in half, then cut each half in half again to make four pieces, and finally cut each of those four pieces in half to yield eight pieces in total.
-
Arrange the sushi pieces on a plate.
-
When ready to roll, bring up the nori sheet and saran wrap over the ingredients, then roll pressing with your hands until it’s rolled up like a cigar.
-
Take your mat and place it over your roll, and press the roll with your hands to tighten roll.
-
It is helpful to cut with the roll wrapped in the saran wrap. Just cut as instructed above with the saran wrap on top of the mat, then when done rolling take off the mat, cut through the saran wrap to cut your sushi into pieces, then pull off the saran wrap.
-
Plate your sushi.
-
Drizzle eel sauce over the top of your sushi (optional).
-
Serve immediately with wasabi, pickled ginger, soy sauce, or any other dipping sauce you prefer.
-
If using lump crab mixed with spicy mayonnaise or masago on top of your sushi, spread it on just before cutting the roll. Then, cut as directed above.
Expert Tips & Tricks:
-
Rice is Key: The quality of your sushi rice dramatically impacts the final product. Ensure the rice is properly cooked and seasoned for optimal flavor and texture.
-
Sharp Knife: A sharp knife is essential for clean cuts. Dull knives will tear the nori and rice, resulting in messy pieces. Keep a bowl of water nearby to moisten the knife between cuts.
-
Don’t Overfill: Resist the urge to overstuff your sushi rolls. Too many ingredients will make rolling difficult and the roll may fall apart.
-
Tight Rolling: Firm and even pressure is crucial for creating a tightly packed roll that holds its shape.
-
Saran Wrap Advantage: Using saran wrap on your rolling mat prevents the rice from sticking and makes cleaning easier.
Serving & Storage Suggestions:
Sushi is best enjoyed fresh. Serve immediately after rolling for optimal flavor and texture. If you have leftovers, store them in an airtight container in the refrigerator. Consume within 24 hours, as the rice can become dry and the nori can become soggy. It is not recommended to freeze sushi. Serve with traditional accompaniments such as wasabi, pickled ginger, and soy sauce. A side of edamame or a refreshing seaweed salad complements the meal beautifully.
Nutritional Information:
(Note: Nutritional information will vary depending on the specific ingredients used. The table below provides an estimate based on a basic roll with rice, nori, cucumber, and avocado.)
| Nutrient | Amount per Serving | % Daily Value |
|---|---|---|
| Calories | 250 kcal | 13% |
| Total Fat | 8g | 12% |
| Saturated Fat | 1g | 5% |
| Cholesterol | 0mg | 0% |
| Sodium | 150mg | 7% |
| Total Carbohydrate | 40g | 13% |
| Dietary Fiber | 3g | 12% |
| Sugars | 2g | – |
| Protein | 5g | 10% |
Variations & Substitutions:
-
Vegetarian/Vegan Sushi: Omit the fish and focus on a variety of colorful vegetables like bell peppers, asparagus, and sweet potato. Cream cheese can be replaced with vegan cream cheese or avocado for a creamy texture.
-
Gluten-Free Sushi: Ensure your soy sauce is gluten-free (tamari is a great option). Also, be mindful of any pre-made sauces, as they may contain gluten.
-
Spicy Tuna Roll Variation: Mix tuna with sriracha and mayonnaise for a spicy kick.
-
California Roll Variation: Include imitation crab meat, avocado, and cucumber.
-
Rainbow Roll: Top the roll with a variety of thinly sliced fish such as tuna, salmon, yellowtail, and avocado for a vibrant and colorful presentation.
FAQs (Frequently Asked Questions):
Q: What kind of rice should I use for sushi?
A: It’s crucial to use short-grain Japanese rice, often labeled as “sushi rice”. This type of rice has the right starch content to become sticky and hold its shape when seasoned with vinegar.
Q: Why is it important to wet my hands when handling sushi rice?
A: Wetting your hands prevents the rice from sticking to your fingers, making it much easier to spread and manipulate.
Q: Can I make sushi ahead of time?
A: Sushi is best enjoyed fresh. However, you can prepare the rice and cut the vegetables in advance. Assemble the rolls just before serving to maintain the best quality.
Q: What if my sushi roll falls apart?
A: This is usually due to the roll not being packed tightly enough or using too many ingredients. Make sure to apply firm, even pressure when rolling and avoid overfilling.
Q: How do I store leftover sushi?
A: Store leftover sushi in an airtight container in the refrigerator and consume it within 24 hours. The texture and flavor will degrade over time.
Final Thoughts:
Making sushi at home may seem daunting at first, but with a little practice and patience, you’ll be creating restaurant-worthy rolls in no time. Don’t be afraid to experiment with different fillings and sauces to create your own signature sushi creations. Gather your friends and family for a fun and interactive sushi-making party! I hope this guide inspires you to embark on your own sushi adventure. Enjoy the process, savor the flavors, and share your creations with those you love. Kampai!