
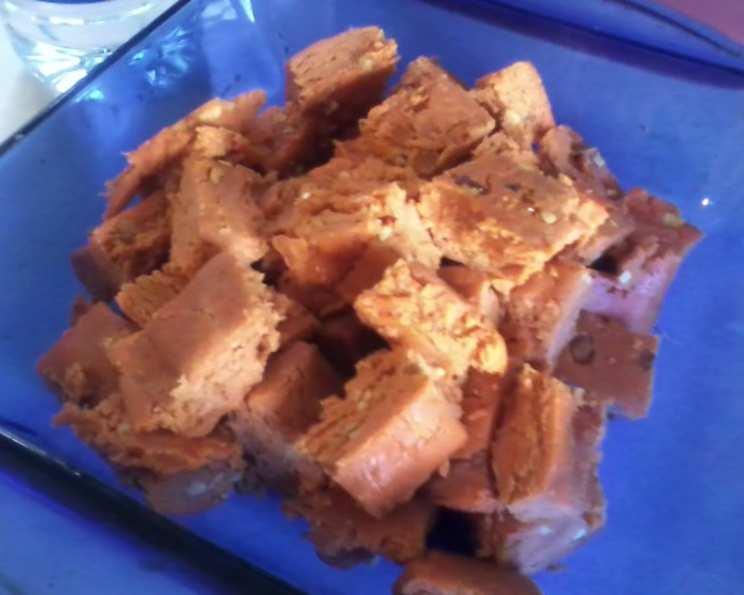
Homemade Butterfinger Candy Bars: A Nostalgic Treat Reimagined
I can still remember the thrill of unwrapping a Butterfinger on Halloween night, that distinctive orange wrapper a beacon amidst the sea of chocolate bars. The crispy, peanut-buttery center, somehow both crumbly and chewy, was a textural marvel. While the original holds a special place in my heart, I’ve always been intrigued by the idea of recreating this iconic candy from scratch. Now, after years of experimenting, I’m excited to share a recipe that captures the essence of the Butterfinger in a surprisingly simple homemade version.
Recipe Overview
- Prep Time: 15 minutes
- Cook Time: 5 minutes
- Total Time: 20 minutes (plus cooling time)
- Servings: Variable, depends on size of cuts
- Yield: Approximately 1 8×8 inch pan
- Dietary Type: Not specified (can be modified to be gluten-free by using a gluten-free chocolate coating)
Ingredients
- 1 lb candy corn
- 16 ounces peanut butter (creamy or chunky, your preference)
- 16 ounces chocolate-flavored candy coating
Equipment Needed
- Microwave-safe bowl
- 8×8 inch baking pan
- Parchment paper
- Spatula
- Waxed paper
Instructions
-
Prepare your 8×8 inch pan by lining it with parchment paper. This will make it easy to remove the finished candy later.
-
In a large, microwave-safe bowl, melt the candy corn. Begin by microwaving on high for 1 minute.
-
Stir the candy corn thoroughly. It will likely not be completely melted at this point.
-
Continue microwaving in 15-second intervals, stirring after each interval, until the candy corn is completely melted and smooth. Be careful not to overheat it, as it can burn easily.
-
Add the peanut butter to the melted candy corn.
-
Stir until the peanut butter is fully incorporated and the mixture is uniform. This may take a little effort, but keep stirring until it’s smooth.
-
Spread the mixture evenly into the prepared 8×8 inch pan.
-
Cool completely. This can be done at room temperature or in the refrigerator to speed up the process. The mixture needs to be firm enough to cut.
-
Once the mixture is firm, cut it into squares or rectangles, depending on your preferred candy bar size.
-
Melt the chocolate-flavored candy coating according to the package directions. This can typically be done in the microwave or over a double boiler.
-
Dip each square or rectangle into the melted chocolate candy coating, ensuring it’s fully covered.
-
Lay the chocolate-covered candies on waxed paper to set. You can place them in the refrigerator to speed up the setting process.
Expert Tips & Tricks
- Peanut Butter Choice: Using chunky peanut butter will add extra texture, closely mimicking the original Butterfinger’s slightly crunchy interior. Creamy peanut butter will create a smoother, more homogenous center. Experiment to find your preferred texture.
- Microwave Mastery: Melting candy corn can be tricky. Overheating it will result in a hard, brittle texture. Microwave in short bursts and stir frequently to ensure even melting and prevent burning.
- Chocolate Tempering (Optional): For a truly professional finish, consider tempering your chocolate candy coating. This will give it a glossy sheen and prevent it from blooming (developing white streaks). While not strictly necessary, it elevates the overall appearance and mouthfeel.
- Adding Salt: A pinch of sea salt sprinkled on top of the chocolate before it sets can enhance the sweetness and bring out the peanut butter flavor.
- Cutting Cleanly: To avoid the peanut butter mixture sticking to your knife, try dipping the knife in hot water and wiping it dry before each cut.
Serving & Storage Suggestions
Serve your homemade Butterfinger candy bars at room temperature for the best texture. They can be stored in an airtight container at room temperature for up to a week. For longer storage, refrigerate them for up to two weeks. Freezing is not recommended, as it can alter the texture of the peanut butter mixture.
These are perfect for Halloween treats, party favors, or a special homemade gift. Enjoy them as a standalone sweet treat or pair them with a glass of cold milk or a scoop of vanilla ice cream for an extra indulgent dessert.
Nutritional Information
Note: Nutritional information is an estimate and may vary based on specific ingredients and portion sizes.
| Nutrient | Amount per Serving | % Daily Value |
|---|---|---|
| Calories | 300 kcal | 15% |
| Total Fat | 18g | 28% |
| Saturated Fat | 8g | 40% |
| Cholesterol | 0mg | 0% |
| Sodium | 150mg | 6% |
| Total Carbohydrate | 30g | 10% |
| Dietary Fiber | 1g | 4% |
| Sugars | 25g | – |
| Protein | 6g | 12% |
Variations & Substitutions
- Gluten-Free: Ensure the chocolate-flavored candy coating is certified gluten-free. Most major brands offer gluten-free options.
- Nut-Free: Substitute the peanut butter with sunflower seed butter (sunbutter) for a nut-free alternative. Be aware that this will alter the flavor profile.
- Dark Chocolate: Use dark chocolate candy coating instead of milk chocolate for a richer, less sweet flavor.
- White Chocolate: For a fun twist, try using white chocolate candy coating.
- Added Crunch: Incorporate crushed pretzels or potato chips into the peanut butter mixture for extra crunch and a salty-sweet flavor combination.
- Spicy Butterfinger: Add a pinch of cayenne pepper to the melted peanut butter mixture for a hint of spice.
FAQs (Frequently Asked Questions)
Q: Can I use real chocolate instead of candy coating?
A: Yes, but keep in mind that real chocolate needs to be tempered properly to achieve a glossy finish and prevent blooming.
Q: My candy corn mixture is too hard. What can I do?
A: Add a tablespoon of milk or water and microwave in short intervals until it softens. Be careful not to overheat.
Q: How do I prevent the chocolate from cracking when I cut the bars?
A: Ensure the chocolate has fully set before cutting. Using a warm knife can also help prevent cracking.
Q: Can I make these ahead of time?
A: Absolutely! These can be made a few days in advance and stored in an airtight container.
Q: My peanut butter mixture is too sticky to cut. What am I doing wrong?
A: Make sure the mixture has cooled completely before attempting to cut it. If it’s still too sticky, refrigerate it for a longer period.
Final Thoughts
This homemade Butterfinger recipe is a delightful way to recreate a classic candy with a personal touch. The combination of simple ingredients and straightforward instructions makes it accessible to bakers of all skill levels. Don’t be afraid to experiment with variations and substitutions to create your perfect version. I encourage you to give it a try and share your feedback – and your delicious creations – with friends and family! Perhaps pair them with a rich, dark roast coffee for the ultimate after-dinner treat. Happy baking!