
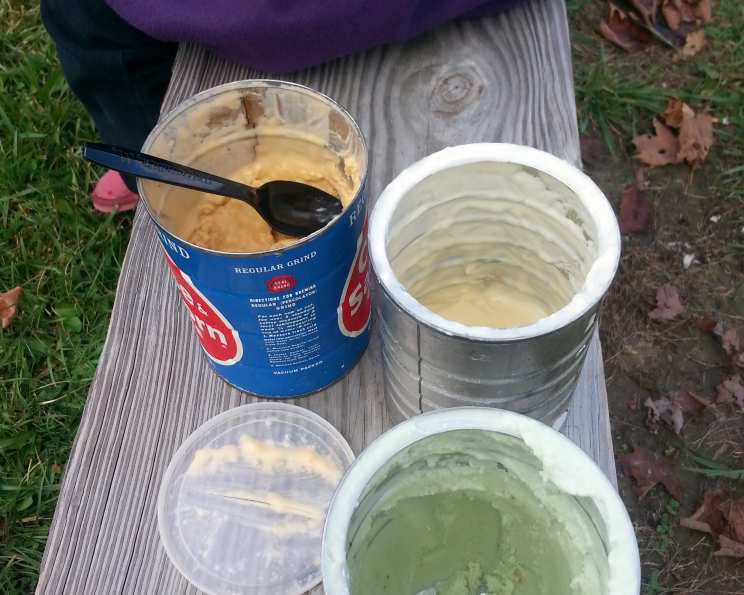
Coffee Can Ice Cream: A Nostalgic Treat
The clatter of ice, the excited anticipation, the slightly damp chill on my hands – these are the memories that flood back every time I think about homemade ice cream. As a kid, summer afternoons meant one thing: gathering with cousins in the backyard, armed with coffee cans and a mission. We’d roll, we’d laugh, and occasionally we’d argue about who got to lick the spoon. This wasn’t just about dessert; it was about creating something special, together. And the reward? The creamiest, freshest ice cream imaginable, a true taste of summer joy.
Recipe Overview
- Prep Time: 15 minutes
- Freeze Time: 20-40 minutes
- Total Time: 35-55 minutes
- Servings: 4-6
- Yield: Approximately 2 cups
- Dietary Type: Vegetarian (Can be adapted to Gluten-Free with appropriate pudding mix)
Ingredients
- 1/2 cup rock salt
- 1 pint half-and-half
- 1 1/2 teaspoons vanilla extract
- 1/3 cup granulated sugar
- 2 tablespoons granulated sugar
- 3 tablespoons of your favorite flavor instant pudding mix (Optional: for flavored ice cream)
- 1/3 cup fruit (such as bananas, strawberries, or peaches, finely diced – Optional: for flavored ice cream)
- 3 of your favorite cookies, crushed into pea-size pieces (Optional: for flavored ice cream)
- 1/4 cup finely chopped nuts (Optional: for flavored ice cream)
Equipment Needed
- 1 lb coffee can with lid
- 3 lb coffee can with lid
- Duct tape (optional)
- Measuring cups and spoons
Instructions
-
In a bowl, combine the half-and-half, vanilla extract, 1/3 cup sugar, and 2 tablespoons sugar. Whisk thoroughly until the sugar is dissolved. If you’re making a flavored ice cream, now is the time to add your instant pudding mix, fruit, crushed cookies, and/or nuts. Stir until evenly distributed.
-
Pour the mixture into the smaller (1 lb) coffee can. Secure the lid tightly. This is crucial to prevent salt from contaminating your ice cream.
-
Place the smaller can inside the larger (3 lb) coffee can.
-
Fill the space between the two cans with ice, alternating layers of ice and rock salt. The rock salt lowers the freezing point of the ice, allowing the ice cream mixture to freeze. Aim for a ratio of roughly 3 parts ice to 1 part salt. Continue layering until the larger can is completely full.
-
Secure the lid on the large can. For added security, you can use duct tape to reinforce the lid and prevent it from popping off during the rolling process.
-
Now for the fun part! Find a smooth surface, such as a floor covered with a sheet or a large towel (to absorb any spills and provide a bit of cushioning).
-
Roll the can back and forth vigorously for at least 10 minutes. This constant movement helps to agitate the ice cream mixture, preventing large ice crystals from forming and resulting in a smoother texture.
-
Open both cans carefully. Check the ice cream in the smaller can. It should be starting to freeze, especially around the sides and bottom.
-
If the ice cream is not sufficiently frozen, replace the lids on both cans and continue rolling for another 10 minutes.
-
If after the second rolling session, the ice cream is still too soft, place the smaller can (with the lid secured) in the freezer for 10-minute intervals, checking after each interval until it reaches your desired consistency. The edges should be firm, and the center should be soft but not liquid.
Expert Tips & Tricks
- Salt Ratio is Key: The amount of rock salt is crucial for achieving the correct freezing temperature. Too little salt, and the ice cream won’t freeze properly. Too much, and it may freeze too quickly and become grainy.
- Pre-Chill Everything: Chilling the half-and-half and the smaller coffee can in the freezer for about 30 minutes beforehand will speed up the freezing process.
- Get Creative with Flavors: Don’t be afraid to experiment with different pudding mix flavors, fruits, cookies, and nuts. Consider seasonal variations or flavors inspired by your favorite desserts. A little espresso powder can add a delicious coffee flavor.
- Duct Tape is Your Friend: Seriously, a little duct tape around the lid of the larger can can save you from a messy cleanup if the lid pops off during rolling.
- Rolling Technique: Try to roll the can in a consistent, even manner. Avoid jerky movements that could cause the lids to loosen.
- Too Sweet?: If the ice cream is too sweet for your liking, reduce the amount of sugar slightly. Remember that the pudding mix also contains sugar.
Serving & Storage Suggestions
Serve your freshly made coffee can ice cream immediately for the best texture. It’s delicious on its own, or you can top it with fresh fruit, chocolate sauce, whipped cream, or a sprinkle of nuts.
If you have leftovers, store the ice cream in an airtight container in the freezer. However, be aware that homemade ice cream tends to harden more than store-bought ice cream due to the lack of stabilizers. To soften it before serving, let it sit at room temperature for a few minutes or microwave it briefly in 10-second intervals. For optimal quality, consume within a week.
Nutritional Information
| Nutrient | Amount per Serving (estimated) | % Daily Value (estimated) |
|---|---|---|
| Calories | 250 kcal | 13% |
| Total Fat | 15g | 23% |
| Saturated Fat | 9g | 45% |
| Cholesterol | 45mg | 15% |
| Sodium | 70mg | 3% |
| Total Carbohydrate | 25g | 8% |
| Dietary Fiber | 0g | 0% |
| Sugars | 20g | N/A |
| Protein | 3g | 6% |
Note: Nutritional information is an estimate and may vary based on specific ingredients and serving sizes.
Variations & Substitutions
- Dairy-Free: Substitute the half-and-half with a combination of coconut milk and almond milk or your favorite non-dairy creamer. You may need to adjust the amount of sugar to compensate for any differences in sweetness.
- Vegan: In addition to the dairy-free substitution, ensure that your pudding mix is also vegan-friendly. Many instant pudding mixes contain dairy-derived ingredients.
- Low-Sugar: Use a sugar substitute like stevia or erythritol. Start with a smaller amount than the recipe calls for and adjust to taste.
- Boozy Ice Cream: Add a tablespoon or two of your favorite liqueur (such as amaretto, coffee liqueur, or rum) to the ice cream mixture before freezing. Be mindful of the alcohol content as it can affect the freezing process.
- Seasonal Flavors: Adapt the recipe to reflect seasonal produce. Use fresh berries in the summer, pumpkin puree and spices in the fall, or citrus zest in the winter.
FAQs (Frequently Asked Questions)
Q: Why do I need rock salt instead of regular table salt?
A: Rock salt is coarser than table salt and melts the ice more slowly, resulting in a lower temperature for a longer period, which is ideal for freezing ice cream.
Q: Can I use a blender to mix the ingredients?
A: Yes, you can use a blender to ensure all the ingredients are thoroughly combined, especially if you are adding fruit or other additions. However, be sure to mix gently and avoid over-blending, as this can incorporate too much air and result in a less creamy texture.
Q: How do I know when the ice cream is ready?
A: The ice cream is ready when it has a soft-serve consistency. It should be frozen around the edges and bottom of the can, with a slightly softer center. If it’s too soft, continue freezing in the freezer for short intervals.
Q: Can I make this recipe without the pudding mix?
A: Yes, you can omit the pudding mix. It is primarily used to add flavor and improve the texture. Without it, the ice cream may be slightly icier, but it will still be delicious.
Q: How long does homemade ice cream last in the freezer?
A: Homemade ice cream is best enjoyed within a week for optimal texture and flavor. After that, it may become icy and less creamy. Be sure to store it in an airtight container to prevent freezer burn.
Final Thoughts
Homemade coffee can ice cream isn’t just a recipe; it’s an experience. It’s a chance to slow down, engage in a hands-on activity, and create something delicious with friends or family. So, gather your loved ones, grab those coffee cans, and get ready to roll! I encourage you to experiment with different flavors and share your creations. There’s nothing quite like the satisfaction of enjoying a cool, creamy treat made with your own two hands. Let me know how it turns out! I’d love to hear about your flavor adventures.