
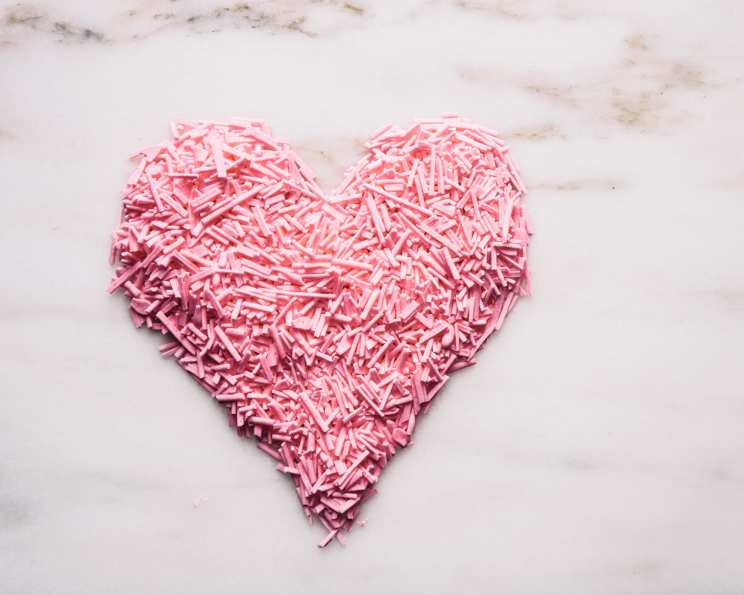
Homemade Sprinkles: A Sweet Touch of Magic
My grandmother, a woman whose hands seemed perpetually dusted with flour and whose heart overflowed with love, had a secret weapon in her baking arsenal: homemade sprinkles. I remember being a small child, perched on a stool in her sun-drenched kitchen, mesmerized as she piped out delicate lines of sugary goodness onto parchment paper. The vibrant colors, the sweet almond scent, and the sheer joy of sprinkling them on freshly baked cookies are memories I cherish. Now, years later, I’m sharing her simple yet magical recipe with you, so you can create your own edible works of art.
Recipe Overview
- Prep Time: 20 minutes
- Cook Time: 0 minutes (drying time: 12 hours)
- Total Time: 12 hours 20 minutes
- Yields: approximately 1 cup
- Serves: varies based on usage, about 16 servings
- Dietary Type: Vegetarian
Ingredients
- 1 large egg white
- 1 tablespoon water
- 2 cups powdered sugar
- 1/4 teaspoon almond extract
- Food coloring (gel or liquid)
Equipment Needed
- Medium bowl
- Electric mixer
- 3 rimmed baking sheets
- Parchment paper
- Pastry bag
- #4 pastry tip
- Paring knife
Instructions
-
In a medium bowl, combine the egg white and water. Using an electric mixer, beat the mixture until frothy, about 20 seconds. This step incorporates air, creating a lighter texture for your sprinkles.
-
Gradually beat in the powdered sugar, adding it slowly to prevent a sugary cloud from engulfing your kitchen. Continue beating until the mixture is smooth and forms a thick paste. The consistency should be similar to royal icing.
-
Stir in the almond extract and a few drops of food coloring. Remember, a little food coloring goes a long way. Start with a small amount and add more until you achieve your desired shade. You can divide the mixture into separate bowls and add different colors to each for a rainbow of sprinkles.
-
Line your 3 rimmed baking sheets with parchment paper. This prevents the sprinkles from sticking and makes it easier to remove them once they’re dry.
-
Transfer the confectioners’ sugar mixture to a pastry bag fitted with a #4 pastry tip. If you don’t have a pastry bag, you can use a zip-top bag and snip off a tiny corner. However, a pastry bag provides more control for creating even lines.
-
Pipe the batter onto the parchment-lined baking sheets in thin, even lines. Cover all three sheets, ensuring the lines do not touch one another. Overlapping lines will fuse together, making it difficult to break them into individual sprinkles later.
-
Let the sheets stand at room temperature, uncovered, until the lines are completely dry. This drying process typically takes about 12 hours, but it may vary depending on the humidity in your environment. The sprinkles should be firm to the touch and easily lift off the parchment paper when fully dried.
-
Using the tip of a sharp paring knife, carefully pick the lines off the parchment paper. The pieces will naturally break off into long and short sprinkles.
-
Once you’ve loosened all the lines from the entire sheet, carefully break the sprinkles down further with your fingers. You can customize the size of your sprinkles at this stage, creating a mix of long strands and tiny dots.
-
Use immediately or store in an air-tight container for up to 2 weeks.
Expert Tips & Tricks
-
Humidity is your enemy: On humid days, the drying process may take longer. Consider using a dehumidifier or a very low oven (around 170°F) to speed up the drying process, but watch carefully to prevent the sprinkles from melting.
-
Gel vs. Liquid Food Coloring: Gel food coloring is more concentrated and produces more vibrant colors without adding extra liquid to the mixture. If using liquid food coloring, use it sparingly to avoid making the mixture too thin.
-
Flavor Variations: Experiment with different extracts! Vanilla, lemon, orange, or even peppermint extract can add unique flavor profiles to your homemade sprinkles.
-
Troubleshooting Sticky Sprinkles: If your sprinkles are still sticky after 12 hours, allow them to dry for a few more hours. You can also dust them lightly with powdered sugar to absorb any excess moisture.
-
Achieving the Perfect Line: Steady hands are key when piping the sprinkles. Rest your elbow on the counter for stability and apply even pressure to the pastry bag.
Serving & Storage Suggestions
Homemade sprinkles add a delightful touch to a wide range of desserts and baked goods. Sprinkle them on cupcakes, cookies, cakes, ice cream, doughnuts, or even waffles and pancakes. They can instantly elevate any treat, adding a pop of color and a hint of sweetness.
Store your homemade sprinkles in an airtight container at room temperature. Properly stored, they will last for up to 2 weeks. Avoid storing them in the refrigerator, as the moisture can cause them to become sticky.
Nutritional Information
(Estimated per serving, based on 16 servings per batch)
| Nutrient | Amount per Serving | % Daily Value |
|---|---|---|
| Calories | 60 kcal | 3% |
| Total Fat | 0g | 0% |
| Saturated Fat | 0g | 0% |
| Cholesterol | 0mg | 0% |
| Sodium | 4mg | 0% |
| Total Carbohydrate | 15g | 5% |
| Dietary Fiber | 0g | 0% |
| Sugars | 15g | 30% |
| Protein | 0g | 0% |
Variations & Substitutions
-
Vegan Sprinkles: Substitute the egg white with aquafaba (the liquid from a can of chickpeas). Use 2 tablespoons of aquafaba in place of the egg white and water.
-
Gluten-Free Sprinkles: This recipe is naturally gluten-free, as it does not contain any wheat-based ingredients.
-
Natural Food Coloring: Use natural food coloring derived from fruits, vegetables, and spices for a more wholesome option. Beet juice can create pink or red hues, turmeric powder can produce yellow, and spinach juice can yield green. Be aware that natural food colorings may not be as vibrant as artificial ones.
-
Chocolate Sprinkles: Add 1-2 tablespoons of unsweetened cocoa powder to the powdered sugar mixture for chocolate-flavored sprinkles.
-
Citrus Sprinkles: Use citrus zest instead of almond extract, like lemon, lime, or orange, for a bright flavor.
FAQs (Frequently Asked Questions)
Q: Can I use regular sugar instead of powdered sugar?
A: No, powdered sugar is essential for this recipe because it dissolves smoothly and creates a fine texture. Granulated sugar will result in gritty sprinkles.
Q: My sprinkles are too soft. What did I do wrong?
A: This is likely due to excess moisture. Make sure to use gel food coloring sparingly, or if using liquid food coloring, reduce the amount of water slightly. Also, ensure the sprinkles dry completely before breaking them apart.
Q: Can I bake these sprinkles to make them dry faster?
A: While you can use a very low oven (around 170°F), it’s risky. Watch them closely to prevent them from melting. Air drying is the safest and most recommended method.
Q: How do I make different shapes besides lines?
A: Experiment with different pastry tips! A star tip will create star-shaped sprinkles, while a round tip will create dots. You can also use cookie cutters to create custom shapes on the parchment paper before the sprinkles dry.
Q: Can I add luster dust to make them shimmery?
A: Yes! Once the sprinkles are dry, lightly dust them with edible luster dust for a shimmering effect.
Final Thoughts
Now that you’ve unlocked the secrets to homemade sprinkles, I encourage you to embrace your inner artist and create a dazzling array of colorful and flavorful decorations. These homemade sprinkles are not only a delightful addition to your own baking endeavors, but they also make a thoughtful and personalized gift for friends and family. So, gather your ingredients, put on some music, and let the sprinkle-making magic begin. I can’t wait to see all of the colorful creations you come up with! Don’t forget to share your sprinkle masterpieces online and tag me in your posts!