
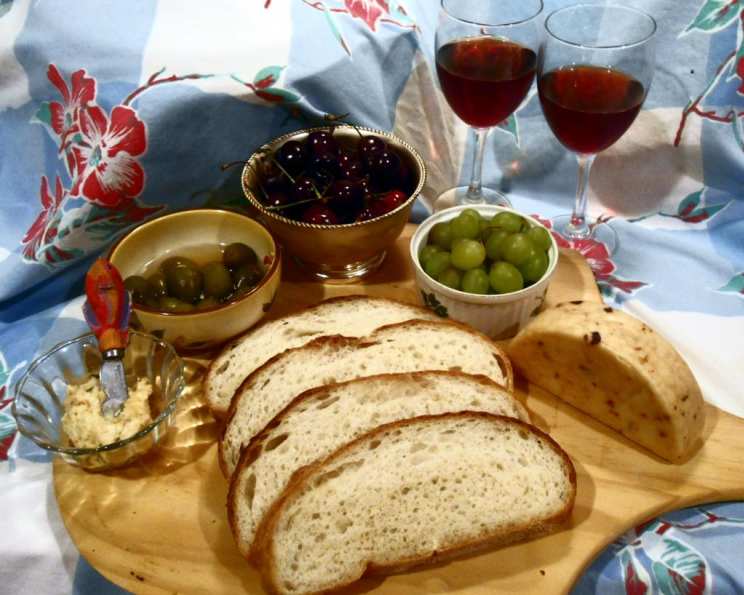
Horiatiko Psomi: Crusty Country Bread
The scent alone transports me back to a sun-drenched taverna nestled in the hills of Crete. A simple meal of ripe tomatoes, Kalamata olives, and feta cheese was made extraordinary by the arrival of a warm loaf of Horiatiko Psomi, its crust crackling as the waiter set it down. Tearing off a piece, the yeasty aroma filled the air, and the taste – slightly tangy, wonderfully chewy – was a perfect complement to the vibrant flavors of the Mediterranean. It was a bread born of simplicity, baked with love, and shared with joy.
Recipe Overview
- Prep Time: 30 minutes
- Rise Time (Proofing): 2.5-3 hours
- Cook Time: 30-35 minutes
- Total Time: 3 hours 35 minutes – 4 hours 5 minutes
- Yields: 3-4 loaves
- Dietary Type: Vegetarian
Ingredients
- 2 tablespoons dry yeast
- 1/2 cup lukewarm water
- 1/2 cup flour (whatever type used for bread)
- 8 cups bread flour (whole wheat, barley, white, corn, or other)
- 1 tablespoon salt
- 2 1/2 cups lukewarm water
- 2 tablespoons milk
- 2 tablespoons olive oil
- 2 tablespoons honey
Equipment Needed
- Small bowl
- Large mixing bowl
- Measuring cups and spoons
- Floured surface
- Lightly oiled mixing bowl
- 3 dishtowels
- Ungreased cookie sheets
- Cooling racks
Instructions
- In a small bowl, dissolve the dry yeast in 1/2 cup lukewarm water. Be sure the water isn’t too hot, as it can kill the yeast.
- Slowly add 1/2 cup of flour to the yeast mixture and mix until all lumps of flour have dissolved, forming a thick liquid. This is called a “sponge”.
- Allow the yeast mixture to rise for about 15-20 minutes. You’ll see bubbles forming, indicating the yeast is active.
- In a large mixing bowl, sift the remaining 8 cups of bread flour with 1 tablespoon salt. Creating a well in the center of the flour mixture.
- Add 2 tablespoons olive oil, 2 tablespoons honey, 2 tablespoons milk, and the yeast mixture (or 1/2 pound of sourdough starter if you’re using it) into the well.
- Add 2 cups of the lukewarm water to the well.
- Slowly pull in the flour from the sides of the well, mixing with your hands until it forms a cohesive mass.
- If the dough seems too dry, add small amounts of the remaining 1/2 cup of water, until a smooth, slightly sticky dough forms. The amount of water needed can vary based on the humidity and the type of flour used.
- Turn the dough out onto a floured surface and continue kneading for 8-10 minutes, until it is nice and smooth and no longer sticks excessively to your hands.
- Place the dough in a lightly oiled mixing bowl and roll it around until all sides are lightly coated with oil. This will prevent the dough from drying out as it rises.
- Cover the bowl with three dishtowels: one dry, one dampened with warm water (wet towel and wring out), and another dry. The damp towel creates a humid environment that helps the dough rise.
- Place the bowl in a warm place and allow the dough to rise until doubled in size, which should take about 1 1/2 to 2 hours. The exact time will depend on the temperature of your kitchen.
- Once the dough has doubled, punch it down to release the air.
- Turn the dough out onto a floured surface and knead it for 5-6 minutes.
- Divide the dough into the desired number of loaves (this recipe typically works well for 3-4 loaves).
- Shape each portion into round, oblong, or baguette-shaped loaves.
- Place the loaves several inches apart on ungreased cookie sheets.
- Cover the loaves with three clean dishtowels (the middle one damp).
- In a warm place, allow the loaves to rise for 1 hour. This second rise is crucial for a light and airy texture.
- Preheat oven to 450°F (220°C).
- For a thicker crust, score the tops of the loaves in 3 or 4 places with a sharp knife or lame before baking. This allows the bread to expand properly in the oven and creates those beautiful cracks.
- Bake the loaves on the rack just below the middle of the oven for 30-35 minutes, or until they are golden brown.
- The bread is done when it sounds hollow when tapped on the bottom.
- When the loaves are done, remove them from the oven and cool on racks completely before slicing. This prevents the bread from becoming gummy.
Expert Tips & Tricks
- For a more intense flavor, try using a portion of whole wheat flour or barley flour in addition to the bread flour.
- The humidity in your kitchen will affect how much water the dough needs. Start with the smaller amount of water and add more as needed, a tablespoon at a time, until the dough comes together.
- If you don’t have a warm place to let the dough rise, you can proof it in your oven. Turn the oven on to the lowest setting for a few minutes, then turn it off and place the dough inside.
- To create a steamier oven environment (which helps with crust development), place a pan of hot water on the bottom rack of your oven while the bread bakes.
Serving & Storage Suggestions
Horiatiko Psomi is best served fresh, still slightly warm from the oven. It’s wonderful with olive oil and herbs for dipping, alongside soups and stews, or as a base for sandwiches.
Store leftover bread in a breadbox or airtight container at room temperature for up to 3 days. For longer storage, freeze the bread in a freezer-safe bag or container for up to 2 months. To reheat, thaw the bread completely and then bake it in a preheated oven at 350°F (175°C) for 5-10 minutes, or until warmed through. You can also slice the bread and toast it.
Nutritional Information
| Nutrient | Amount per Serving (estimated) | % Daily Value (approximate) |
|---|---|---|
| Calories | 380 kcal | 19% |
| Total Fat | 8g | 12% |
| Saturated Fat | 1g | 5% |
| Cholesterol | 0mg | 0% |
| Sodium | 450mg | 19% |
| Total Carbohydrate | 70g | 23% |
| Dietary Fiber | 4g | 16% |
| Sugars | 4g | N/A |
| Protein | 12g | 24% |
Note: Nutritional information is an estimate and may vary based on specific ingredients and portion sizes.
Variations & Substitutions
- Whole Wheat Horiatiko: Replace up to half of the bread flour with whole wheat flour for a nuttier flavor and denser texture.
- Herb-Infused Horiatiko: Add 2 tablespoons of chopped fresh herbs, such as rosemary, thyme, or oregano, to the dough during the kneading process.
- Olive Horiatiko: Incorporate 1/2 cup of chopped Kalamata olives into the dough for a savory twist.
- Seed-Crusted Horiatiko: Brush the loaves with a beaten egg white before baking and sprinkle with sesame seeds, poppy seeds, or sunflower seeds.
FAQs (Frequently Asked Questions)
Q: Can I use all-purpose flour instead of bread flour?
A: While you can use all-purpose flour, bread flour has a higher protein content, which results in a chewier and more structured loaf. If using all-purpose, the bread may be slightly less chewy.
Q: How do I know if my yeast is still good?
A: To test your yeast, mix it with lukewarm water and a pinch of sugar. If it foams up within 5-10 minutes, it’s active and ready to use.
Q: My dough isn’t rising. What could be the problem?
A: Possible reasons include using old or inactive yeast, the water being too hot or too cold, or the dough not being in a warm enough place.
Q: Can I freeze the dough after the first rise?
A: Yes, you can freeze the dough after the first rise. Punch it down, wrap it tightly in plastic wrap and then place it in a freezer bag. Thaw it in the refrigerator overnight before shaping and baking.
Q: What’s the best way to get a really crusty crust?
A: Besides scoring the loaves, baking with steam is key. You can achieve this by placing a pan of hot water on the bottom rack of your oven during baking or by spraying the loaves with water a few times during the first 10 minutes of baking.
Final Thoughts
Now it’s your turn to create a masterpiece of rustic bread. Don’t be intimidated by the process – bread baking is a rewarding experience that connects you to traditions spanning generations. Embrace the feel of the dough in your hands, savor the aromas that fill your kitchen, and share the warmth of freshly baked Horiatiko Psomi with those you love. Whether you’re a seasoned baker or a novice in the kitchen, this recipe offers a taste of authentic Greek flavors that will surely delight. Kali Orexi!