
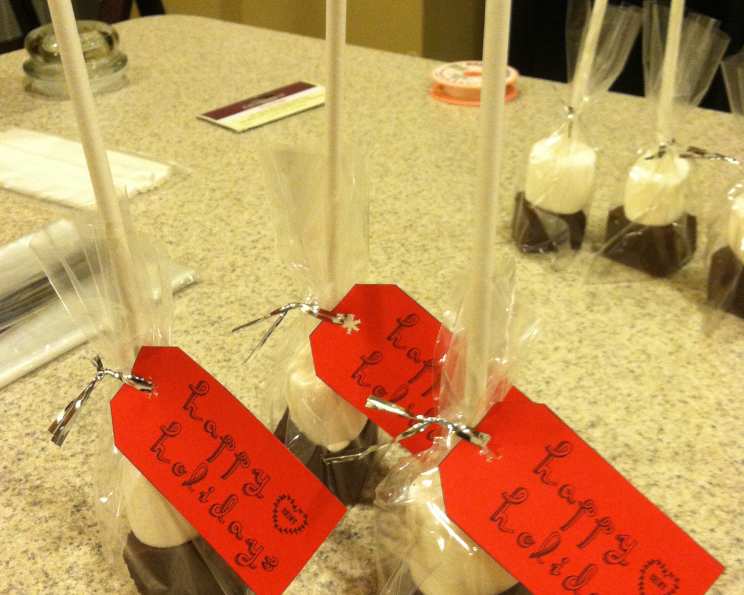
Cocoa Blocks: The Ultimate Hot Chocolate Upgrade
As a child, winter afternoons meant one thing: hot chocolate. Not the powdered stuff, though. My grandmother, a woman who believed shortcuts were for quitters, would slowly melt bars of dark chocolate into simmering milk, stirring until the concoction was velvety smooth and intensely flavored. The ritual itself was a warm embrace, and the resulting drink, a comforting symphony of bittersweetness. These Cocoa Blocks are a sophisticated nod to that cherished memory, offering a richer, more customizable hot chocolate experience. They are so simple, yet so rewarding, and add a touch of elegance to a classic comfort.
Recipe Overview
- Prep Time: 30 minutes
- Cook Time: 20 minutes
- Total Time: 12 hours, 50 minutes (includes setting time)
- Servings: 36
- Yield: 3 dozen
- Dietary Type: Vegetarian (check chocolate labels for vegan option)
Ingredients
- 1/2 cup heavy cream
- 14 ounces sweetened condensed milk (1 1/4 cups)
- 3 cups semi-sweet chocolate chips
- 3/4 cup unsweetened baking chocolate
- Optional: wooden sticks
- Optional: flavoring oil (hazelnut, coffee, or vanilla)
- Optional: cocoa powder or crushed candy canes for coating
Equipment Needed
- 8″ x 8″ pan
- Parchment paper or aluminum foil
- Saucepan
- Whisk
- Knife
- Cutting board
Instructions
-
First, prepare your pan. Line an 8″ x 8″ pan with parchment paper or aluminum foil. This will make it much easier to remove the solidified chocolate later. Ensure the lining extends over the edges of the pan, creating an overhang for easy lifting.
-
In a saucepan, combine the heavy cream and sweetened condensed milk. Heat over low heat, stirring constantly, until the mixture is steaming. Be careful not to boil the mixture, as this can scorch the milk solids.
-
Remove the saucepan from the heat. Add the semi-sweet chocolate chips and unsweetened baking chocolate to the warm cream mixture. Allow the chocolate to sit undisturbed for about 10 minutes. This allows the heat to gently melt the chocolate without seizing.
-
After 10 minutes, return the saucepan to low heat. Stir constantly with a whisk until all the chocolate is completely melted and the mixture is smooth. It is crucial to maintain low heat during this process.
-
Continue whisking the chocolate mixture vigorously until it becomes thick and shiny. This may take a few minutes, but the consistent whisking emulsifies the ingredients, creating a rich, glossy texture.
-
Pour the melted chocolate mixture into the prepared pan. Gently shake the pan to level the surface, ensuring the chocolate spreads evenly into all corners.
-
Set the pan aside at room temperature to set up overnight. This slow setting process is crucial for achieving the proper texture. Do not refrigerate the mixture, as this can cause the chocolate to bloom and result in a less desirable texture.
-
The next day, once the chocolate is fully set, run a knife around the edge of the pan to loosen it from the sides. Use the parchment paper or foil overhang to lift the chocolate slab out of the pan onto a clean cutting surface.
-
Slice the chocolate into 1 1/4″ cubes. For the smoothest cuts, heat a knife in hot water, wipe it dry, and then slice through the chocolate. Repeat this process before each cut. The heat from the knife helps to prevent the chocolate from cracking or crumbling.
-
If desired, insert a wooden stick into the center of each block to create a “hot chocolate on a stick” presentation.
-
Wrap each cocoa block individually in waxed paper, parchment paper, or plastic wrap for storage. This will prevent the blocks from sticking together and help maintain their freshness.
-
For added flavor, you can incorporate a few drops of flavoring oil (like hazelnut, coffee, or vanilla) into the chocolate mixture before pouring it into the pan. Alternatively, roll the finished blocks in cocoa powder or crushed candy canes for a festive touch.
Expert Tips & Tricks
- Chocolate Quality Matters: Use high-quality chocolate for the best flavor and melting properties. Consider using a combination of dark and milk chocolate for a more complex flavor profile.
- Gentle Melting is Key: Avoid overheating the chocolate, as this can cause it to seize or become grainy. Low and slow is the way to go.
- Patience is a Virtue: Allow the chocolate blocks to set completely at room temperature for the best texture. Rushing the process can result in a soft, sticky final product.
- Infuse Your Cream: For an extra layer of flavor, infuse the heavy cream with spices like cinnamon, cardamom, or chili flakes before heating. Remove the spices before adding the condensed milk.
- Vegan Adaptation: To make these cocoa blocks vegan, use vegan chocolate chips and unsweetened baking chocolate, along with full-fat coconut cream instead of heavy cream and sweetened condensed coconut milk.
Serving & Storage Suggestions
To serve, simply swirl a cocoa block into a mug of steaming hot milk (dairy or non-dairy) and stir until completely dissolved. Garnish with whipped cream, marshmallows, or a sprinkle of cocoa powder.
Store the wrapped cocoa blocks at room temperature in an airtight container for up to 2 weeks. You can also store them in the refrigerator for up to 1 month or in the freezer for up to 3 months. If freezing, wrap the blocks tightly to prevent freezer burn.
Nutritional Information
Note: Nutritional information is an estimate and may vary based on specific ingredients used.
| Nutrient | Amount per Serving | % Daily Value |
|---|---|---|
| Calories | 128 kcal | 6% |
| Total Fat | 8g | 12% |
| Saturated Fat | 5g | 25% |
| Cholesterol | 8mg | 3% |
| Sodium | 18mg | 1% |
| Total Carbohydrate | 16g | 6% |
| Dietary Fiber | 1g | 4% |
| Sugars | 14g | 28% |
| Protein | 2g | 4% |
Variations & Substitutions
- Mexican Hot Chocolate: Add a pinch of ground cinnamon and a pinch of cayenne pepper to the chocolate mixture for a spicy kick.
- Peppermint Bark Cocoa Blocks: Swirl in crushed peppermint candies during the last few minutes of melting.
- Salted Caramel Cocoa Blocks: Drizzle the top of the chocolate slab with caramel sauce and sprinkle with sea salt before it sets.
- Espresso Cocoa Blocks: Add a teaspoon of instant espresso powder to the chocolate mixture for a coffee-infused treat.
- Nutella Cocoa Blocks: Swirl in a few tablespoons of Nutella to the melted chocolate for a hazelnut-chocolate flavor.
- Dairy-Free Cocoa Blocks: Use dairy-free chocolate and coconut cream.
FAQs (Frequently Asked Questions)
Q: Can I use a different size pan?
A: Yes, but keep in mind that the thickness of the blocks will vary. A larger pan will result in thinner blocks, while a smaller pan will result in thicker blocks. You may need to adjust the setting time accordingly.
Q: Can I use milk chocolate instead of semi-sweet?
A: Yes, you can substitute milk chocolate for semi-sweet chocolate. However, the resulting cocoa blocks will be sweeter. You may want to reduce the amount of sweetened condensed milk slightly.
Q: What if my chocolate seizes while melting?
A: If your chocolate seizes, try adding a tablespoon of hot water to the mixture and whisking vigorously. This can sometimes help to re-emulsify the chocolate.
Q: How long do the cocoa blocks last?
A: Stored properly, the cocoa blocks will last for up to 2 weeks at room temperature, 1 month in the refrigerator, or 3 months in the freezer.
Q: Can I add other toppings to the blocks?
A: Absolutely! Feel free to get creative and add any toppings you like, such as sprinkles, chopped nuts, or dried fruit. Just make sure to add them before the chocolate sets.
Final Thoughts
These Cocoa Blocks are more than just a recipe; they’re an invitation to create moments of warmth and joy. The rich, decadent flavor is sure to impress, and the customizable options make it easy to tailor them to your own taste preferences. So, gather your ingredients, embrace the process, and prepare to elevate your hot chocolate game to a whole new level. I encourage you to experiment with different flavors and toppings to create your own signature cocoa block recipe. And most importantly, don’t forget to share the warmth with loved ones!