
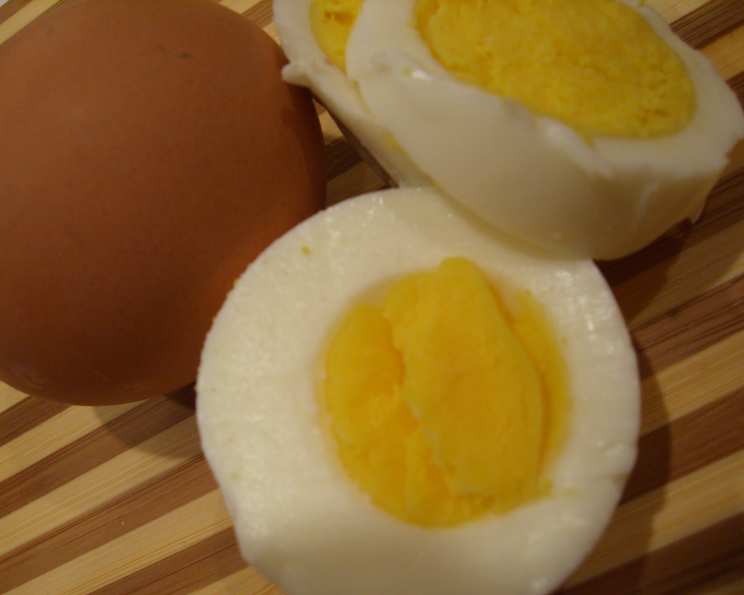
The Perfect Hard-Boiled Egg: A Culinary Essential
My grandmother, a woman who could coax flavor from the simplest ingredients, always had a bowl of hard-boiled eggs in her refrigerator. They weren’t just a snack; they were a canvas. One day they’d be transformed into creamy deviled eggs for a picnic, the next, chopped and sprinkled over a vibrant green salad. I remember watching her meticulously peel each egg, her hands weathered but gentle, a silent testament to a lifetime spent in the kitchen. The simplicity of the humble hard-boiled egg, perfectly cooked and easily peeled, became synonymous with her effortless culinary magic. That’s the magic I want to share with you.
Recipe Overview
- Prep Time: 1 minute
- Cook Time: 17 minutes
- Total Time: 18 minutes
- Servings: Varies
- Yield: Varies
- Dietary Type: Gluten-Free, Dairy-Free, Paleo, Keto
Ingredients
- Eggs (near their expiration date)
- Water
Equipment Needed
- Small saucepan
- Slotted spoon
Instructions
- Start with eggs that are nearing their expiration date. This is key, as fresher eggs tend to stick to the shell, making them difficult to peel.
- Remove the desired number of eggs from the refrigerator and allow them to sit at room temperature for about 15 minutes. This helps prevent the shells from cracking due to the sudden temperature change.
- Place the eggs in a small saucepan. The size of the pan matters; using a pan that’s just large enough to hold the eggs snugly will minimize their movement during cooking, reducing the chance of cracking.
- Add just enough water to completely cover the eggs. Ensure all eggs are submerged for even cooking.
- Bring the water to a rolling boil over high heat. Covering the pan will help the water boil faster, and is recommended. Keep a close eye; you want a rolling boil, not a violent one.
- Once the water reaches a rolling boil, immediately reduce the heat to a simmer and remove the cover from the pan. A gentle simmer prevents the eggs from bouncing around and cracking against each other.
- Let the eggs sit in the simmering water for precisely 12 minutes. For medium-sized eggs, reduce the time to 11 minutes; for extra-large eggs, increase it to 13 minutes. This precise timing is crucial for achieving a perfectly cooked yolk – not too runny, not too dry.
- Carefully remove the pan from the stovetop and immediately place it under the kitchen faucet. Run cool water into the pan for about a minute, until the water is cool to the touch. This stops the cooking process and makes peeling easier.
- Give each egg a gentle whack against the side of the pan, creating one or two cracks on the shell. Some believe this allows trapped sulfur to escape, preventing that unpleasant green ring around the yolk. More practically, the cracks allow a little steam to build between the cooked egg and its shell, facilitating easier peeling.
- Let the eggs sit in the cool water for 2 to 5 minutes. This allows the water to seep under the shell, further loosening it.
- To peel the “Mr. Breakfast way”: Place a hard-boiled egg on a hard surface such as a cutting board. Gently roll the egg back and forth, applying very slight pressure. The goal is to crack the shell all over without crushing the egg.
- Remove the cracked shell under a faucet of cool running water. The water will help to lift the shell away from the egg.
- If peeling multiple eggs, place the peeled eggs in a bowl of cold water as you work on the others. This prevents them from drying out.
Expert Tips & Tricks
- Temperature Matters: Starting with room temperature eggs minimizes cracking. Taking them straight from the fridge to boiling water increases the risk of shattering.
- Don’t Overcrowd: Ensure the eggs have enough space in the saucepan. Overcrowding can lead to uneven cooking.
- Perfect Yolk Color: For a vibrant yellow yolk, avoid overcooking. The 12-minute simmer is ideal. Overcooked yolks develop a green ring around the outside, which, while harmless, is visually unappealing.
- Adding Vinegar or Baking Soda: Some cooks swear by adding a teaspoon of vinegar or baking soda to the water. The vinegar is said to help the egg whites coagulate faster if the egg cracks, and the baking soda may slightly raise the pH of the egg white, making it less likely to stick to the shell.
- The Ice Bath Alternative: For super easy peeling, transfer the cooked eggs to an ice bath instead of running them under cool water. The rapid temperature change causes the egg to contract slightly, pulling it away from the shell.
Serving & Storage Suggestions
Hard-boiled eggs are incredibly versatile. They can be enjoyed as a simple snack, sliced and added to salads or sandwiches, or transformed into more elaborate dishes like deviled eggs, egg salad, or Scotch eggs.
- Serving: Serve hard-boiled eggs chilled or at room temperature. They are best enjoyed shortly after peeling.
- Storage: Peeled hard-boiled eggs should be stored in a bowl of cold water in the refrigerator and consumed within a day or two. Unpeeled hard-boiled eggs, stored in their shell, can be kept in the refrigerator for up to 5 days.
- Freezing: Freezing hard-boiled eggs is not recommended, as the egg white becomes rubbery and unpleasant.
Nutritional Information
Here is an approximate nutritional breakdown for one large hard-boiled egg:
| Nutrient | Amount per Serving | % Daily Value |
|---|---|---|
| Calories | 78 kcal | 4% |
| Total Fat | 5g | 6% |
| Saturated Fat | 1.6g | 8% |
| Cholesterol | 186mg | 62% |
| Sodium | 62mg | 3% |
| Total Carbohydrate | 0.6g | 0% |
| Dietary Fiber | 0g | 0% |
| Sugars | 0.6g | – |
| Protein | 6g | 12% |
| Vitamin A | 75mcg | 8% |
| Vitamin D | 22IU | 6% |
| Vitamin B12 | 0.5mcg | 21% |
| Iron | 0.6mg | 3% |
Note: Nutritional information is an estimate and may vary based on specific ingredients and portion sizes.
Variations & Substitutions
While the classic hard-boiled egg is perfect as is, there are a few ways to customize the flavor and presentation:
- Tea-Stained Eggs: Simmer the eggs in tea (such as black tea or oolong tea) along with soy sauce, star anise, and other spices for a flavorful and visually appealing twist. This creates a marbled effect on the egg white.
- Pickled Eggs: Hard-boiled eggs can be pickled in a brine of vinegar, spices, and herbs for a tangy and savory snack.
- Spiced Eggs: Add spices like turmeric, chili powder, or paprika to the cooking water for a subtle flavor infusion.
- Deviled Egg Variations: Get creative with your deviled egg fillings. Try adding avocado, bacon, jalapenos, or smoked salmon.
FAQs (Frequently Asked Questions)
Q: Why are my hard-boiled eggs so difficult to peel?
A: Extremely fresh eggs are the primary culprit. As eggs age, the pH of the egg white increases, causing it to separate more easily from the shell membrane. Using eggs nearing their expiration date and properly cooling them after cooking are key to easy peeling.
Q: How can I tell if an egg is hard-boiled without cracking it open?
A: Place the cooked egg on a flat surface and spin it. If it spins easily, it’s likely hard-boiled. If it wobbles, it’s probably still raw or undercooked.
Q: Is it safe to eat hard-boiled eggs with a green ring around the yolk?
A: Yes, the green ring is harmless. It’s caused by a chemical reaction between sulfur in the egg white and iron in the yolk, and it usually indicates that the egg was overcooked.
Q: How long can I store hard-boiled eggs in the refrigerator?
A: Unpeeled hard-boiled eggs can be stored in the refrigerator for up to 5 days. Peeled hard-boiled eggs should be stored in a bowl of cold water and consumed within a day or two.
Q: Can I use this method for quail eggs or other small eggs?
A: Yes, but you’ll need to adjust the cooking time. For quail eggs, simmer for about 5-6 minutes. The key is to experiment and find the perfect timing for your specific type of egg.
Final Thoughts
Mastering the art of the perfect hard-boiled egg is a fundamental culinary skill, and the gateway to many simple pleasures. Don’t be discouraged if your first attempt isn’t flawless; with a little practice, you’ll be whipping up perfect hard-boiled eggs with ease. Experiment with different cooking times to find your preferred yolk consistency, and don’t be afraid to get creative with your toppings and flavor combinations. Share your culinary creations with friends and family, and savor the simple satisfaction of a perfectly executed egg.