
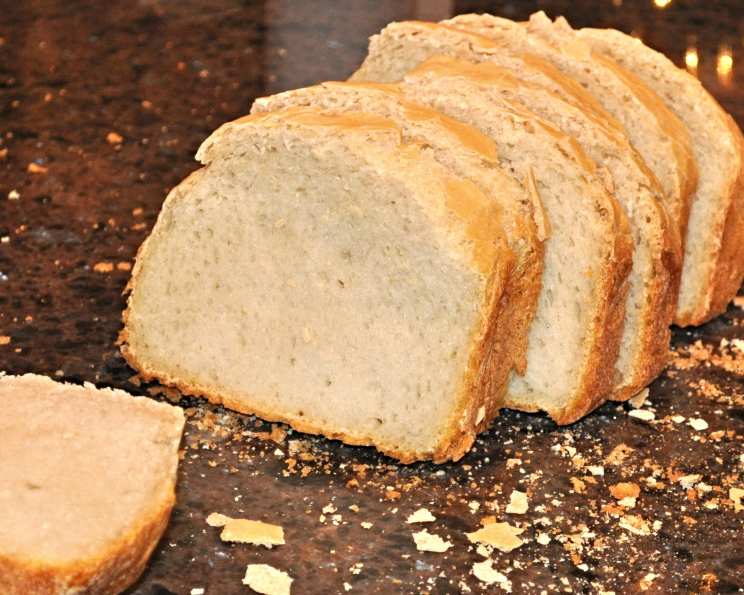
Sourdough Bread, Bread Machine Magic: A Custom Creation
The scent of sourdough baking always transports me back to my grandmother’s kitchen. I can still picture her, flour dusting her apron, patiently nurturing her starter – a bubbling, yeasty beast she affectionately called “Bessie.” While I cherish those memories of hands-on kneading and shaping, life sometimes calls for a little modern convenience. This recipe brings the tangy delight of sourdough into the 21st century, harnessing the power of a custom-programmable bread machine to deliver a truly exceptional loaf. It’s the best of both worlds: artisanal flavor with push-button ease.
Recipe Overview
- Prep Time: 15 minutes
- Cook Time: 62 minutes
- Total Time: 11 hours 30 minutes
- Servings: 8
- Yield: 1 1-1/2 lb loaf
- Dietary Type: Vegetarian
Ingredients
WET
- 1 cup sourdough starter (the consistency of pancake batter)
- ¾ cup water
- 1 tablespoon extra virgin olive oil
DRY
- 3 cups bread flour
- 1 ½ teaspoons powdered milk
- 1 teaspoon salt
- 1 tablespoon sugar
Equipment Needed
- Custom-programmable bread machine (e.g., Zojirushi Home Bakery)
- Measuring cups and spoons
Instructions
-
The key to incredible sourdough lies in a vibrant starter. Your sourdough starter should have been fed the day before, and still have some active bubbles, and perhaps even a layer of “hooch” on top – a clear liquid that’s a telltale sign of active fermentation.
-
Before measuring, stir up the starter to mix it all together and to collapse the bubbles. This ensures consistent measuring. After you remove the 1 cup of starter needed for this recipe, be sure to feed your starter to replenish it.
-
For bread machines like the Zojirushi, begin by placing the wet ingredients – the sourdough starter, water, and olive oil – in the bottom of the bread machine’s pan. This order helps prevent the dry ingredients from clumping at the bottom.
-
Next, add the dry ingredients. Put the bread flour into the pan on top of the wet ingredients, followed by the remaining dry ingredients: powdered milk, salt, and sugar.
-
Now comes the magic of the custom cycle. Program your bread machine with the following settings:
- Preheat: 15 minutes
- Knead: 28 minutes
- Rise #1: 6 hours
- Rise #2: 2 hours
- Rise #3: 1 hour 30 minutes
- Bake: 62 minutes
-
Consistency is key! After the bread machine has been kneading for 3-5 minutes, carefully check the dough consistency. This is especially important the first couple of times you try this recipe.
-
The mixed and kneaded batter should be a bit wetter than your usual bread dough, because some water will evaporate during the long, 11-hour process. However, it should still come together to make a (somewhat sticky and looser than usual) dough ball. If the dough is too wet or too dry, it won’t knead properly, and you won’t develop enough gluten to get a good rise and a smooth, light interior texture.
-
If the dough is runnier than pancake batter, you may need to add more flour, a tablespoon or two at a time, to the dough to get it to come together and knead properly.
-
On the other hand, if your starter is more of a sponge than a batter consistency, you’ll need to add more water, a tablespoon or two at a time, to the dough.
-
Whether you add extra flour or water, it’s crucial to make a note of it, so you can simply adjust the amount of water or flour the next time you make the bread. The beauty of bread baking is that it’s all about learning what works best in your particular environment.
-
Once the bread machine cycle is complete, promptly remove the loaf from the pan.
-
Now comes the hard part: cool completely on a wire rack. If you can possibly restrain yourself, let it cool for at least 2 hours for maximum sourdough flavor development. This allows the internal moisture to redistribute, preventing a gummy texture.
Expert Tips & Tricks
- Starter Strength: A lively, active starter is the foundation of good sourdough. Ensure your starter doubles in size after feeding before using it in this recipe.
- Dough Temperature: While the bread machine takes care of most of the temperature control, try to use water that’s around 75-80°F (24-27°C) for best results. This helps activate the yeast in the starter.
- Listen to Your Dough: Pay attention to how the dough feels during the kneading process. If it’s slapping around the sides of the pan and not forming a cohesive ball, it’s likely too wet. If it’s stubbornly dry and refuses to come together, it needs more moisture.
- Scoring (Optional): If you want to add a decorative touch, score the top of the loaf with a sharp knife or lame before baking. This also helps control the expansion of the bread during baking. (However, this loaf is baked inside the breadmaker, so external scoring is probably not possible or advised.)
Serving & Storage Suggestions
This sourdough bread is delicious on its own, toasted with butter, or used for sandwiches. Its tangy flavor pairs beautifully with creamy cheeses, hearty soups, and savory dips.
Store the bread at room temperature in a bread box or loosely wrapped in plastic wrap for up to 3 days. For longer storage, slice the bread and freeze it in an airtight container for up to 2 months. Reheat frozen slices in a toaster or oven.
Nutritional Information
Please note that these values are estimates and may vary based on specific ingredients used.
| Nutrient | Amount per Serving | % Daily Value |
|---|---|---|
| Calories | 194 kcal | 10% |
| Total Fat | 2.3g | 3% |
| Saturated Fat | 0.4g | 2% |
| Cholesterol | 0.5mg | 0% |
| Sodium | 294mg | 12% |
| Total Carbohydrate | 37.5g | 13% |
| Dietary Fiber | 1.3g | 5% |
| Sugars | 1.9g | N/A |
| Protein | 5g | 10% |
Variations & Substitutions
- Whole Wheat Sourdough: For a nuttier flavor and added fiber, substitute 1 cup of bread flour with 1 cup of whole wheat flour and 1 teaspoon of vital wheat gluten.
- Rye Sourdough: Similarly, you can substitute 1 cup of bread flour with 1 cup of rye flour for a more pronounced earthy flavor.
- Herb Infusion: Add 1-2 tablespoons of chopped fresh herbs like rosemary, thyme, or oregano to the dough for an aromatic twist. Add them with the dry ingredients.
FAQs (Frequently Asked Questions)
Q: Can I use all-purpose flour instead of bread flour?
A: While you can, bread flour has a higher protein content, which results in a stronger gluten network and a chewier texture. Bread flour is highly recommended for best results.
Q: My dough didn’t rise much during the rising cycles. What could be the problem?
A: This could be due to several factors: a weak starter, incorrect dough consistency (too wet or too dry), or temperature fluctuations. Ensure your starter is active, adjust the dough consistency as needed, and keep the bread machine in a warm environment.
Q: Can I shorten the rising times?
A: Sourdough relies on a long fermentation process for its characteristic flavor and texture. Shortening the rising times may result in a less tangy and dense loaf. If you’re short on time, consider using a commercial yeast in addition to the sourdough starter. However, this recipe does not call for commercial yeast.
Q: My bread is gummy inside. What did I do wrong?
A: This is usually caused by not allowing the bread to cool completely before slicing. The internal moisture needs time to redistribute. Ensure you let the loaf cool for at least 2 hours on a wire rack.
Q: Can I double the recipe?
A: That depends on the size of your bread machine pan. Refer to your bread machine’s manual to determine its maximum capacity. It’s generally safer to make two separate loaves than to risk overfilling the machine.
Final Thoughts
I urge you to embark on this sourdough bread machine adventure! It’s a fantastic way to bring the complex flavors of sourdough into your home with surprising ease. Don’t be afraid to experiment with different flours and additions to create your own signature loaf. And please, share your creations and any tips you discover along the way. Happy baking!