
Mastering Irish Scones: From Buttermilk Classics to Savory Cheese & Herb Delights
The scent of warm scones, fresh from the oven, always transports me back to my grandmother’s kitchen in County Cork. I remember standing on a stool, barely tall enough to reach the counter, watching her nimble hands transform simple ingredients into golden-brown perfection. The gentle thud of the rolling pin, the soft whisper of flour dusting the wooden surface, and the anticipation of that first warm, buttery bite – these are memories I cherish. Today, I’m excited to share her secrets (and a few of my own) for creating truly exceptional Irish scones. Whether you crave the classic sweetness of buttermilk or the savory depth of cheese and herbs, this recipe will guide you to scone-making success.
Recipe Overview
- Prep Time: 15 minutes
- Cook Time: 15-20 minutes
- Total Time: 30-35 minutes
- Yields: 8 scones
- Dietary Type: Vegetarian
Ingredients
For Buttermilk Scones:
- 8 ounces self-raising flour (preferably self-raising soda bread flour)
- 1 pinch salt
- 1 ounce butter or 1 ounce hard margarine
- 1 egg, beaten
- 5 fluid ounces buttermilk
- Egg or milk, to glaze
- Cinnamon sugar, to dust
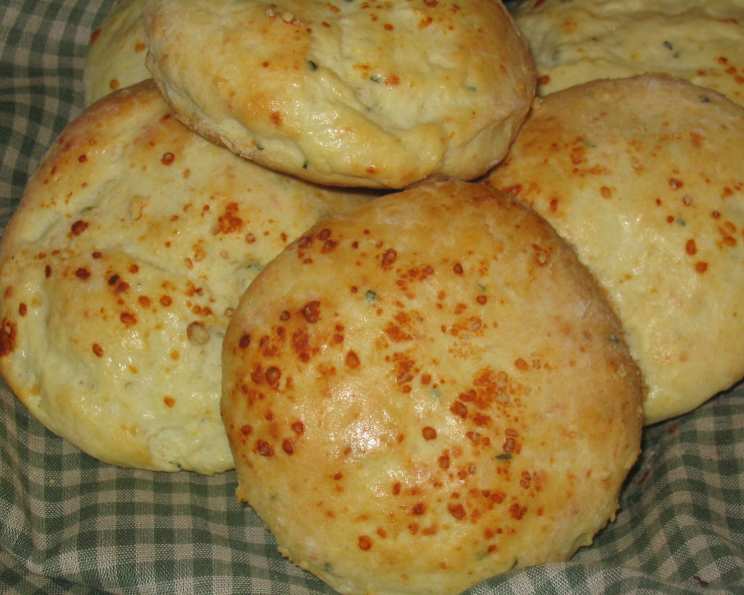
For Cheese and Herb Scones:
- 8 ounces self-raising flour (preferably self-raising soda bread flour)
- 1 pinch salt
- 1 ounce butter or 1 ounce hard margarine
- 1 teaspoon dry mustard
- 2 ounces cheese, grated
- 2 tablespoons fresh herbs, chopped (basil, chives, rosemary, or whatever you like)
- 1 egg, beaten
- 5 fluid ounces buttermilk
- Egg or milk, to glaze
- Optional: Grated cheese, to sprinkle on top
Equipment Needed
- Large mixing bowl
- Measuring cups and spoons
- Pastry blender or your fingertips
- Rolling pin
- 2-inch round cutter
- Baking sheet
- Pastry brush
Instructions
-
Preheat your oven to 450°F (230°C, gas mark 8). This high temperature is crucial for creating a light and airy scone.
-
Sift the flour and salt into a large mixing bowl. Sifting ensures there are no lumps and incorporates air, resulting in a lighter texture.
-
Rub in the butter or margarine using a pastry blender or your fingertips. The goal is to create a mixture that resembles coarse breadcrumbs. Work quickly to prevent the butter from melting, as this will result in a tough scone.
-
For Cheese & Herb Scones: Add the mustard, grated cheese, and chopped herbs to the dry ingredients at this point. Gently mix to distribute evenly.
-
Make a well in the center of the dry ingredients and pour in the beaten egg and most of the buttermilk. Reserve a little buttermilk, you may not need it all.
-
Mix quickly to form a soft dough, adding a little extra buttermilk if necessary. Be careful not to overmix, as this will develop the gluten in the flour and result in tough scones. The dough should be slightly sticky but hold its shape.
-
Turn out the dough onto a lightly floured surface and roll out lightly until it’s approximately 1 inch (2.5 cm) thick. Avoid pressing down too hard on the dough, as this will compact it.
-
Working quickly, use a 2-inch round cutter to cut out the scones. Don’t twist the cutter, as this can seal the edges and prevent them from rising properly. Gently re-roll any scraps of dough, but keep in mind that the second batch of scones may not be as tender.
-
Place the scones on a floured baking sheet, leaving a little space between each one.
-
Glaze the tops of the scones with egg or milk. This will give them a beautiful golden-brown color.
-
Before baking:
- For Buttermilk Scones: Dust the tops with cinnamon sugar. The cinnamon sugar adds a touch of sweetness and a delightful aroma.
- For Cheese & Herb Scones: Sprinkle a little grated cheese on top of each scone. This adds a cheesy crust and enhances the savory flavor.
-
Bake for 15-20 minutes, or until the scones are light brown and well-risen. To check for doneness, insert a toothpick into the center of a scone. If it comes out clean, the scones are ready.
Expert Tips & Tricks
- Use cold ingredients: Keeping your butter and buttermilk cold is essential for creating a light and flaky scone. Cold butter creates pockets of steam as it bakes, resulting in a tender crumb.
- Don’t overmix: Overmixing develops the gluten in the flour, leading to tough scones. Mix the dough just until it comes together.
- Handle the dough gently: Avoid pressing down too hard on the dough when rolling it out or cutting out the scones.
- Bake in a hot oven: A high oven temperature is crucial for achieving a good rise and a golden-brown crust.
- For extra flavor: Experiment with different herbs and cheeses in the Cheese & Herb Scones. Sun-dried tomatoes, olives, and a sprinkle of chili flakes can also add a delicious twist.
- Make-ahead tip: You can prepare the dry ingredients ahead of time and store them in an airtight container. When you’re ready to bake, simply add the wet ingredients and proceed with the recipe. You can also shape the scones and freeze them on a baking sheet. When frozen solid, transfer them to a freezer bag. Bake from frozen, adding a few extra minutes to the baking time.
Serving & Storage Suggestions
Serve the scones warm from the oven with a generous dollop of clotted cream and your favorite jam. They’re also delicious with a cup of tea or coffee.
- Storage: Store leftover scones in an airtight container at room temperature for up to 2 days.
- Reheating: To reheat, warm the scones in a preheated oven at 350°F (175°C) for 5-10 minutes, or until heated through. You can also microwave them for a few seconds, but they may become slightly softer.
- Freezing: Freeze baked scones in an airtight container for up to 2 months. Thaw at room temperature or in the refrigerator before reheating.
Nutritional Information
Please note that the following values are estimates and may vary depending on specific ingredients and portion sizes.
| Nutrient | Amount per Serving | % Daily Value |
|---|---|---|
| Calories | 250 kcal | 13% |
| Total Fat | 12g | 18% |
| Saturated Fat | 7g | 35% |
| Cholesterol | 50mg | 17% |
| Sodium | 400mg | 17% |
| Total Carbohydrate | 30g | 10% |
| Dietary Fiber | 1g | 4% |
| Sugars | 5g | N/A |
| Protein | 5g | 10% |
Variations & Substitutions
- Gluten-Free Scones: Use a gluten-free self-raising flour blend. You may need to add a little xanthan gum to help bind the dough.
- Dairy-Free Scones: Substitute the buttermilk with a mixture of plant-based milk (such as almond or soy milk) and a tablespoon of lemon juice or vinegar. Use a dairy-free margarine or butter alternative.
- Vegan Scones: In addition to the dairy-free substitutions, replace the egg with a flax egg (1 tablespoon ground flaxseed mixed with 3 tablespoons water, let sit for 5 minutes to thicken).
- Sweet Scones: Add dried fruits like raisins, cranberries, or chopped dates to the dough. You can also add a teaspoon of vanilla extract for extra flavor.
- Seasonal Variations: In the fall, try adding pumpkin puree and warm spices like cinnamon, nutmeg, and ginger. In the spring, incorporate fresh berries or lemon zest.
FAQs (Frequently Asked Questions)
Q: Why are my scones flat and dense?
A: This is usually due to overmixing the dough or using old baking powder. Make sure to mix the dough just until it comes together and use fresh baking powder. Also, ensure your oven is hot enough.
Q: Can I use regular flour instead of self-raising flour?
A: Yes, but you’ll need to add baking powder. Use 2 teaspoons of baking powder per cup of all-purpose flour.
Q: My scones are too dry. What did I do wrong?
A: You may have added too much flour or not enough liquid. Be sure to measure your ingredients accurately and add the buttermilk gradually until the dough is soft but not sticky.
Q: Can I make these scones ahead of time?
A: You can prepare the dry ingredients or shape the scones ahead of time and store them in the refrigerator or freezer. Bake them just before serving for the best results.
Q: How do I get my scones to rise evenly?
A: Avoid twisting the cutter when cutting out the scones, as this can seal the edges and prevent them from rising properly. Also, ensure your oven is preheated to the correct temperature.
Final Thoughts
Now, armed with this recipe and a few simple techniques, you’re ready to create your own batch of delectable Irish scones. Whether you choose the classic buttermilk version or the savory cheese and herb variation, I hope these scones bring you as much joy as they’ve brought me over the years. Don’t be afraid to experiment with different flavors and ingredients to create your own signature scone. And most importantly, enjoy the process of baking and sharing these warm, comforting treats with loved ones. Perhaps pair your scones with a steaming mug of Irish Breakfast tea or a creamy bowl of potato soup for a truly authentic Irish experience. Happy baking!