
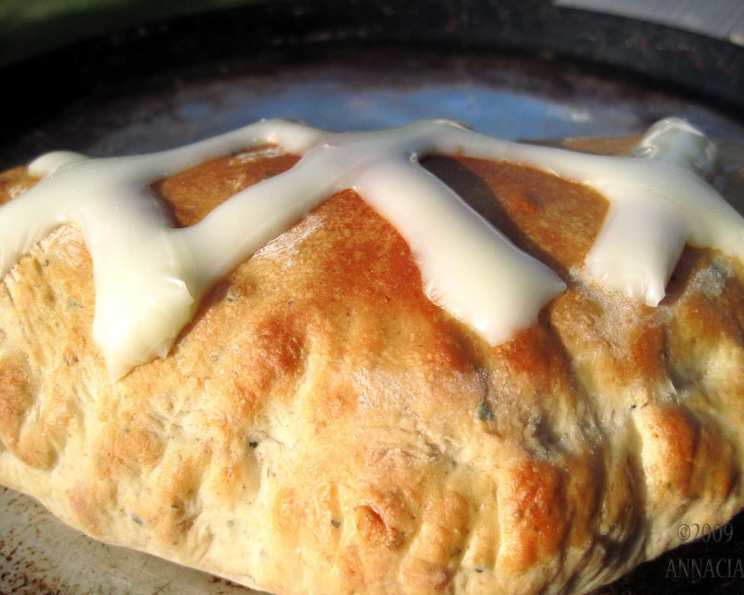
Italian Herb Bread for the Breadmaker: Aromatic Comfort in Every Slice
The scent of freshly baked bread, mingling with the savory aroma of Italian herbs, is one of my earliest and fondest culinary memories. My Nonna Emilia always had a loaf of herb-infused bread on the counter, ready to be sliced and shared. It wasn’t just bread; it was a symbol of her warmth, her generosity, and her unwavering love, a taste of home in every bite. To this day, that comforting fragrance instantly transports me back to her sun-drenched kitchen, filled with laughter and the promise of a delicious meal.
Recipe Overview
- Prep Time: 15 minutes
- Cook Time: 3 hours
- Total Time: 3 hours 15 minutes
- Yields: 2 lb. loaf
- Dietary Type: Vegetarian
Ingredients
- 1 1⁄2 cups water
- 1⁄4 cup nonfat dry milk powder
- 1 1⁄2 teaspoons salt
- 2 tablespoons granulated sugar
- 2 tablespoons shortening
- 3 cups bread flour
- 1 1⁄4 cups whole wheat flour
- 1⁄3 cup snipped fresh parsley
- 1 1⁄4 teaspoons dried basil
- 1 1⁄4 teaspoons dried dill
- 1 1⁄4 teaspoons dried thyme
- 1 1⁄4 teaspoons bread machine yeast
Equipment Needed
- Bread Machine
- Measuring cups and spoons
- Knife or kitchen shears for snipping parsley (optional)
Instructions
-
Begin by carefully measuring all your ingredients. This is crucial for breadmaking success, as precise measurements ensure the proper gluten development and rise.
-
Add the ingredients to the bread machine pan in the order recommended by your bread machine manufacturer. This is important, as layering ingredients correctly can prevent issues with yeast activation and mixing. Typically, liquids go in first, followed by dry ingredients, with the yeast added last, often in a well on top of the flour. For this recipe, start with the water, then add the nonfat dry milk powder, salt, granulated sugar, and shortening.
-
Next, add the bread flour and whole wheat flour. Create a small well on top of the flour and add the bread machine yeast.
-
Add the snipped fresh parsley, dried basil, dried dill, and dried thyme. Make sure the herbs are evenly distributed in the pan.
-
Place the bread machine pan into the oven chamber of your bread machine. Ensure that the pan is securely locked into place.
-
Select the Basic Cycle on your bread machine. This cycle will typically include kneading, rising, and baking. If your machine has a crust setting, you can choose your desired crust color. A medium crust is often a good starting point.
-
Start the bread machine. The machine will now go through its programmed cycle. This usually takes around 3 hours, but the exact time may vary depending on your machine model.
-
Once the baking cycle is complete, carefully remove the bread pan from the machine using oven mitts, as it will be hot.
-
Turn the pan upside down and gently shake or tap it to release the loaf. If the loaf is stuck, use a spatula to loosen the sides.
-
Place the freshly baked loaf on a wire rack to cool completely before slicing. This prevents the bread from becoming soggy and allows the internal structure to set properly.
Expert Tips & Tricks
- Herb Enhancement: For a more intense herb flavor, lightly sauté the dried herbs in a tablespoon of olive oil before adding them to the bread machine. Allow the herbs to cool slightly before incorporating them.
- Flour Power: The ratio of bread flour to whole wheat flour contributes to the bread’s texture. Using only bread flour will result in a softer loaf, while increasing the amount of whole wheat flour will create a denser, more rustic texture. Adjust the ratio to your preference.
- Yeast Considerations: Always check the expiration date of your yeast to ensure it is active. Inactive yeast can lead to a flat, dense loaf.
- Dough Consistency: Keep an eye on the dough during the kneading process. If the dough appears too dry, add water one tablespoon at a time until it forms a smooth, elastic ball. If the dough is too wet, add flour one tablespoon at a time.
- Scoring the Loaf: For a more professional look, you can score the top of the loaf with a sharp knife before baking. This allows the bread to expand evenly during baking and prevents it from cracking. (Note: this is mainly for oven-baked bread, not bread machine versions, but can be adapted).
- Adding Cheese: Experiment with adding shredded Parmesan, Asiago, or Romano cheese to the dough for an extra layer of flavor. Add about 1/2 cup of cheese during the last few minutes of the kneading cycle.
Serving & Storage Suggestions
This Italian Herb Bread is delightful served warm, either on its own or with a drizzle of olive oil. It’s also a fantastic accompaniment to soups, salads, and pasta dishes. The aromatic herbs complement a wide range of flavors. It also makes excellent sandwiches!
To store the bread, wrap it tightly in plastic wrap or place it in an airtight container at room temperature. It will stay fresh for up to 3 days. For longer storage, you can freeze the loaf for up to 2 months. Thaw completely before slicing and serving. To refresh the bread, you can wrap it in foil and warm it in a 350°F (175°C) oven for about 10-15 minutes.
Nutritional Information
| Nutrient | Amount per Serving | % Daily Value |
|---|---|---|
| Calories | 1169 kcal | N/A |
| Calories from Fat | 148 g | 13% |
| Total Fat | 16.5 g | 25% |
| Saturated Fat | 3.9 g | 19% |
| Cholesterol | 3 mg | 1% |
| Sodium | 1844.2 mg | 76% |
| Total Carbohydrate | 220.7 g | 73% |
| Dietary Fiber | 15.7 g | 62% |
| Sugars | 21.3 g | N/A |
| Protein | 36.6 g | 73% |
Note: Nutritional information is an estimate and may vary based on specific ingredients and serving sizes.
Variations & Substitutions
- Gluten-Free Version: Substitute the bread flour and whole wheat flour with a gluten-free bread flour blend. You may also need to add a binder like xanthan gum to improve the texture.
- Vegan Option: Ensure your sugar is vegan-friendly (some granulated sugar is processed with bone char).
- Herb Variations: Experiment with different combinations of herbs, such as rosemary, oregano, or marjoram. Adjust the quantities to your liking.
- Garlic Infusion: Add 1-2 cloves of minced garlic to the dough for a garlicky twist.
- Spicy Kick: Add a pinch of red pepper flakes to the dough for a subtle heat.
FAQs (Frequently Asked Questions)
Q: Can I use fresh herbs instead of dried?
A: Yes, you can substitute fresh herbs for dried, but you’ll need to use about three times the amount of fresh herbs as dried herbs to achieve a similar flavor intensity.
Q: My bread came out dense. What could have gone wrong?
A: A dense loaf can be caused by several factors, including inactive yeast, incorrect measurements, or too much whole wheat flour. Ensure your yeast is fresh and measure ingredients accurately.
Q: Can I add olives or sun-dried tomatoes to this recipe?
A: Absolutely! Adding chopped olives or sun-dried tomatoes can enhance the flavor and texture of the bread. Add about 1/2 cup during the last few minutes of the kneading cycle.
Q: How do I prevent the bread from sticking to the pan?
A: Lightly grease the bread machine pan before adding the ingredients. You can also use a non-stick cooking spray.
Q: Is it necessary to let the bread cool completely before slicing?
A: Yes, it’s best to let the bread cool completely before slicing. This allows the internal structure to set properly, preventing the bread from becoming gummy or soggy.
Final Thoughts
This Italian Herb Bread recipe is a simple yet satisfying way to bring the taste of Nonna’s kitchen into your own home. The aromatic herbs and comforting texture make it a delightful addition to any meal. Don’t be afraid to experiment with different herbs and variations to create your own signature loaf. Whether you enjoy it warm with a drizzle of olive oil or use it to create delicious sandwiches, this bread is sure to become a family favorite. So, gather your ingredients, fire up your bread machine, and let the irresistible aroma of freshly baked Italian Herb Bread fill your kitchen! Enjoy, and feel free to share your creations and variations!