
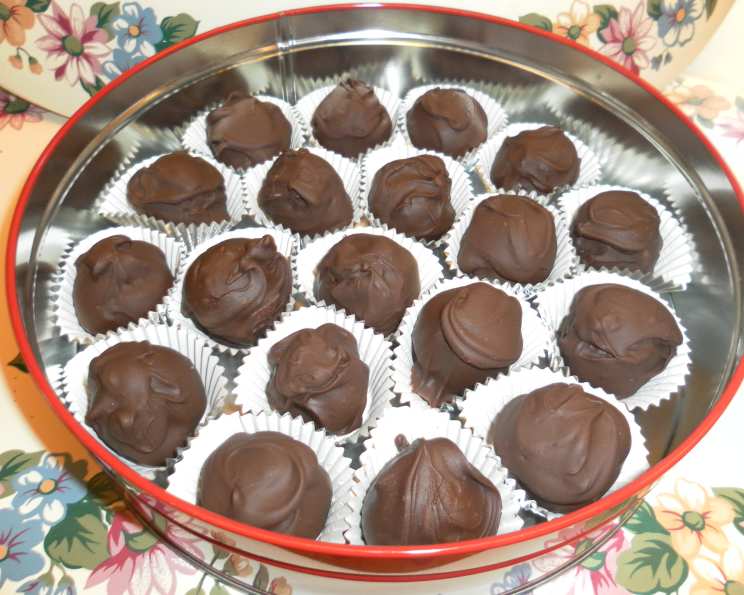
Kate’s Chocolate Coconut Truffles (No Sweetened Condensed Milk)
The first time I tasted a chocolate coconut truffle, it was at a holiday party hosted by a dear friend named Kate. I remember the rich, dark chocolate yielding to a creamy, coconutty center – a perfect bite of pure indulgence. I was instantly hooked, and knew I had to learn how to make them myself. This recipe, inspired by that initial delicious encounter, allows me to recreate those moments of pure bliss anytime I crave a taste of the holidays.
Recipe Overview
- Prep Time: 20 minutes
- Cook Time: 10 minutes
- Total Time: 30 minutes
- Yields: 25 truffles
- Dietary Type: Gluten-Free
Ingredients
- 2 cups finely shredded unsweetened flaked coconut
- ¼ cup confectioners’ sugar
- 1 tablespoon unsalted butter
- 3 tablespoons shortening
- 4 tablespoons half-and-half, as needed (or more)
- 12 ounces Ghirardelli semi-sweet chocolate chips
Equipment Needed
- Food processor
- Spring-loaded candy scooper or tablespoon
- 2 large baking sheets
- Wax paper
- Double boiler
- Plastic spatula
- Wire dipping scoop (optional but recommended)
Instructions
- First, gather your equipment. Having everything ready to go will make the truffle-making process much smoother. You’ll need a food processor, a spring-loaded candy scooper or a tablespoon, two large baking sheets lined with wax paper, a double boiler, a plastic spatula, and, ideally, a wire dipping scoop. While you can dip the truffles without the scoop, it truly minimizes chocolate waste and makes the coating process far easier.
- Prepare the coconut filling. In the food processor, combine the coconut flakes, confectioners’ sugar, butter, shortening, and 3 tablespoons of half-and-half. Process until the mixture starts to come together.
- Check the consistency. Add more half-and-half, one tablespoon at a time, as needed to thoroughly moisten the coconut mixture. The goal is for it to stick together without being watery. Typically, you’ll only need about 4 tablespoons total, but adjust as needed depending on the moisture content of your coconut.
- Shape the truffles. Pour the coconut mixture into a bowl. Using the spring-loaded candy scooper or a tablespoon, portion out level tablespoon rounds of the coconut mixture onto one of the wax paper-lined baking sheets.
- Roll and firm. Shape each round by gently rolling it between your palms until it forms a smooth ball.
- Chill. Place the baking sheet with the formed coconut balls in the freezer for at least five minutes to firm up. This makes them much easier to dip in the chocolate without falling apart.
- Melt the chocolate. Fill the bottom pot of your double boiler with water and bring it to a boil. Reduce the heat to low. Pour half of the chocolate chips (about 6 ounces, or one cup) into the top of the double boiler.
- Stir constantly. Using your plastic spatula, constantly stir the chocolate chips, scraping the bottom of the bowl, until they are completely melted and smooth. Be extremely careful not to let any water get into the chocolate, as this can cause it to seize.
- Remove from heat. Once the chocolate is melted, remove the top of the double boiler from the heat.
- Begin dipping. Place one coconut round in the wire dipper, leaving the rest of the rounds in the freezer to stay firm. Dip the ball completely into the melted chocolate, ensuring it’s fully coated.
- Remove excess chocolate. Gently tap the wire dipper against the side of the bowl to remove any excess chocolate. Use a spoon to wipe off any drips from the dipper.
- Place on baking sheet. Carefully place the chocolate-covered truffle onto the second wax paper-lined baking sheet.
- Repeat. Repeat the dipping process until you run out of melted chocolate or coconut rounds.
- Melt remaining chocolate. Melt the remaining chocolate chips (6 ounces, or one cup) in the double boiler, following the same procedure as before.
- Continue dipping. Coat the rest of the coconut rounds in the melted chocolate.
- Add final touches. Using a spoon, drizzle any remaining melted chocolate over any spots of coconut that are not fully covered. You can also drizzle the chocolate decoratively over each truffle until all the melted chocolate is used.
- Chill again. Refrigerate the truffles for at least 30 minutes to allow the chocolate to set completely.
- Serve and store. Place candy liners in a cookie tin with a lid. Place one truffle in each candy liner. Store the truffles in the refrigerator. For the best flavor and creamiest texture, allow them to warm up to room temperature for about 15-20 minutes before serving.
Expert Tips & Tricks
- Don’t overheat the chocolate: Overheated chocolate can become grainy and lose its shine. Keep the heat low and stir constantly.
- Use high-quality chocolate: Since the chocolate is a key component, using a good quality semi-sweet chocolate, like Ghirardelli, will make a noticeable difference in the final flavor.
- Control the moisture: The amount of half-and-half needed will depend on the dryness of your coconut. Add it gradually, one tablespoon at a time, until you achieve the desired consistency.
- Get creative with toppings: While the recipe calls for a simple chocolate drizzle, feel free to experiment with other toppings like chopped nuts, sprinkles, or a dusting of cocoa powder.
- Make ahead: These truffles can be made a day or two in advance. Store them in an airtight container in the refrigerator until ready to serve.
Serving & Storage Suggestions
These truffles are best served chilled, but slightly warmed to room temperature to allow the coconut filling to soften. Arrange them attractively on a platter or in individual candy liners. They make a perfect after-dinner treat, holiday gift, or addition to a dessert buffet.
Store leftover truffles in an airtight container in the refrigerator for up to a week. You can also freeze them for longer storage (up to a month), but be aware that the texture of the chocolate may change slightly after thawing. To thaw, transfer them from the freezer to the refrigerator overnight. They are not recommended for room temperature storage due to the dairy component.
Nutritional Information
| Nutrient | Amount per Serving | % Daily Value |
|---|---|---|
| Calories | 300.8 kcal | N/A |
| Calories from Fat | 189 kcal | 63% |
| Total Fat | 21.1 g | 32% |
| Saturated Fat | 13.3 g | 66% |
| Cholesterol | 2.1 mg | 0% |
| Sodium | 8.9 mg | 0% |
| Total Carbohydrate | 33.6 g | 11% |
| Dietary Fiber | 3.9 g | 15% |
| Sugars | 27.8 g | N/A |
| Protein | 2.6 g | 5% |
Variations & Substitutions
- Dairy-Free: Substitute the butter with coconut oil and the half-and-half with full-fat coconut milk for a dairy-free version.
- Dark Chocolate: Use dark chocolate chips instead of semi-sweet for a richer, more intense flavor.
- White Chocolate: Try using white chocolate chips for a sweeter, more delicate truffle.
- Extracts: Add a drop or two of vanilla extract, almond extract, or peppermint extract to the coconut filling for a different flavor profile.
- Nuts: Add finely chopped almonds, pecans, or walnuts to the coconut filling for added texture and flavor.
FAQs (Frequently Asked Questions)
Q: Why is it important to chill the coconut balls before dipping?
A: Chilling helps the coconut balls firm up, preventing them from falling apart when dipped in the melted chocolate. It also helps the chocolate set more quickly.
Q: Can I use sweetened coconut flakes instead of unsweetened?
A: It is not recommended to use sweetened coconut flakes as it will make the truffles overly sweet. The recipe already includes confectioner’s sugar.
Q: What if my chocolate seizes while melting?
A: If a small amount of water gets into the chocolate, it can seize up and become grainy. Try adding a tablespoon of vegetable oil and stirring vigorously to see if it smooths out. If not, unfortunately, you’ll need to start with fresh chocolate.
Q: Can I use a microwave to melt the chocolate?
A: Yes, but melt it in 30-second intervals, stirring in between each interval to prevent burning. The double boiler method provides more gentle and even heating.
Q: How do I prevent the truffles from sticking to the wax paper?
A: Make sure the wax paper is clean and dry. If the chocolate is still very warm when the truffles are placed on the paper, it may help to let the truffles cool slightly before placing them on the paper, or use parchment paper instead of wax paper.
Final Thoughts
These chocolate coconut truffles are a delightful treat that’s perfect for any occasion. With their creamy coconut filling and rich chocolate coating, they’re sure to be a crowd-pleaser. Don’t be intimidated by the multiple steps; each one is simple and straightforward. I encourage you to give this recipe a try and experience the joy of homemade truffles. Share them with friends and family, and let me know what you think! Perhaps pair them with a glass of dessert wine or a cup of hot coffee for the ultimate indulgence. Happy truffle-making!