
Kelly’s Rich and Creamy Key Lime Pie: A Slice of Sunshine
There’s something utterly magical about the first bite of a perfect Key lime pie. I remember the first time I tasted one. I was on vacation in the Florida Keys, the sun was setting in a blaze of orange and pink, and the tangy, creamy filling against the buttery graham cracker crust was pure bliss. It was a flavor explosion that instantly transported me to paradise, and I’ve been chasing that perfect pie ever since. This recipe, inspired by a close friend named Kelly, gets me closer than ever.
Recipe Overview
- Prep Time: 15 minutes
- Cook Time: 44 minutes
- Total Time: 6 hours 59 minutes (includes cooling and refrigeration)
- Servings: 8-10
- Yield: 1 pie
- Dietary Type: Not Gluten-Free (can be adapted – see variations)
Ingredients
- 6 egg yolks
- 2 (14 ounce) cans sweetened condensed milk
- 1 cup key lime juice, fresh or bottled
- 1 (9 ounce) Keebler graham cracker crust, 10-inch size
- Sweetened whipped cream or Cool Whip, for topping
- Kiwi slices (optional, for garnish)
- Fresh strawberries (optional, for garnish)
Equipment Needed
- Medium mixing bowl
- Whisk
- Measuring cups and spoons
- Oven
- Cooling rack
- Refrigerator
Instructions
-
Preheat your oven to 325ºF (160ºC). Make sure your oven rack is in the center position for even baking.
-
In a medium bowl, gently whisk the egg yolks. Be careful not to over-whisk at this stage, as you don’t want to incorporate too much air. We’re aiming for a smooth, emulsified base.
-
Slowly whisk in the sweetened condensed milk into the egg yolks. Incorporate it gradually to ensure a homogeneous mixture. You want a smooth and creamy base without any lumps.
-
Slowly whisk in the key lime juice. The mixture will thicken as the acid in the lime juice reacts with the egg yolks and sweetened condensed milk. Continue to whisk gently until everything is well combined.
-
Important Tip: Do not overmix at any point in the process. Overmixing can introduce air bubbles that will negatively affect the pie’s texture. Just stir gently until all ingredients are combined.
-
Pour the key lime mixture into the graham cracker crust. Spread evenly so that the filling distributes properly during baking.
-
Pop the pie into the preheated oven and bake for 44 minutes. Baking time can vary depending on the oven, so keep a close eye on the pie.
-
Checking for Doneness: The edge of the pie will just start to slightly puff up and will also be very slightly a pale golden brown. It’s a very subtle browning, so don’t wait for a deep golden color. The pie should no longer jiggle when gently shaken. The center might still seem a little soft, but it will set up as it cools.
-
Once baked, remove the pie from the oven and place it on a cooling rack. Allow it to cool completely to room temperature. This step is crucial for the pie to set properly.
-
After cooling, refrigerate the pie for at least 4-6 hours, or preferably overnight. The chilling time allows the pie to fully set and the flavors to meld together beautifully.
-
The pie gets even better the next day! The flavors deepen and the texture becomes even more luscious.
-
Before serving, top with sweetened whipped cream or Cool Whip.
-
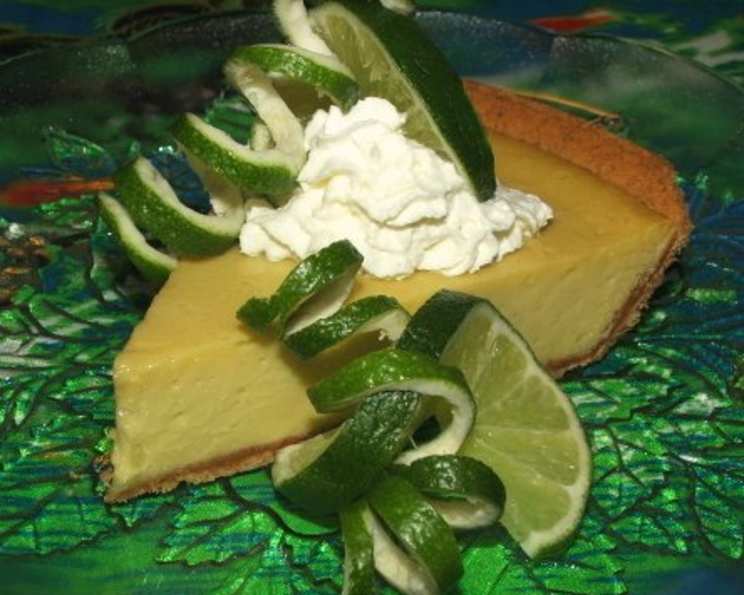
Garnish with slices of key limes, kiwi, and/or fanned strawberries if desired for an added touch of elegance and visual appeal.
-
Slice and serve cold.
Expert Tips & Tricks
- Zest is Best: For a more intense Key lime flavor, add the zest of 1-2 Key limes to the filling. Be careful not to include the white pith, which can be bitter.
- Blind Baking: While this recipe utilizes a pre-made graham cracker crust, if you are making your own, consider blind baking it first for a crisper crust.
- Room Temperature Ingredients: Bring the eggs to room temperature before whisking. This helps them incorporate more easily and creates a smoother filling.
- Prevent Cracking: To prevent cracking during baking, you can place a shallow pan of water on the bottom rack of the oven. The steam will help keep the pie moist.
- Homemade Graham Cracker Crust Upgrade: Consider adding a pinch of salt and a teaspoon of sugar to your homemade crust recipe to enhance the flavor. Also, using melted butter instead of shortening will give the crust a richer taste.
- Dealing with a Soggy Crust: If you live in a humid environment, the graham cracker crust can sometimes get soggy. To prevent this, brush the crust with a thin layer of melted chocolate before adding the filling. The chocolate acts as a barrier against moisture.
Serving & Storage Suggestions
Serve Kelly’s Rich and Creamy Key Lime Pie chilled. Garnish each slice with a dollop of whipped cream and a lime wedge for a refreshing presentation.
Storage: Leftover pie should be stored in the refrigerator, covered tightly with plastic wrap or in an airtight container. It will keep for up to 3-4 days.
The pie can also be frozen for longer storage. Wrap it tightly in plastic wrap and then in foil. It will keep in the freezer for up to 2-3 months. Thaw overnight in the refrigerator before serving. Freezing may slightly alter the texture of the filling, but it will still taste delicious.
Nutritional Information
Please note that this is an estimate and can vary based on specific ingredients used.
| Nutrient | Amount per Serving | % Daily Value |
|---|---|---|
| Calories | 450 kcal | 23% |
| Total Fat | 20g | 31% |
| Saturated Fat | 12g | 60% |
| Cholesterol | 130mg | 43% |
| Sodium | 250mg | 11% |
| Total Carbohydrate | 60g | 22% |
| Dietary Fiber | 1g | 4% |
| Sugars | 50g | N/A |
| Protein | 8g | 16% |
Variations & Substitutions
- Gluten-Free Key Lime Pie: Use a gluten-free graham cracker crust or make an almond flour crust.
- Vegan Key Lime Pie: This requires significant modifications, substituting the eggs with a vegan egg replacer and the sweetened condensed milk with a vegan alternative (coconut condensed milk can work).
- Lime Variety: While Key limes are traditional, you can use regular limes if Key limes are unavailable. The flavor will be slightly different, but still delicious.
- Chocolate Crust: For a decadent twist, use a chocolate graham cracker crust or add cocoa powder to your homemade crust.
- Coconut Key Lime Pie: Incorporate coconut flakes into the graham cracker crust and add a splash of coconut extract to the filling for a tropical flavor.
- Meringue Topping: If you prefer a meringue topping, use the reserved egg whites to make a meringue and bake until golden brown after the pie has cooled completely.
FAQs (Frequently Asked Questions)
Q: Can I use bottled Key lime juice?
A: Yes, bottled Key lime juice works well, especially if fresh Key limes are unavailable. However, fresh juice will always provide the most authentic flavor.
Q: Why is my pie cracking on top?
A: Overbaking is the most common cause of cracking. Be sure to follow the baking time closely and check for doneness as described in the instructions. Using a water bath can also help prevent cracking.
Q: Can I make this pie ahead of time?
A: Absolutely! In fact, it’s best to make this pie at least 6 hours in advance to allow it to chill and set properly.
Q: My graham cracker crust is getting soggy. How can I prevent this?
A: Brushing the crust with melted chocolate before adding the filling creates a moisture barrier. Also, be sure to store the pie properly in the refrigerator.
Q: Can I freeze Key Lime Pie?
A: Yes, you can freeze the pie for up to 2-3 months. Wrap it tightly in plastic wrap and then in foil. Thaw overnight in the refrigerator before serving.
Final Thoughts
Kelly’s Rich and Creamy Key Lime Pie is a guaranteed crowd-pleaser. The tangy lime flavor, combined with the rich, creamy filling and buttery graham cracker crust, creates a symphony of flavors that will transport you to a sunny paradise with every bite. Don’t be afraid to experiment with the variations and make it your own. I encourage you to try this recipe and share your feedback! Pair it with a refreshing glass of iced tea or a light, crisp white wine for the ultimate dessert experience. Enjoy!