
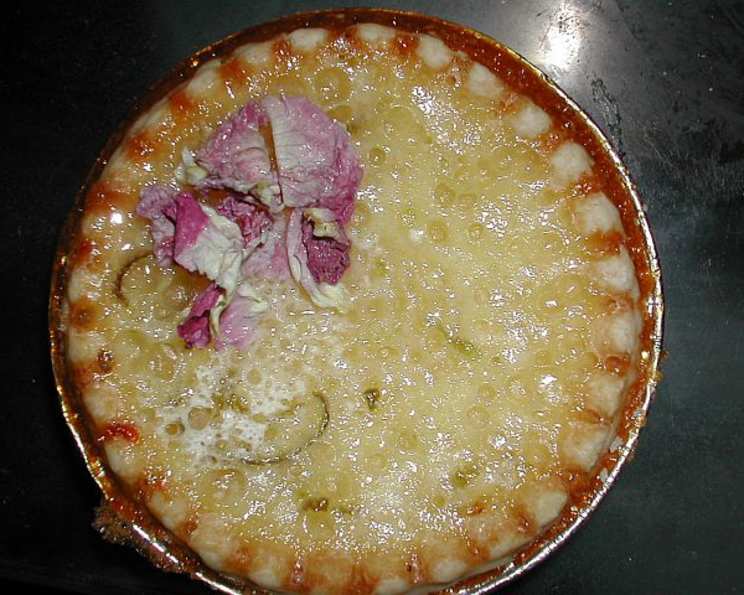
Key Lime Tarts: A Taste of Sunshine
The scent of key limes always transports me back to my grandmother’s sun-drenched Florida kitchen. She’d be humming a tune as she zested those tiny, fragrant limes, their bright, citrusy aroma filling the air. Her Key Lime Pie was legendary, but these little tarts? They were my personal favorite, a perfectly portioned burst of sunshine in every bite. The tangy filling, nestled in a crisp pastry shell, was pure joy.
Recipe Overview
- Prep Time: 15 minutes
- Cook Time: 25-36 minutes
- Total Time: 40-51 minutes
- Servings: 8
- Yield: 8 tarts
- Dietary Type: Not Gluten-Free
Ingredients
- 8 frozen 3-inch pie pastry tart shells (mini pie shells, approx. 3 1/2 inch size)
- 3 large eggs
- 1 cup granulated sugar
- 3 tablespoons all-purpose flour
- 3 tablespoons key lime juice (fresh or bottled)
- 1 – 1 1⁄2 tablespoons lemon zest or 1 – 1 1/2 tablespoons lime zest, finely grated
- 1 dash salt
- Whipped cream or whipped topping, for serving
- Lime slices (or other sliced fruits for garnish) or strawberries (or other sliced fruits for garnish), for serving
Equipment Needed
- Baking sheet
- Whisk
- Measuring cups and spoons
- Zester
- Spoon or ladle
Instructions
- Preheat your oven to 325°F (160°C). Place the frozen tart shells on a baking sheet.
- Bake the tart shells at 325°F for about 6 minutes. This par-baking helps prevent a soggy crust. Keep a close eye on them – you want them lightly golden, not browned.
- While the crusts are baking, prepare the filling. In a medium bowl, whisk together the eggs, granulated sugar, all-purpose flour, key lime juice, zest, and salt. Ensure everything is well combined and smooth. This mixture is the heart and soul of the tarts.
- Once the tart shells are par-baked, carefully spoon or ladle the key lime filling into each shell. Fill them almost to the top, leaving a little space for expansion during baking.
- Bake the tarts until the custard is set. This usually takes about 25 to 30 minutes. The filling should be firm around the edges but with a slight jiggle in the center. A toothpick inserted near the edge should come out clean. Note that oven times may vary, so start checking at 25 minutes.
- Remove the tarts from the oven and let them cool completely on the baking sheet. As they cool, the filling will firm up even more.
- Serve the key lime tarts completely cooled, or slightly warm with ice cream or whipped cream.
- Garnish with a few ripe blackberries or strawberries, or a lime slice for a pretty presentation.
Expert Tips & Tricks
- Zest with Care: When zesting, be sure to only zest the colored part of the lime or lemon peel. The white pith underneath is bitter and can detract from the flavor of the tarts.
- Fresh vs. Bottled Key Lime Juice: While fresh key lime juice is ideal, bottled key lime juice can be a good substitute if you can’t find fresh key limes. Look for a high-quality brand without added sugar.
- Prevent Soggy Crust: Par-baking the crust is essential for preventing a soggy bottom. You can also brush the inside of the par-baked crust with a little melted white chocolate for an extra layer of protection.
- Don’t Overbake: Overbaking will result in a dry, cracked filling. The tarts are done when the edges are set, but the center still has a slight wiggle.
- Room Temperature Ingredients: While this recipe doesn’t strictly require room temperature ingredients, allowing the eggs to come to room temperature can help them incorporate more easily with the sugar.
Serving & Storage Suggestions
These Key Lime Tarts are best served chilled or at room temperature. A dollop of freshly whipped cream or a swirl of whipped topping is a classic accompaniment. For a more elegant presentation, garnish with fresh berries, lime slices, or a sprinkle of lime zest.
To store leftover tarts, cover them loosely and refrigerate for up to 3 days. They can also be frozen for longer storage. To freeze, place the cooled tarts on a baking sheet and freeze until solid. Then, transfer them to an airtight container or freezer bag. Frozen tarts can be stored for up to 2 months. Thaw them in the refrigerator before serving.
Nutritional Information
| Nutrient | Amount per Serving | % Daily Value |
|---|---|---|
| Calories | 232 kcal | 12% |
| Total Fat | 8g | 12% |
| Saturated Fat | 1.5g | 7% |
| Cholesterol | 79mg | 26% |
| Sodium | 167mg | 6% |
| Total Carbohydrate | 37g | 12% |
| Dietary Fiber | 0.4g | 1% |
| Sugars | 26g | N/A |
| Protein | 3.5g | 7% |
Note: Nutritional information is an estimate and may vary based on specific ingredients and portion sizes.
Variations & Substitutions
- Gluten-Free: Substitute the all-purpose flour in the filling with a gluten-free all-purpose blend. You’ll also need to use gluten-free tart shells.
- Dairy-Free: Use a dairy-free whipped topping or coconut cream for serving.
- Lemon Lime: Replace half of the key lime juice with lemon juice for a slightly different flavor profile.
- Coconut Crust: Use a shortbread cookie recipe and add shredded coconut to the mixture. Press the mixture into the tart shells and bake until golden brown before adding the filling.
FAQs (Frequently Asked Questions)
Q: Can I use regular limes instead of key limes?
A: Yes, you can, but the flavor will be slightly different. Key limes are more tart and aromatic than regular limes. If using regular limes, you may want to add a bit more zest to compensate for the difference in flavor.
Q: Can I make these tarts ahead of time?
A: Absolutely! These tarts are perfect for making ahead of time. You can bake them a day or two in advance and store them in the refrigerator until ready to serve.
Q: How do I know when the tarts are done?
A: The filling should be set around the edges but still have a slight jiggle in the center. A toothpick inserted near the edge should come out clean.
Q: Can I freeze these tarts?
A: Yes, these tarts freeze well. Make sure they are completely cooled before freezing. Wrap them individually in plastic wrap and then place them in a freezer bag or airtight container.
Q: My crusts are browning too quickly. What should I do?
A: If your crusts are browning too quickly, you can cover them loosely with foil during the last few minutes of baking.
Final Thoughts
I truly hope you enjoy making and savoring these delightful Key Lime Tarts as much as I do. Whether you’re serving them at a summer barbecue, bringing them to a holiday gathering, or simply treating yourself to a little slice of sunshine, they’re sure to be a hit. Don’t hesitate to experiment with different garnishes or variations to make them your own. And please, share your creations and feedback – I’d love to hear about your experience! Maybe pair it with a refreshing iced tea or a crisp glass of white wine for the ultimate indulgence.