
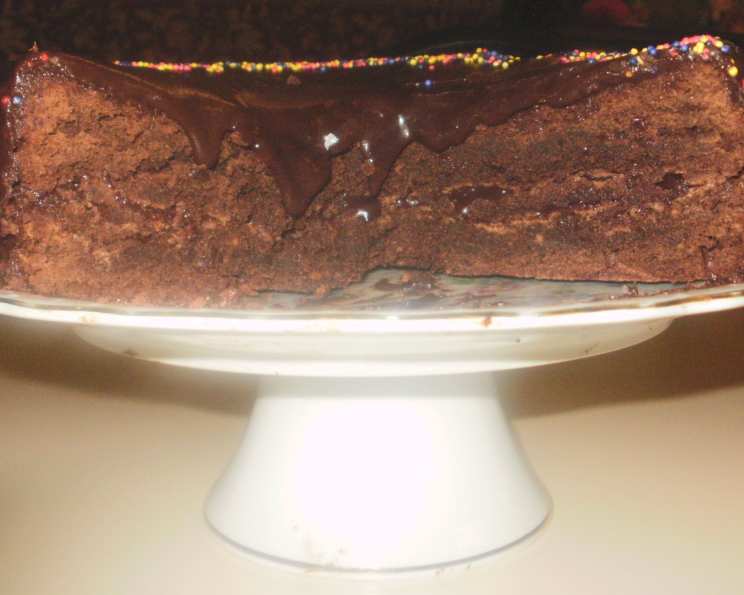
Killer Fudge Cake: A Chocolate Lover’s Dream
The scent alone is enough to transport me back to my grandmother’s kitchen. Every holiday, every birthday, every anything-worthy-of-celebration, there it was: a towering, dark beauty slathered in a glossy, intensely chocolate frosting. My grandmother, a woman who believed more was always better when it came to chocolate, called it her “Killer Fudge Cake,” and one bite was enough to understand why. It’s dangerously delicious, utterly decadent, and guaranteed to disappear faster than you can say “second slice.”
Recipe Overview
- Prep Time: 30 minutes
- Cook Time: 35 minutes
- Total Time: 1 hour 5 minutes
- Servings: 12-16
- Yield: One 9-inch double layer cake
- Dietary Type: Not specified
Ingredients
For the Cake:
- 6 ounces unsalted butter
- 6 ounces unsweetened chocolate
- 6 large eggs
- 3 cups sugar
- 1/2 teaspoon salt
- 1 tablespoon vanilla extract
- 1 1/2 cups all-purpose flour
For the Icing:
- 1 1/2 cups sugar
- 2 tablespoons instant coffee powder
- 1 cup heavy cream
- 5 ounces unsweetened chocolate
- 4 ounces unsalted butter
- 1 tablespoon vanilla extract
- Pecans or walnuts, chopped for decoration
Equipment Needed
- Double boiler or heatproof bowl and saucepan
- Mixing bowl
- Whisk
- Two 9-inch round cake pans
- Parchment paper
- Cake rack
- Small saucepan
- Piping bag (optional)
- Rosette tip (optional)
Instructions
-
Prepare the chocolate mixture: In the top of a double boiler, over hot water (or in a heatproof bowl set over a simmering saucepan), melt the 6 ounces of butter with the 6 ounces of unsweetened chocolate. Stir frequently until completely smooth. Be careful not to let the bottom of the bowl touch the water, as this can scorch the chocolate.
-
Cool the chocolate mixture: Once melted, remove the mixture from the heat and transfer it to a mixing bowl. Allow it to cool to room temperature. This is crucial; adding the eggs while the chocolate is too hot will cook them, resulting in a grainy texture.
-
Prepare the cake pans: While the chocolate and butter are cooling, lightly butter the bottoms of two 9-inch round cake pans and line the bottoms with parchment paper circles. This ensures the cakes release easily and cleanly.
-
Preheat the oven: Preheat your oven to 350°F (175°C). Ensure your oven is properly calibrated for even baking.
-
Combine wet ingredients: Once the chocolate mixture is cool, add the eggs, sugar, salt, and vanilla extract to the mixing bowl. Whisk together until well combined and the mixture is smooth and glossy.
-
Incorporate the flour: Stir in the flour until just combined. Be careful not to overmix, as this can develop the gluten and result in a tough cake. A few streaks of flour are okay; they will disappear during baking.
-
Divide and bake: Pour the batter evenly into the prepared baking pans. Bake for 35 minutes, or until a toothpick inserted into the center comes out clean. If the toothpick has wet batter, bake for a few more minutes and check again.
-
Cool the cakes: Remove the cakes from the oven and cool them in the pans for 30 minutes. This allows them to set and prevents them from breaking when you turn them out.
-
Release and cool completely: After 30 minutes, loosen the edges of each cake from the pan with a knife. Invert the cakes onto a cake rack to cool completely. Make sure they are entirely cool before frosting.
-
Prepare the icing: While the cakes are baking (or cooling), prepare the icing. In a small saucepan, combine the sugar, instant coffee powder, and heavy cream.
-
Boil the icing: Bring the mixture to a boil over medium heat, and boil gently for 6 minutes, stirring constantly to prevent scorching. The mixture will thicken slightly.
-
Melt the chocolate: Remove the saucepan from the heat and add the unsweetened chocolate. Allow it to sit for a minute to soften, then stir until the chocolate is completely melted and the icing is smooth.
-
Finish the icing: Add the butter and vanilla to the icing. Stir until the butter is melted and the icing is glossy. Cool the icing to room temperature. It will thicken as it cools, reaching a perfect spreading consistency.
-
Assemble the cake: Set one of the cakes, top side up, on a plate or cake stand. Cover the top with a generous layer of icing.
-
Add the second layer: Set the second cake layer upside down (bottom facing up) on top of the iced layer. This creates a flatter, more even surface for frosting the top.
-
Frost the cake: Ice the top and sides of the cake with the remaining icing.
-
Decorate: Pat the chopped nuts onto the sides of the cake. You can gently press them into the icing to help them adhere. Center some nuts in the middle of the top layer for an extra touch.
-
Chill and pipe (optional): Refrigerate any remaining icing until firm. Transfer the icing to a piping bag fitted with a rosette tip and pipe rosettes around the edges of the cake for a fancy presentation. This step is optional but adds a beautiful finishing touch.
-
Chill before serving: Store the cake in the refrigerator, but bring it back to room temperature before serving for the best flavor and texture.
Expert Tips & Tricks
- Bloom the coffee: For an even deeper coffee flavor in the icing, bloom the instant coffee by adding it to a tablespoon of hot water before adding it to the cream and sugar.
- Don’t overheat the chocolate: When melting the chocolate for both the cake and the icing, be patient and use low heat. Overheated chocolate can seize up and become grainy.
- Room temperature is key: Ensure all ingredients are at room temperature for best results. This helps them emulsify properly, creating a smooth and even batter and icing.
- Prevent sticking: Even with parchment paper, consider greasing and flouring the cake pans for extra insurance against sticking.
- Level the layers: If your cake layers are domed, use a serrated knife to level them before frosting for a more professional look.
Serving & Storage Suggestions
Serve this Killer Fudge Cake slightly chilled or at room temperature. A scoop of vanilla ice cream or a dollop of whipped cream makes a perfect accompaniment.
Store leftover cake in an airtight container in the refrigerator for up to 3-4 days. You can also freeze the cake for longer storage (up to 2-3 months). Wrap it tightly in plastic wrap and then foil to prevent freezer burn. Thaw overnight in the refrigerator before serving.
Nutritional Information
| Nutrient | Amount per Serving | % Daily Value |
|---|---|---|
| Calories | 1138.8 kcal | N/A |
| Calories from Fat | 576 g | 51% |
| Total Fat | 64.1 g | 98% |
| Saturated Fat | 38.9 g | 194% |
| Cholesterol | 275.6 mg | 91% |
| Sodium | 223.4 mg | 9% |
| Total Carbohydrate | 143.8 g | 47% |
| Dietary Fiber | 7.1 g | 28% |
| Sugars | 113.6 g | 454% |
| Protein | 13.2 g | 26% |
Note: Nutritional information is an estimate and may vary based on specific ingredients and serving sizes.
Variations & Substitutions
- Chocolate Variations: Experiment with different types of chocolate for the cake and icing. Dark chocolate, semi-sweet chocolate, or even milk chocolate can be used to customize the flavor.
- Nut-Free Option: Omit the nuts entirely for a nut-free version. You can decorate the cake with chocolate shavings, sprinkles, or fresh berries instead.
- Coffee Intensity: Adjust the amount of instant coffee in the icing to your preference. For a stronger coffee flavor, use espresso powder.
- Boozy Boost: Add a tablespoon or two of your favorite liqueur (such as rum, coffee liqueur, or Irish cream) to the icing for an extra layer of flavor.
- Mint Chocolate: Add a teaspoon of peppermint extract to the icing for a refreshing mint chocolate flavor.
FAQs (Frequently Asked Questions)
Q: Why is my cake dry?
A: Overbaking is the most common cause of a dry cake. Make sure to check for doneness with a toothpick and avoid overbaking. Using the correct amount of flour and measuring accurately is also important.
Q: Can I make this cake a day ahead?
A: Absolutely! In fact, the flavors often meld together even more beautifully when the cake sits overnight. Just make sure to store it properly in the refrigerator.
Q: My icing is too thin. What can I do?
A: If your icing is too thin, try refrigerating it for a bit longer to allow it to thicken. You can also add a tablespoon of powdered sugar at a time until it reaches your desired consistency.
Q: Can I use a stand mixer instead of whisking by hand?
A: Yes, a stand mixer with the whisk attachment can be used to combine the wet ingredients for the cake. Be careful not to overmix.
Q: How do I prevent the nuts from falling off the sides of the cake?
A: Make sure the icing is still slightly tacky when you apply the nuts. Gently press them into the icing to help them adhere.
Final Thoughts
Don’t be intimidated by the ingredient list – this Killer Fudge Cake is worth every minute spent in the kitchen. It’s a guaranteed crowd-pleaser, perfect for birthdays, holidays, or any occasion that calls for a serious dose of chocolate indulgence. So, gather your ingredients, preheat your oven, and prepare to experience chocolate bliss! I’d love to hear about your baking adventures and any variations you try, so please share your feedback! Pair a slice with a strong cup of coffee or a glass of cold milk for the ultimate treat.