
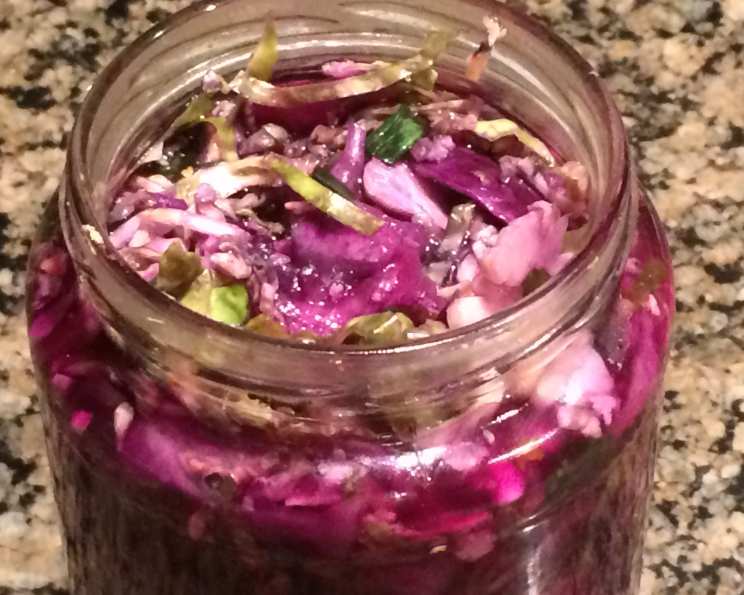
Kimchi With Red Cabbage and Brussels Sprouts: A Colorful Culinary Adventure
My love affair with kimchi began, strangely enough, not in Korea, but in my grandmother’s sun-drenched garden. She, a woman who rarely ventured beyond simple, classic American fare, had become enamored with a Korean family down the street and their vibrant, spicy ferments. I remember the day she proudly presented me with a jar of her homemade kimchi, the ruby red vegetables glistening under the afternoon light. It was a revelation – a fiery, tangy, and utterly addictive taste that sparked a lifelong obsession with the art of fermentation. This particular recipe, using the often-overlooked Brussels sprout, brings a new level of depth to the classic kimchi flavor.
Recipe Overview
- Prep Time: 30 minutes
- Cook Time: 0 minutes (plus overnight fermentation)
- Total Time: 1 hour 30 minutes (plus overnight fermentation)
- Servings: About 48 servings
- Yield: About 6 cups
- Dietary Type: Vegan (depending on fish sauce)
Ingredients
- 1⁄2 red cabbage, shredded
- 8 Brussels sprouts, sliced thinly
- 2 ounces carrots, peeled and sliced thinly
- 2 ounces gingerroot, peeled and grated
- 2 garlic cloves, grated
- 1 ounce green onion, sliced
- 5 tablespoons kosher salt
- 1 teaspoon crushed red pepper flakes (or Korean chili flakes)
- 3 anchovy fillets, finely chopped (Optional: substitute with kelp granules or vegan fish sauce for a vegan version)
- 1 ounce fish sauce (Optional: substitute with vegan fish sauce for a vegan version)
- 2 ounces rice vinegar
- 1 teaspoon sugar
Equipment Needed
- Large bowl
- Sieve
- Glass jars
Instructions
- If you have one, use a mandoline to thinly slice the Brussels sprouts and carrots. This ensures uniform size and quicker fermentation. Always use a cut-proof glove for safety when using a mandoline. If you don’t have a mandoline, a sharp knife and some patience will do.
- In a large bowl, dissolve the kosher salt in 5 cups of warm water. Stir until completely dissolved. This creates the brine that will help to draw out moisture from the vegetables and begin the fermentation process.
- Add the shredded red cabbage, sliced Brussels sprouts, thinly sliced carrots, and sliced green onion to the bowl of brine. Ensure all vegetables are submerged. You can use a plate or bowl to weigh them down if needed. Let the vegetables soak for 1 hour. This step is crucial for proper fermentation.
- While the vegetables are soaking, prepare the chili paste. In a separate large bowl, stir together 1/4 cup water, rice vinegar, fish sauce, and sugar. Whisk until the sugar is dissolved. The sugar helps to balance the flavors and provides food for the beneficial bacteria.
- Add the crushed red pepper flakes, grated ginger, grated garlic, and finely chopped anchovies (if using) to the chili paste mixture. Blend thoroughly until a smooth paste forms. This paste is the heart and soul of the kimchi, providing the characteristic heat and umami flavor.
- After the vegetables have soaked for an hour, drain them using a sieve set over a bowl. Reserve the brined juices. Don’t discard the brine; it contains beneficial microorganisms and will be used later.
- Add the drained vegetables to the bowl with the prepared chili paste. Mix very well to ensure that all the vegetables are thoroughly coated with the paste. Use your hands to gently massage the paste into the vegetables.
- Pack the mixture tightly into clean glass jars. An old pickle jar or mason jar works perfectly. Leave about an inch of headspace at the top of the jar.
- Pour some of the reserved brine into the bowl that contained the chili paste residue. Mix well to capture any leftover seasonings. This ensures that no precious flavor is wasted.
- Pour the chili-infused brine into the jar, making sure the vegetables are submerged, but still leaving the one inch of headspace at the top.
- Cover the jar loosely. You can use the jar lid, but don’t screw it on tightly. This is important because the fermentation process produces gases, and a tight lid could cause the jar to explode. Let the jar stand at room temperature overnight (or up to 24 hours, depending on the temperature of your kitchen).
- After the initial fermentation period, refrigerate the kimchi. The fermentation process will continue to slow down in the refrigerator. Enjoy within 1 week.
Expert Tips & Tricks
- Salt is key: Don’t skimp on the salt in the brine. It’s essential for drawing out moisture and preventing the growth of harmful bacteria.
- Spice it up (or down): Adjust the amount of crushed red pepper flakes to your liking. If you prefer a milder kimchi, start with half a teaspoon and taste as you go. For a fiery kick, use Korean chili flakes (gochugaru).
- Massage the paste: Gently massaging the chili paste into the vegetables helps to break down the cell walls and release their natural flavors.
- Brine is your friend: Don’t throw away the reserved brine! It’s packed with flavor and beneficial bacteria. Use it to add depth to soups, stews, or even marinades.
- Burp the jars: If you notice excessive bubbling during the fermentation process, burp the jars by briefly opening them to release the built-up gases.
- Vegan Version: If you are making a vegan version, you can use dried kelp granules in place of the anchovies, and use vegan fish sauce to replace the fish sauce.
Serving & Storage Suggestions
Serve your homemade kimchi as a side dish with rice, grilled meats, or tofu. It’s also a fantastic addition to stir-fries, soups, and even sandwiches. For a Korean-inspired meal, try pairing it with bibimbap or bulgogi.
Store leftover kimchi in the refrigerator in an airtight container. It will continue to ferment slowly, developing a more sour and complex flavor over time. The kimchi is best consumed within 1 week. If you notice any mold or unusual odors, discard it. Because this kimchi contains live cultures, it should not be stored at room temperature. This is not shelf-stable food.
Nutritional Information
| Nutrient | Amount per Serving | % Daily Value* |
|---|---|---|
| Calories | 6.8 kcal | N/A |
| Total Fat | 0.1 g | 0% |
| Saturated Fat | 0 g | 0% |
| Cholesterol | 0.2 mg | 0% |
| Sodium | 754.8 mg | 31% |
| Total Carbohydrate | 1.4 g | 0% |
| Dietary Fiber | 0.3 g | 1% |
| Sugars | 0.6 g | 2% |
| Protein | 0.3 g | 0% |
* Percent Daily Values are based on a 2,000 calorie diet.
Variations & Substitutions
- Radish Kimchi: Substitute some of the red cabbage with daikon radish for a milder, more refreshing flavor.
- Cucumber Kimchi: Add sliced cucumbers to the vegetable mix for a crisp and cooling element.
- Spicy Gochujang Kimchi: Incorporate a tablespoon or two of gochujang (Korean chili paste) into the chili paste for a deeper, more complex flavor.
- Seasonal Variations: Experiment with different seasonal vegetables, such as Napa cabbage in the winter or green beans in the summer.
FAQs (Frequently Asked Questions)
Q: Can I use regular cabbage instead of red cabbage?
A: Yes, you can substitute regular green cabbage for red cabbage, but the color of the finished kimchi will be less vibrant.
Q: How long does kimchi last in the refrigerator?
A: Kimchi is best consumed within one week for optimal flavor and texture, but it can last longer if stored properly.
Q: My kimchi is too sour. Is it still safe to eat?
A: A more sour flavor is a normal part of the fermentation process. As long as there are no signs of mold or unusual odors, the kimchi is generally safe to eat, even if it is sour.
Q: Can I freeze kimchi?
A: Freezing kimchi is not recommended as it can affect the texture and flavor. The vegetables may become mushy upon thawing.
Q: How can I make this recipe vegan?
A: To make this recipe vegan, substitute the anchovy fillets and fish sauce with kelp granules or vegan fish sauce.
Final Thoughts
Making kimchi is a rewarding and surprisingly simple culinary adventure. This recipe, with its unique combination of red cabbage and Brussels sprouts, offers a delightful twist on the classic Korean staple. Don’t be intimidated by the fermentation process; it’s all about creating the perfect environment for beneficial bacteria to thrive. So, gather your ingredients, embrace the spicy aroma, and get ready to embark on a kimchi-making journey that will tantalize your taste buds and impress your friends. I would love to know if you gave the recipe a try and what you thought of it!