
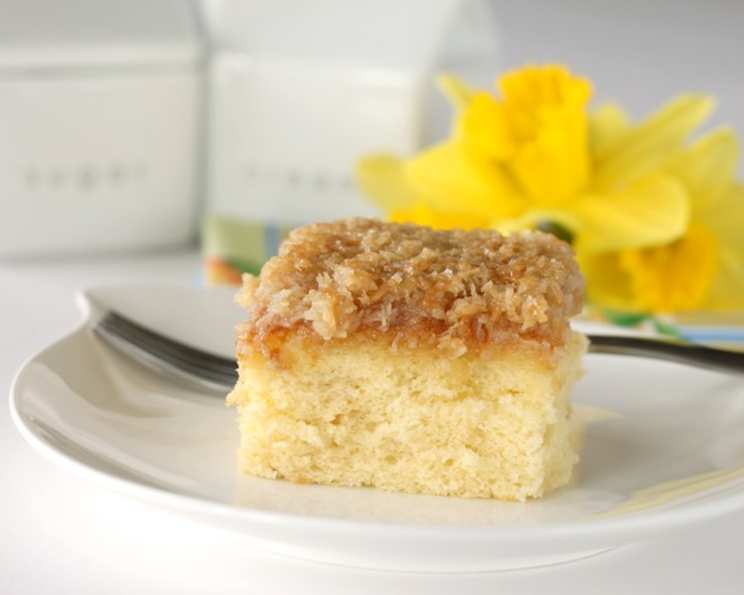
Lazy Daisy Cake: A Taste of Nostalgia
The scent of Lazy Daisy Cake always transports me back to my grandmother’s sun-drenched kitchen. I can almost see her now, humming a cheerful tune as she carefully spread the toasted coconut frosting, its sweet, caramel notes filling the air. It was her go-to dessert for family gatherings, a simple yet incredibly satisfying treat that always brought smiles to everyone’s faces. To me, it is more than just a cake – it is a symbol of love, warmth, and cherished memories.
Recipe Overview
- Prep Time: 20 minutes
- Cook Time: 38 minutes
- Total Time: 58 minutes
- Servings: 16-20
- Yield: 1 cake
- Dietary Type: Not Gluten-Free
Ingredients
For the Cake:
- 4 eggs
- 2 cups sugar
- 2 teaspoons vanilla extract
- 2 cups all-purpose flour
- 2 teaspoons baking powder
- ½ teaspoon salt
- 1 cup milk
- ¼ cup butter
For the Frosting:
- 1 ½ cups brown sugar, packed
- ¾ cup butter, melted
- ½ cup half-and-half cream
- 2 cups flaked coconut
Equipment Needed
- Large mixing bowl
- Saucepan
- 13-in. x 9-in. x 2-in. baking pan
- Whisk
- Mixer
- Measuring cups and spoons
- Toothpick
Instructions
-
Preheat your oven to 350°F (175°C). Grease a 13-in. x 9-in. x 2-in. baking pan thoroughly to prevent the cake from sticking.
-
In a large mixing bowl, combine the eggs, sugar, and vanilla extract. Use a mixer to beat the ingredients together until the mixture is thick and pale yellow. This should take about 4 minutes. The increased volume and lighter color will contribute to a tender cake crumb.
-
In a separate bowl, whisk together the all-purpose flour, baking powder, and salt. This ensures that the baking powder is evenly distributed throughout the flour, leading to a uniform rise.
-
Gradually add the flour mixture to the egg mixture, beating on low speed just until combined. Be careful not to overmix, as this can develop the gluten in the flour and result in a tough cake.
-
In a saucepan, combine the milk and butter. Heat over medium heat, stirring constantly, until the butter is melted and the mixture comes to a boil.
-
Carefully pour the hot milk mixture into the batter and beat until just combined. The hot liquid will help to further emulsify the batter, resulting in a moist and tender cake.
-
Pour the batter into the prepared baking pan, spreading it evenly.
-
Bake at 350°F (175°C) for 30-35 minutes, or until a toothpick inserted near the center comes out clean. Start checking for doneness at 30 minutes. If the top is browning too quickly, you can loosely tent the cake with foil for the last few minutes of baking.
-
While the cake is baking, prepare the frosting. In a saucepan, combine the brown sugar, melted butter, and half-and-half cream.
-
Cook the frosting over medium heat, stirring constantly, until the brown sugar is dissolved and the mixture is smooth. Remove from heat and stir in the flaked coconut.
-
Once the cake is done baking, remove it from the oven and immediately spread the frosting evenly over the warm cake.
-
Place the cake under the broiler, about 4 inches from the heat source. Broil until the coconut is lightly browned, about 3-4 minutes. Watch carefully, as the frosting can burn quickly under the broiler. The toasted coconut adds a wonderful nutty flavor and textural contrast.
-
Remove from the oven and let the cake cool completely before cutting and serving.
Expert Tips & Tricks
- For a richer flavor, use browned butter in the frosting. To brown butter, melt it in a light-colored saucepan over medium heat, stirring frequently. Continue cooking until the butter turns a nutty brown color and has a fragrant aroma. Be careful not to burn it.
- If you don’t have half-and-half, you can substitute with a mixture of equal parts milk and heavy cream.
- To prevent the coconut from burning under the broiler, you can spread it on the cake after it has been broiled for a minute or two.
- For a more intense vanilla flavor, use vanilla bean paste instead of vanilla extract.
Serving & Storage Suggestions
Lazy Daisy Cake is best served at room temperature. It’s delicious on its own, or you can pair it with a scoop of vanilla ice cream or a dollop of whipped cream.
Store leftover cake in an airtight container at room temperature for up to 3 days. For longer storage, you can refrigerate the cake for up to a week or freeze it for up to 2 months. To freeze, wrap the cake tightly in plastic wrap and then in aluminum foil. Thaw the cake in the refrigerator overnight before serving.
To reheat frozen cake, you can microwave individual slices for a few seconds until warmed through. You can also reheat the entire cake in a low oven (200°F/95°C) for about 15-20 minutes.
Nutritional Information
| Nutrient | Amount per Serving | % Daily Value |
|---|---|---|
| Calories | 416.7 kcal | N/A |
| Calories from Fat | 155 g | 37% |
| Total Fat | 17.3 g | 26% |
| Saturated Fat | 11.2 g | 56% |
| Cholesterol | 88.3 mg | 29% |
| Sodium | 259.9 mg | 10% |
| Total Carbohydrate | 62.7 g | 20% |
| Dietary Fiber | 0.8 g | 3% |
| Sugars | 49 g | 196% |
| Protein | 4.3 g | 8% |
Variations & Substitutions
- Gluten-Free: Substitute the all-purpose flour with a gluten-free all-purpose flour blend. Be sure to add a teaspoon of xanthan gum to help bind the ingredients.
- Dairy-Free: Use a dairy-free butter substitute and dairy-free milk in both the cake and the frosting. Coconut milk can also be used.
- Coconut Variation: Add shredded coconut to the cake batter for an extra coconut flavor.
- Nutty Variation: Add chopped pecans or walnuts to the frosting for a nutty twist.
- Citrus Variation: Add the zest of one lemon or orange to the cake batter for a bright, citrusy flavor.
FAQs (Frequently Asked Questions)
Q: Can I use a different type of sugar?
A: While granulated sugar is recommended for the cake itself, using dark brown sugar in the frosting will amplify the caramel flavor.
Q: Can I make this cake ahead of time?
A: Yes! The cake can be baked a day in advance and stored at room temperature. Frost just before serving.
Q: My frosting is too thin. What can I do?
A: Simmer the frosting for a few more minutes on low heat to allow it to thicken slightly. Be careful not to burn it.
Q: How do I prevent the coconut from burning under the broiler?
A: Watch the cake carefully and remove it from the broiler as soon as the coconut starts to brown. You can also lower the broiler rack or use a lower broil setting.
Q: Can I use unsweetened coconut instead of sweetened?
A: Yes, but you may want to add a tablespoon or two of extra sugar to the frosting to compensate for the lack of sweetness.
Final Thoughts
Lazy Daisy Cake is more than just a recipe; it’s an invitation to create lasting memories. Its simplicity and comforting flavors make it a perfect treat for any occasion. Don’t hesitate to experiment with variations and make it your own. I encourage you to try this recipe and share your creations with friends and family. Perhaps pair it with a cup of freshly brewed coffee or a scoop of vanilla ice cream. And if you have any questions or feedback, please don’t hesitate to reach out. Happy baking!