
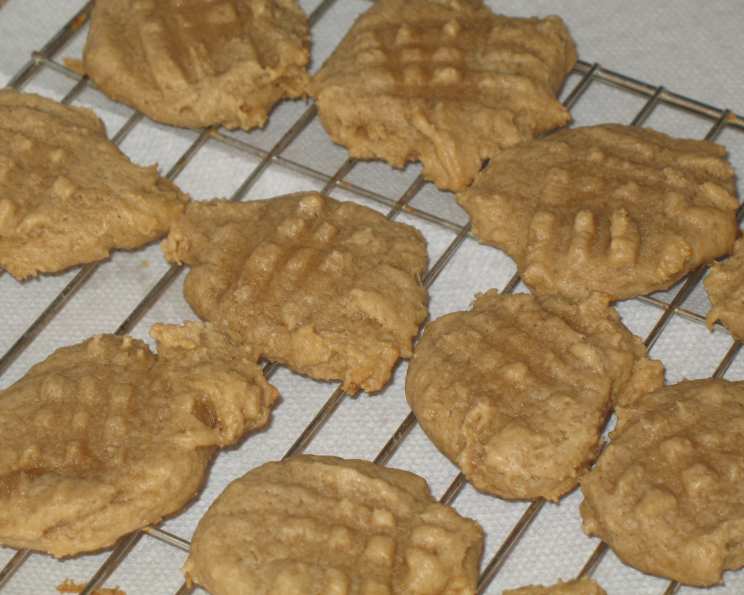
Magical Diabetic Peanut Butter Cookies
The scent of peanut butter cookies baking always transports me back to my grandmother’s kitchen. She was a master baker, and her peanut butter cookies were legendary – soft, chewy, and bursting with that nutty goodness. Sadly, diabetes entered our family picture, limiting many of the beloved sweets. But that didn’t stop my grandmother, she spent weeks developing a sugar-conscious alternative and came up with these cookies. It was a labor of love, and I’m excited to share this magic with you!
Recipe Overview
- Prep Time: 15 minutes
- Cook Time: 7-9 minutes
- Total Time: 22-24 minutes
- Yields: 48 cookies
- Serves: 24
- Dietary Type: Diabetic-Friendly
Ingredients
- ¼ cup margarine, softened
- 1 cup creamy style peanut butter
- ¼ cup egg substitute
- 2 tablespoons honey
- ½ teaspoon vanilla extract
- 1 cup Splenda sugar substitute (or any powdered sugar substitute that is the equivalent of 1 cup of sugar)
- 1 ½ cups all-purpose flour
- ½ teaspoon baking soda
- ½ teaspoon salt
Equipment Needed
- Large bowl
- Electric mixer
- Small bowl
- Lined baking sheet
- Wire rack
Instructions
- Preheat your oven to 350°F (175°C).
- In a large bowl, beat the margarine and peanut butter with an electric mixer until creamy. This should take about 1 minute. Ensure the margarine is properly softened to avoid lumps.
- Add the egg substitute, honey, and vanilla extract to the mixture.
- Beat on high speed for approximately 1 ½ minutes, incorporating the wet ingredients thoroughly. This will help to create a light and airy base for your cookies.
- Add the Splenda sugar substitute (or equivalent).
- Beat on medium speed until well blended, about 30 seconds. Make sure there are no lumps of sweetener remaining. The mixture should be smooth and consistent.
- In a separate, small bowl, combine the all-purpose flour, baking soda, and salt. Whisk together to ensure even distribution of the leavening agent and salt.
- Slowly add the flour mixture to the peanut butter mixture, beating on low speed until well blended, about 1 ½ minutes. The dough may appear crumbly at first, but continue mixing until it comes together. Be careful not to overmix, which can result in tough cookies.
- Roll level teaspoons of dough into balls. This ensures uniform cookie size, which is crucial for even baking.
- Drop the dough balls onto a lined baking sheet, about 2 inches apart. Lining the baking sheet with parchment paper or a silicone mat will prevent sticking and make cleanup easier.
- Flatten each ball with a fork, pressing a crisscross pattern into each cookie. This not only creates a visually appealing design but also helps to evenly distribute the heat during baking.
- Bake for 7-9 minutes, or until light brown around the edges. Keep a close eye on the cookies, as they can burn quickly. The baking time may vary depending on your oven.
- Cool on a wire rack. Allow the cookies to cool completely before storing. This will prevent them from sticking together and help them retain their crispness.
Expert Tips & Tricks
- Softening the Margarine: To ensure the margarine creams properly, allow it to soften at room temperature for at least 30 minutes. Avoid microwaving it, as this can melt it and affect the texture of the cookies.
- Preventing Spreading: If you find that your cookies are spreading too much during baking, try chilling the dough for 30 minutes before rolling it into balls. This will help the fats solidify and prevent excessive spreading.
- Adding a Touch of Spice: For a warmer flavor profile, try adding a pinch of cinnamon or nutmeg to the flour mixture.
- Make-Ahead Dough: The dough can be made ahead of time and stored in the refrigerator for up to 3 days. Allow it to come to room temperature slightly before rolling and baking.
- For a Chewier Texture: Slightly underbaking the cookies will result in a softer, chewier texture.
Serving & Storage Suggestions
These cookies are delightful on their own, perfect with a cup of unsweetened tea or coffee, or even crumbled over low-fat yogurt for a satisfying dessert.
- Storage: Store cooled cookies in an airtight container at room temperature for up to 5 days. To maintain their texture, avoid storing them in humid environments.
- Freezing: For longer storage, freeze the cookies in a single layer on a baking sheet until solid, then transfer them to a freezer-safe bag or container. They can be frozen for up to 2 months. Thaw at room temperature before serving.
- Reheating: While not necessary, you can warm the cookies in a low oven (200°F/95°C) for a few minutes to restore their warmth and aroma.
Nutritional Information
| Nutrient | Amount per Serving | % Daily Value |
|---|---|---|
| Calories | 116.3 kcal | – |
| Calories from Fat | 67 g | 58% |
| Total Fat | 7.5 g | 11% |
| Saturated Fat | 1.5 g | 7% |
| Cholesterol | 0 mg | 0% |
| Sodium | 151 mg | 6% |
| Total Carbohydrate | 9.6 g | 3% |
| Dietary Fiber | 0.9 g | 3% |
| Sugars | 2.5 g | – |
| Protein | 3.8 g | 7% |
Note: Nutritional information is an estimate and may vary based on specific ingredients and portion sizes.
Variations & Substitutions
- Gluten-Free: Substitute the all-purpose flour with a gluten-free blend designed for baking. Be sure to add a binder like xanthan gum if the blend doesn’t already include it.
- Nut-Free: While this is a peanut butter cookie recipe, if you want to make it with another nut butter (almond, cashew) go for it. Alternatively, substitute the peanut butter with sunflower seed butter (sunbutter) for a nut-free alternative.
- Dairy-Free: Ensure the margarine is a dairy-free variety. Most margarines are plant-based, but always check the label.
- Enhanced Flavor: Add a tablespoon of unsweetened cocoa powder to the flour mixture for a chocolate peanut butter twist. A dash of cinnamon or nutmeg can also enhance the warmth of the cookies.
FAQs (Frequently Asked Questions)
Q: Can I use a different sugar substitute besides Splenda?
A: Yes, you can use any powdered sugar substitute that is equivalent to 1 cup of sugar. Be sure to check the package instructions for proper conversion ratios.
Q: Why is my dough crumbly?
A: The dough may appear crumbly initially, but it should come together as you continue to mix. Avoid overmixing, which can result in tough cookies. If it remains too crumbly, add a teaspoon of water or egg substitute at a time until it forms a cohesive dough.
Q: Can I make these cookies ahead of time?
A: Yes, you can prepare the dough in advance and store it in the refrigerator for up to 3 days. Let it soften slightly before rolling and baking. You can also bake the cookies ahead of time and store them in an airtight container.
Q: How do I prevent the cookies from spreading too much?
A: Chilling the dough for 30 minutes before baking can help prevent excessive spreading. Also, ensure your oven temperature is accurate, as a too-low temperature can cause the cookies to spread.
Q: Can I freeze these cookies?
A: Absolutely! Freeze the cookies in a single layer on a baking sheet until solid, then transfer them to a freezer-safe bag or container for up to 2 months. Thaw at room temperature before serving.
Final Thoughts
I hope you enjoy this recipe for Magical Diabetic Peanut Butter Cookies as much as my family does. Whether you’re managing diabetes, watching your sugar intake, or simply looking for a healthier treat, these cookies offer a delicious and satisfying option. Don’t hesitate to experiment with variations and make them your own! Please share your feedback and experiences with this recipe – I’d love to hear how they turn out for you!