
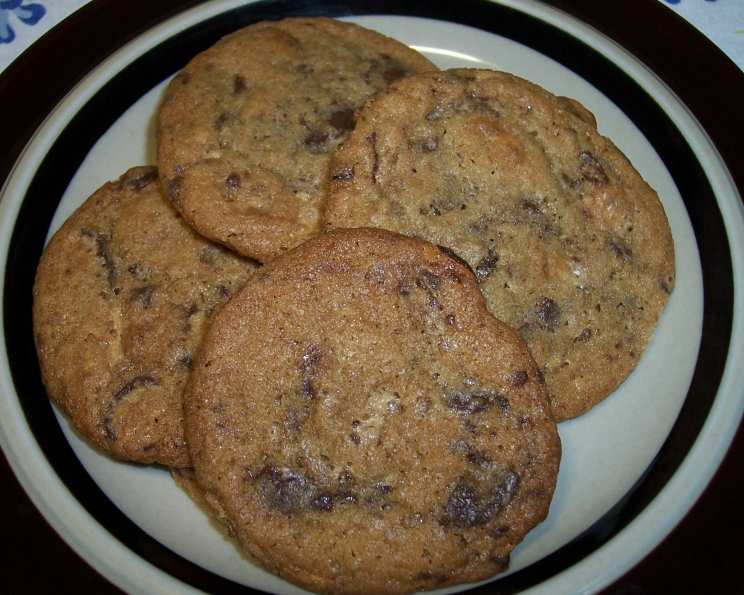
Malted Milk Cookie Magic: A Taste of Nostalgia
The first time I tasted a malted milk ball, I was probably five years old, standing on tiptoes in my grandmother’s pantry. Hidden behind the cans of peaches and jars of homemade pickles was a crinkly bag, its contents a mystery until she winked and offered me one. That sweet, slightly salty, and undeniably malty flavor instantly transported me to a world of pure joy, a memory that returns with every bite of these Malted Milk Cookies. They’re a delightful twist on the classic cookie, offering a unique flavor and texture that’s both comforting and exciting.
Recipe Overview
- Prep Time: 15 minutes
- Cook Time: 10-12 minutes
- Total Time: 25-27 minutes
- Yields: Approximately 3 dozen cookies
- Dietary Type: Not specified (contains dairy and eggs)
Ingredients
- 1 cup butter, softened
- ¾ cup packed brown sugar
- ⅓ cup sugar
- 1 large egg
- 2 teaspoons vanilla extract
- 2 ¼ cups all-purpose flour
- 2 tablespoons instant chocolate drink mix (such as Nestle’s)
- 1 teaspoon baking soda
- ½ teaspoon salt
- 2 cups malted milk balls, crushed
Equipment Needed
- Mixing bowl
- Electric mixer (handheld or stand mixer)
- Measuring cups and spoons
- Baking sheets
- Parchment paper or silicone baking mats (optional, for easier cleanup)
- Cookie scoop or spoon
- Cooling rack
- Food processor or rolling pin (for crushing malted milk balls)
Instructions
-
Cream Together the Butter and Sugars: In a large mixing bowl, use an electric mixer to cream together the softened butter, packed brown sugar, and sugar until the mixture is light and fluffy. This step is crucial for creating cookies with a tender crumb. Be sure to scrape down the sides of the bowl occasionally to ensure even mixing.
-
Incorporate the Egg and Vanilla: Beat in the egg and vanilla extract until well combined. The egg acts as a binder and adds richness to the cookies, while the vanilla enhances the overall flavor profile.
-
Combine the Dry Ingredients: In a separate bowl, whisk together the flour, instant chocolate drink mix, baking soda, and salt. The chocolate drink mix adds a subtle chocolate note and complements the malted milk balls beautifully. The baking soda helps the cookies rise and become light and airy.
-
Gradually Add Dry Ingredients to Wet Ingredients: Gradually add the dry ingredients to the creamed mixture, mixing on low speed until just combined. Be careful not to overmix, as this can result in tough cookies. A few streaks of flour are okay at this stage.
-
Stir in the Crushed Malted Milk Balls: Gently stir in the crushed malted milk balls. Distribute them evenly throughout the dough. For best results, crush the malted milk balls into varying sizes – some finely ground, others in larger chunks. This will create a nice textural contrast in the finished cookies.
-
Shape the Cookies: Shape the dough into 1 ½-inch balls using a cookie scoop or a spoon. Rolling them between your palms works well, too.
-
Arrange on Baking Sheets: Place the cookie dough balls on greased baking sheets, spacing them about 2 inches apart. Alternatively, line the baking sheets with parchment paper or silicone baking mats for easier cleanup and to prevent sticking.
-
Bake to Perfection: Bake in a preheated oven at 375°F (190°C) for 10-12 minutes, or until the edges are set and the centers are just slightly soft. The cookies should be a light golden brown color.
-
Cool Completely: Remove the baking sheets from the oven and let the cookies cool on the sheets for a few minutes before transferring them to a wire rack to cool completely. This prevents them from breaking apart while they’re still warm and delicate.
Expert Tips & Tricks
- Don’t overbake: Overbaked cookies will be dry and crumbly. Keep a close eye on them in the last few minutes of baking.
- Softened Butter is Key: Ensure your butter is properly softened but not melted. This ensures the cookies spread evenly.
- Chill the Dough (Optional): For thicker cookies, chill the dough for 30 minutes before baking. This will help prevent them from spreading too much in the oven.
- Even Baking: Rotate the baking sheets halfway through baking to ensure even browning.
- Crushing the Malted Milk Balls: Use a food processor for a quick and even crush. Alternatively, place them in a zip-top bag and crush them with a rolling pin. Avoid creating just a powder; some larger chunks are ideal.
- Elevate the Chocolate: For an even richer chocolate flavor, consider adding a tablespoon of cocoa powder to the dry ingredients.
Serving & Storage Suggestions
Serve these Malted Milk Cookies with a cold glass of milk, a cup of hot cocoa, or even a scoop of vanilla ice cream. They’re also delicious on their own as a sweet treat.
Store the cookies in an airtight container at room temperature for up to 3-4 days. For longer storage, freeze them in a freezer-safe bag or container for up to 2 months. To thaw, simply leave them at room temperature for a few hours.
Nutritional Information
Note: The following is an estimate and may vary based on specific ingredients and serving size.
| Nutrient | Amount per Serving | % Daily Value |
|---|---|---|
| Calories | 102 kcal | 5% |
| Total Fat | 5.7 g | 7% |
| Saturated Fat | 3.5 g | 18% |
| Cholesterol | 12.5 mg | 4% |
| Sodium | 39 mg | 2% |
| Total Carbohydrate | 12.5 g | 4% |
| Dietary Fiber | 0.1 g | 0% |
| Sugars | 6.3 g | – |
| Protein | 0.8 g | 2% |
Variations & Substitutions
- Gluten-Free Option: Substitute the all-purpose flour with a gluten-free blend. Be sure to use a blend that contains xanthan gum or add a small amount yourself (about ¼ teaspoon per cup of flour) for better binding.
- Different Chocolate Drink Mix: Experiment with different flavors of instant chocolate drink mix, such as dark chocolate or mocha.
- Nutty Addition: Add chopped nuts, such as pecans or walnuts, to the dough for extra crunch and flavor.
- Malted Milk Powder: For a more intense malt flavor, replace 2 tablespoons of the flour with malted milk powder.
- Chocolate Chips: Enhance the chocolate element by adding a cup of chocolate chips, chunks, or even mini chocolate chips.
FAQs (Frequently Asked Questions)
Q: Can I use a different type of sugar?
A: While the combination of brown sugar and granulated sugar provides the best texture and flavor, you can substitute with all granulated sugar if needed. However, the cookies may be slightly crispier.
Q: Can I make the dough ahead of time?
A: Yes, you can make the dough ahead of time and store it in the refrigerator for up to 2 days. Be sure to wrap it tightly in plastic wrap to prevent it from drying out.
Q: How do I prevent the cookies from spreading too much?
A: Chilling the dough before baking and ensuring that the butter is softened but not melted can help prevent excessive spreading.
Q: Can I freeze the baked cookies?
A: Absolutely! Store the cooled cookies in a freezer-safe bag or container for up to 2 months. Thaw them at room temperature before serving.
Q: What if I don’t have malted milk balls?
A: While malted milk balls are the star ingredient, you can substitute them with chocolate-covered pretzels or other crunchy candies for a slightly different flavor and texture.
Final Thoughts
These Malted Milk Cookies are more than just a recipe; they’re a trip down memory lane, a celebration of simple pleasures, and a testament to the magic that a single bite can evoke. I hope you’ll give this recipe a try and share the joy of these cookies with your loved ones. Feel free to experiment with variations and make them your own. Happy baking!