
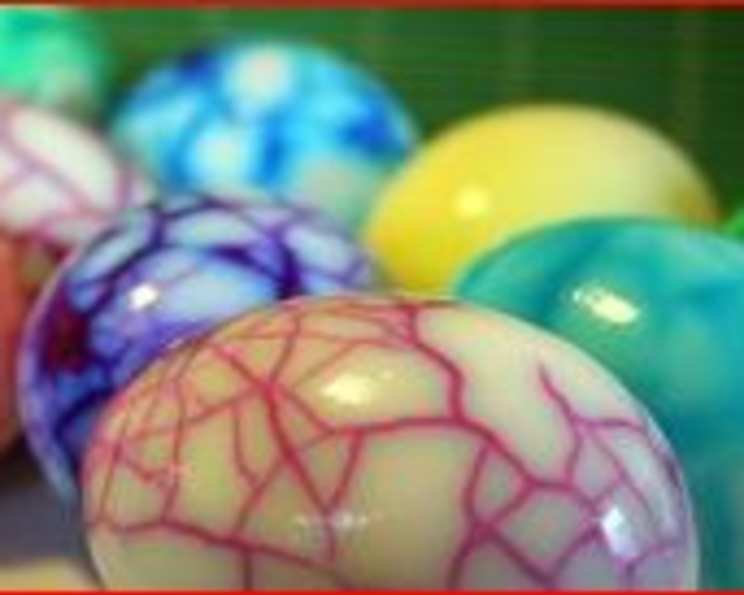
Marbled Eggs: A Culinary Canvas
I remember making these marbled eggs with my grandmother every Easter. The anticipation of cracking the shells just so, the vibrant colors swirling in the dye bath, the surprise of peeling away the shell to reveal the intricate patterns – it was pure magic. My tiny hands would meticulously roll the eggs, creating the mosaic of cracks that would become the canvas for our edible art. The best part, of course, was finally biting into one, the slightly vinegary flavor a perfect counterpoint to the rich yolk. It wasn’t just about decorating eggs; it was about creating memories that have lasted a lifetime.
Recipe Overview
- Prep Time: 10 minutes
- Cook Time: 20 minutes
- Total Time: 30 minutes
- Servings: 12
- Yield: 12 Eggs
- Dietary Type: Vegetarian, Gluten-Free, Dairy-Free
Ingredients
- 12 eggs
- Water
- Food coloring (various colors)
Equipment Needed
- Large pot
- Spoon
- Bowls or jars for dye
- Paper towels
Instructions
-
Begin by placing the eggs in a large pot and covering them with cold water. Ensure the water level is at least an inch above the eggs.
-
Bring the water to a rolling boil over high heat. Once boiling, turn off the heat, cover the pot, and let the eggs sit for 12 minutes. This will ensure they are hard-boiled. For perfectly cooked yolks, avoid overcooking.
-
After 12 minutes, immediately drain the hot water and rinse the eggs with cold water until they are cool enough to handle. This stops the cooking process and prevents the yolks from turning green.
-
Gently roll each egg on a hard surface, such as a countertop or table, to create a network of fine cracks all over the shell. The key is to crack the shell without peeling it off. Aim for a spiderweb-like pattern. Try to avoid breaking the membrane just beneath the shell.
-
In separate bowls or jars, prepare your dye baths. Fill each container with enough water to fully submerge an egg and add your desired food coloring. The amount of food coloring will depend on the brand and desired intensity of color; start with 10-20 drops and adjust as needed. Stir well to ensure the color is evenly distributed.
-
Carefully place the cracked eggs into the dye baths, ensuring they are fully submerged. Let the eggs soak in the dye for at least 30 minutes, or longer for a more vibrant color. You can even let them soak overnight in the refrigerator for maximum color penetration.
-
Remove the eggs from the dye baths and gently pat them dry with paper towels.
-
Carefully peel the shells from the eggs, revealing the marbled patterns created by the dye seeping through the cracks. The longer the eggs soaked, the more intricate the marbling will be.
-
Rinse the peeled eggs under cold water to remove any lingering shell fragments.
Expert Tips & Tricks
- Egg Freshness: Use older eggs for easier peeling. Fresh eggs tend to stick to the shell.
- Color Intensity: Add a tablespoon of white vinegar to each dye bath to help the color adhere better to the eggshell.
- Creating Variations: Experiment with different cracking techniques. For example, a few larger cracks will result in bolder patterns.
- Dyeing Techniques: For a more vibrant, multi-colored effect, you can dip the eggs in multiple dye baths, one after another, allowing each color to set before moving on to the next.
- Shell Removal: If the shell is difficult to remove, try tapping the egg gently all over and then rolling it between your hands before peeling.
- Natural Dyes: Experiment with natural dyes like beet juice (pink), turmeric (yellow), red cabbage water (blue/purple) or onion skins (orange/brown) for an all-natural approach.
Serving & Storage Suggestions
These marbled eggs make a beautiful and festive addition to any Easter table or spring brunch. Arrange them on a platter as part of a larger spread, or use them to decorate salads or sandwiches. They are also perfect for making visually stunning deviled eggs.
Store peeled marbled eggs in an airtight container in the refrigerator for up to 5 days. Unpeeled eggs can also be stored in the refrigerator, but they may not last as long once peeled. Avoid leaving hard-boiled eggs at room temperature for more than two hours.
Nutritional Information
Here’s an approximate nutritional breakdown for one hard-boiled egg:
| Nutrient | Amount per Serving | % Daily Value |
|---|---|---|
| Calories | 78 kcal | 4% |
| Total Fat | 5g | 6% |
| Saturated Fat | 1.6g | 8% |
| Cholesterol | 213mg | 71% |
| Sodium | 62mg | 3% |
| Total Carbohydrate | 0.6g | 0% |
| Dietary Fiber | 0g | 0% |
| Sugars | 0.6g | |
| Protein | 6g | 12% |
| Vitamin A | 260 IU | 5% |
| Calcium | 25mg | 2% |
| Iron | 0.8mg | 4% |
Note: Nutritional information can vary depending on the size of the egg and the type of food coloring used.
Variations & Substitutions
- Spicy Marbled Eggs: Add a pinch of cayenne pepper to the dye bath for a subtle kick.
- Herb-Infused Marbled Eggs: Add fresh herbs like thyme or rosemary to the dye bath for a fragrant twist.
- Soy Sauce Marbled Eggs: Substitute some of the water in the dye bath with soy sauce for a savory flavor and a darker color.
- Natural Dye Variations: Use natural dyes like beet juice, turmeric, or red cabbage juice for a more natural approach to coloring your eggs. The results can be less predictable but often yield beautiful and unique hues.
- Cracking Patterns: Experiment with different tools to create unique cracking patterns, such as using a textured rolling pin or gently tapping the eggs with a spoon.
FAQs (Frequently Asked Questions)
Q: Can I use brown eggs for this recipe?
A: Yes, you can use brown eggs, but the colors will appear differently and may be less vibrant than on white eggs. The dye will tint the brown shell, resulting in a more muted effect.
Q: How long should I soak the eggs in the dye?
A: For pastel shades, 30 minutes may be sufficient. For deeper, more vibrant colors, soak for several hours or even overnight in the refrigerator.
Q: Is the food coloring safe to eat since it seeps into the egg?
A: Yes, most commercially available food colorings are considered safe for consumption in small quantities. However, if you are concerned, you can use natural food coloring alternatives.
Q: Why are my egg yolks turning green?
A: Green yolks are a result of overcooking. Avoid overcooking the eggs by following the recommended cooking time and immediately cooling them in ice water after boiling.
Q: Can I reuse the dye baths?
A: It is generally not recommended to reuse dye baths for food safety reasons. It is best to discard the dye after use.
Final Thoughts
Creating these marbled eggs is more than just a cooking project; it’s a chance to unleash your creativity and connect with traditions. Whether you’re preparing them for a festive holiday or simply adding a touch of whimsy to your everyday meals, these eggs are sure to impress. Don’t be afraid to experiment with different colors, patterns, and techniques to create your own unique masterpieces. So gather your ingredients, embrace the process, and enjoy the delightful surprise of revealing the marbled beauty within!