
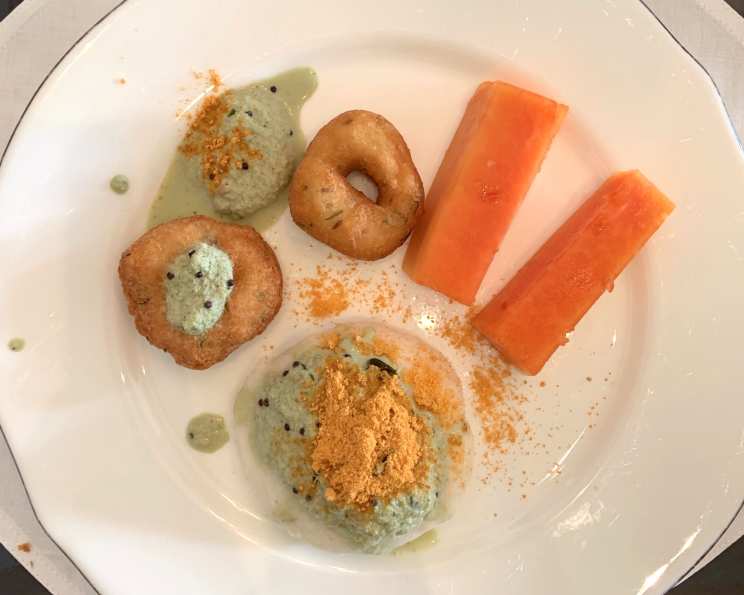
Medu Vada: A Culinary Journey to South India
The first time I tasted Medu Vada was at a bustling street corner in Chennai. The aroma of hot oil mingled with the spices of sambar, creating an irresistible symphony. Watching the vendor skillfully shape the vada with his bare hands and then drop them into the sizzling oil was a mesmerizing experience. The crisp, golden exterior giving way to a soft, airy interior, paired with the tangy sambar and sweet coconut chutney, was an explosion of flavors that etched itself into my culinary memory. From that day on, I was determined to master this South Indian delicacy and bring its magic into my own kitchen.
Recipe Overview
- Prep Time: 20 minutes
- Cook Time: 25 minutes
- Total Time: 45 minutes
- Yields: 8 pieces
- Serves: 4
- Dietary Type: Vegetarian, Gluten-Free (naturally)
Ingredients
- 1 cup split washed Urad Dal
- 1 pinch hing (asafoetida)
- 1 tablespoon green chili pepper, chopped
- ½ cup chopped onion
- 2 tablespoons cilantro, chopped
- 1 teaspoon salt
- Oil, for frying
Equipment Needed
- Blender or grinder
- Large bowl
- Frying pan or deep fryer
- Slotted spoon
- Paper towels
Instructions
- Thoroughly wash the Urad Dal under cold running water until the water runs clear. This removes any excess starch.
- Soak the washed Urad Dal in about 3 cups of water for 4-6 hours, or preferably overnight. This rehydrates the dal, making it easier to grind into a smooth batter.
- Drain the water completely from the soaked dal.
- Grind the drained dal in a blender or grinder to a smooth paste. Add a little water at a time, if needed, to facilitate the grinding process. Be careful not to add too much water, as this can make the batter too thin. The consistency should be thick and fluffy.
- Transfer the dal batter to a wide bowl.
- Add the chopped cilantro, chopped green chili, chopped onion, hing, and salt to the dal batter.
- Beat the batter vigorously for 2-3 minutes. This incorporates air into the batter, making the vadas light and fluffy. You can use your hands or a whisk.
- The consistency of the batter is crucial. To test the consistency, drop a small amount of batter onto your palm. It should hold its shape without spreading. If it’s too thin, add a tablespoon of rice flour or sooji (semolina) to thicken it.
- Prepare the vadas batter just before frying to prevent it from becoming too runny.
- Heat the oil in a frying pan or deep fryer over medium-high heat. The pan should have about 1 inch of oil.
- To check if the oil is hot enough, drop a tiny piece of batter into the oil. It should sizzle and rise to the surface without browning too quickly. If it browns immediately, the oil is too hot, and the vadas will cook on the outside but remain raw inside. If it sinks and doesn’t sizzle, the oil is not hot enough, and the vadas will absorb too much oil.
- Wet your palms with water. This prevents the batter from sticking to your hands.
- Take a golf ball-sized portion of the batter and place it on one of your wet palms.
- Flatten the batter gently into a round shape, about 2-3 inches in diameter.
- Using wet fingers on your other hand, make a hole in the center of the flattened vada. This helps the vada cook evenly.
- Carefully slide the vada into the hot oil. Avoid overcrowding the pan; fry only 2-3 vadas at a time, depending on the size of your pan.
- Fry the vadas on both sides until they are golden brown and crispy. This usually takes about 3-4 minutes per side.
- Remove the fried vadas from the oil using a slotted spoon and place them on a plate lined with paper towels to drain excess oil.
- Serve the Medu Vada hot with coconut chutney and sambar. You can also serve them with tomato ketchup, if desired.
Expert Tips & Tricks
- Soaking Time: Don’t skimp on the soaking time for the Urad Dal. This is crucial for achieving a light and fluffy vada.
- Batter Consistency: Achieving the right batter consistency is key. If the batter is too thin, the vadas will absorb too much oil and become soggy. If it’s too thick, they will be dense and hard.
- Frying Temperature: Maintaining the correct oil temperature is also important. If the oil is too hot, the vadas will brown quickly on the outside but remain raw inside. If it’s too cool, they will absorb too much oil.
- Shaping the Vadas: Wetting your hands before shaping the vadas prevents the batter from sticking and makes the process easier.
- Make-Ahead Tip: You can grind the dal and prepare the batter ahead of time. Store it in the refrigerator for up to 24 hours. However, add the salt and hing just before frying, as salt can draw out moisture from the batter.
Serving & Storage Suggestions
Medu Vada are best served hot and fresh, accompanied by coconut chutney and sambar. Garnish with fresh cilantro for an extra touch of freshness.
- Room Temperature: Medu Vada can be kept at room temperature for a few hours, but they are best consumed immediately for optimal crispness.
- Refrigeration: Leftover Medu Vada can be stored in the refrigerator for up to 2 days.
- Reheating: To reheat, bake in a preheated oven at 350°F (175°C) for 5-7 minutes, or until heated through and slightly crispy. You can also reheat them in an air fryer for a few minutes. Avoid microwaving, as this will make them soggy.
- Freezing: Medu Vada can be frozen after frying. Allow them to cool completely, then arrange them in a single layer on a baking sheet and freeze for about 2 hours. Once frozen, transfer them to a freezer bag or container. They can be stored in the freezer for up to 2 months. Reheat directly from frozen in a preheated oven or air fryer.
Nutritional Information
| Nutrient | Amount per Serving | % Daily Value |
|---|---|---|
| Calories | 181.5 kcal | N/A |
| Calories from Fat | 4g | 3% |
| Total Fat | 0.5 g | 0% |
| Saturated Fat | 0.1 g | 0% |
| Cholesterol | 0 mg | 0% |
| Sodium | 585.7 mg | 24% |
| Total Carbohydrate | 31.6 g | 10% |
| Dietary Fiber | 15.2 g | 60% |
| Sugars | 2.3 g | N/A |
| Protein | 12.7 g | 25% |
Variations & Substitutions
- Lentil Variations: Instead of just Urad dal, you can try mixing it with other dals, like moong dal, to vary the flavour and texture.
- Spice Level: Adjust the amount of green chili pepper according to your spice preference. You can also add a pinch of red chili powder for extra heat.
- Herb Variations: Experiment with different herbs, such as curry leaves or mint, to add unique flavors to the vada.
- Vegetable Additions: Grated ginger, carrots, or cabbage can be added to the batter for added nutrition and flavor.
- Vegan Medu Vada: This recipe is naturally vegan.
FAQs (Frequently Asked Questions)
Q: Why are my Medu Vadas not crispy?
A: This could be due to several factors: the batter being too thin, the oil not being hot enough, or overcrowding the pan. Ensure the batter is thick, the oil is at the correct temperature, and fry in batches.
Q: Can I make Medu Vada without onion?
A: Yes, you can omit the onion if you prefer. The taste will be slightly different, but the vada will still be delicious.
Q: Can I use a food processor instead of a blender to grind the dal?
A: A food processor can be used, but a blender generally yields a smoother batter. If using a food processor, add a little water at a time to help the dal grind evenly.
Q: How do I prevent the vadas from absorbing too much oil?
A: Ensure the oil is hot enough and avoid overcrowding the pan. Also, drain the fried vadas on paper towels to remove excess oil.
Q: Can I add rice flour to the batter?
A: Adding a tablespoon or two of rice flour can help make the vadas crispier. However, avoid adding too much, as it can make them dense.
Final Thoughts
Medu Vada is more than just a recipe; it’s a culinary experience that brings the vibrant flavors of South India into your kitchen. From the satisfying sizzle of the vadas frying to the delightful crunch and soft interior, every bite is a celebration of textures and tastes. I encourage you to try this recipe and share the joy of Medu Vada with your loved ones. Don’t hesitate to experiment with different variations and make it your own. And most importantly, savor every moment of this delicious journey!