
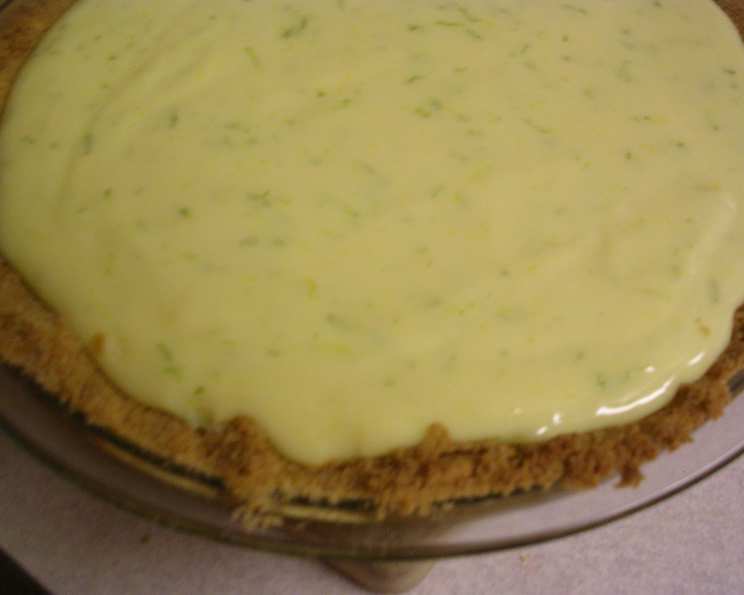
Mimi’s Fresh Key Lime Pie: A Taste of Sunshine
The memory of Mimi’s Key Lime Pie is forever etched in my mind, a vibrant green slice of pure happiness. I remember summers spent at her cozy bungalow, the air thick with the scent of citrus and warm sugar. Her kitchen, always a flurry of activity, felt like the heart of the home, and this pie, with its tartness that danced on the tongue, was her signature creation. It was more than just dessert; it was a symbol of her love, her warmth, and the endless summer days we shared.
Recipe Overview
- Prep Time: 15 minutes
- Cook Time: 5 minutes
- Total Time: 1 hour 20 minutes (includes chilling time)
- Servings: 8
- Yield: 1 9-inch pie
- Dietary Type: Not Gluten-Free
Ingredients
- 1 (9-inch) graham cracker crust
- 2 (14 ounce) cans condensed milk (not evaporated or canned milk)
- 4 egg yolks, beaten
- ¾ cup fresh key lime juice (about 10-20 key limes)
- 1 tablespoon grated lime zest (key-lime zest, from about 5 key limes)
For Garnish:
- 1 pint whipping cream, whipped
- Mint leaf
- 8 slices key limes, thin
Equipment Needed
- Pie dish (if not using pre-made crust)
- Mixing bowls
- Whisk
- Grater or zester
- Measuring cups and spoons
- Oven
- Refrigerator
Instructions
-
Preheat your oven to 300 degrees (F). This low temperature is key for setting the filling gently without browning it.
-
In a large mixing bowl, combine the condensed milk with the beaten egg yolks. Whisk until the mixture is smooth and homogenous. Make sure there are no lumps from the egg yolks.
-
Add the fresh key lime juice and key lime zest to the bowl. Gently whisk everything together until well combined. The mixture will thicken slightly as the lime juice reacts with the condensed milk. Don’t overmix, just ensure everything is incorporated.
-
Pour the key lime filling into the graham cracker pie crust. Distribute it evenly across the bottom of the crust.
-
Carefully transfer the pie to the preheated oven. Bake for 5 minutes. This short baking time is just enough to set the filling. Overbaking will result in a cracked or rubbery pie.
-
Remove the pie from the oven and let it cool for about 5 minutes at room temperature. This allows the pie to stabilize slightly before chilling.
-
Refrigerate the pie for at least 1 hour before serving. This chilling time is crucial for the pie to fully set and develop its characteristic creamy texture. You can refrigerate it for longer, even overnight, for the best results.
-
Just before serving, cover the pie filling with whipped cream. Be generous with the whipped cream!
-
To serve, slice the pie into 8 equal pieces. Garnish each slice with a thin slice of key lime and a fresh mint leaf for a touch of elegance and freshness.
Expert Tips & Tricks
- Use fresh key limes! Bottled juice just won’t give you the same vibrant flavor. Key limes are smaller and more tart than regular limes, so plan accordingly.
- Zest first, juice second. It’s much easier to zest the limes before you juice them.
- Don’t overbake! The filling should be just set, not browned or cracked. If you see it starting to puff up too much, reduce the baking time slightly.
- For a smoother filling: Gently warm the condensed milk before mixing. This will help it combine more easily with the other ingredients.
- Make your own graham cracker crust: If you prefer a homemade crust, combine graham cracker crumbs with melted butter and sugar, then press it into a pie dish and bake until golden brown before adding the filling.
- If you’re short on time: Purchase a pre-made whipped topping instead of making your own whipped cream. While not quite the same, it’s a convenient shortcut.
Serving & Storage Suggestions
Mimi’s Key Lime Pie is best served chilled, straight from the refrigerator. The cool, creamy texture is incredibly refreshing, especially on a warm day.
- Serving: Garnish each slice with a key lime slice and a mint leaf for a beautiful presentation. A sprinkle of extra lime zest adds a pop of color and flavor.
- Storage: Store leftover pie in the refrigerator, covered tightly with plastic wrap or in an airtight container. It will keep for up to 3 days.
- Room Temperature: Do not leave Key Lime Pie at room temperature for more than 2 hours, as it contains dairy and eggs.
- Freezing: While you can freeze Key Lime Pie, the texture may change slightly upon thawing. Freeze individual slices for best results. Wrap them tightly in plastic wrap and then in foil. Thaw in the refrigerator overnight.
- Reheating: This pie is best served cold, so reheating is not recommended.
Nutritional Information
| Nutrient | Amount per Serving | % Daily Value |
|---|---|---|
| Calories | 722 kcal | – |
| Calories from Fat | 366 g | 51% |
| Total Fat | 40.7 g | 62% |
| Saturated Fat | 21.8 g | 108% |
| Cholesterol | 200.4 mg | 66% |
| Sodium | 331.7 mg | 13% |
| Total Carbohydrate | 80.8 g | 26% |
| Dietary Fiber | 0.6 g | 2% |
| Sugars | 69.4 g | 277% |
| Protein | 12.1 g | 24% |
Note: Nutritional information is an estimate and may vary based on specific ingredients and serving sizes.
Variations & Substitutions
- Gluten-Free: Use a gluten-free graham cracker crust or make a crust using almond flour and butter.
- Coconut Cream Topping: Substitute the whipping cream with chilled coconut cream for a dairy-free alternative. The rich, creamy texture of coconut cream pairs perfectly with the tartness of the key lime.
- Lime Variety: While Key Limes are traditional, you can use regular limes if you can’t find Key Limes. The flavor will be slightly different, but still delicious.
- Meringue Topping: Instead of whipped cream, top the pie with a fluffy meringue made from egg whites and sugar. Brown the meringue lightly with a kitchen torch for a beautiful presentation.
- Key Lime Bars: Press the graham cracker crust into a square baking pan, then pour the filling over it. Bake as directed, then cut into bars for a portable treat.
FAQs (Frequently Asked Questions)
Q: Why is it important to use fresh key lime juice?
A: Fresh key lime juice has a unique, tart flavor that bottled juice can’t replicate. It’s what gives the pie its signature taste.
Q: Can I use regular limes if I can’t find key limes?
A: Yes, you can substitute with regular limes, but the flavor will be slightly different. Key limes are more tart and aromatic.
Q: How do I know when the pie is done?
A: The filling should be just set, with a slight jiggle in the center. It will continue to firm up as it cools.
Q: Can I make this pie ahead of time?
A: Absolutely! In fact, it’s best to make it at least a few hours ahead of time to allow it to chill properly.
Q: Why did my pie crack on top?
A: Cracking usually happens when the pie is overbaked. Make sure to follow the baking time and temperature carefully.
Final Thoughts
Mimi’s Key Lime Pie is more than just a dessert; it’s a taste of sunshine, a reminder of warm memories, and a celebration of simple pleasures. I urge you to try this recipe and experience the magic for yourself. It is an easy recipe to follow that yields exceptional results. Share it with your loved ones, and let them taste the love and care that goes into every slice. And don’t forget to let me know what you think! I am sure it will be a hit at your next gathering.