
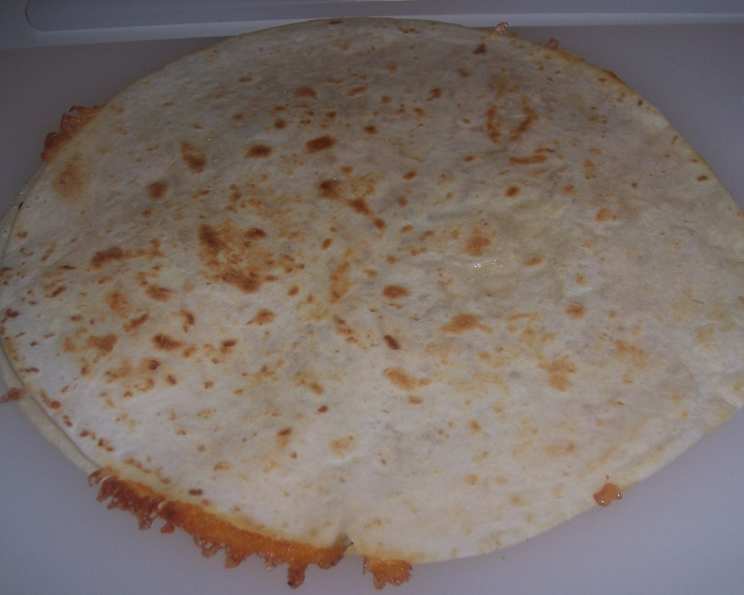
Mini Cheese Quesadillas: A Culinary Hug in Every Bite
The memory is as vivid as the taste: a rainy afternoon, my grandmother’s kitchen filled with the warm aroma of melting cheese, and the comforting sight of her flipping tortillas on the stove. She always made these simple cheese quesadillas for us grandkids – little golden pockets of cheesy goodness that chased away the gloom of any dreary day. It wasn’t just the taste; it was the feeling of being loved and cared for, wrapped up in a warm tortilla embrace. These aren’t just quesadillas; they’re edible nostalgia.
Recipe Overview
- Prep Time: 10 minutes
- Cook Time: 10 minutes
- Total Time: 20 minutes
- Servings: 6
- Yield: 48 wedges
- Dietary Type: Vegetarian
Ingredients
- 1⁄4 teaspoon chili powder
- 1⁄4 teaspoon ground cumin
- 1⁄4 teaspoon salt
- 1⁄4 teaspoon dried oregano leaves
- 1 cup shredded cheddar cheese
- 1⁄2 cup shredded Monterey Jack cheese
- Vegetable oil
- 6 (6-7 inch) flour tortillas
- Salsa, sour cream (optional)
Equipment Needed
- Large plastic food storage bag
- Medium skillet
Instructions
- In a large plastic food storage bag, combine the chili powder, ground cumin, salt, and dried oregano leaves. Seal the bag and gently shake to mix the spices.
- Add the shredded cheddar cheese and shredded Monterey Jack cheese to the bag. Seal the bag tightly, ensuring it’s properly closed to prevent any cheese from escaping. Shake the bag well to thoroughly coat the cheese with the spice mixture. This ensures every bite is packed with flavor.
- Heat 1/2 tablespoon of vegetable oil in a medium skillet over medium heat. Allow the oil to heat up properly; you want it shimmering but not smoking.
- Place one flour tortilla in the heated skillet.
- Sprinkle 1/2 cup of the cheese mixture evenly over the surface of the tortilla in the skillet.
- Top the cheese-covered tortilla with a second flour tortilla. Press down gently to ensure good contact between the tortillas and the cheese.
- Cook for 30 seconds, or until the bottom tortilla begins to turn a light golden brown. Keep a close eye on it to prevent burning.
- Carefully flip the quesadilla using a spatula.
- Cook for another 30 seconds, or until the second tortilla is also lightly golden brown and the cheese is melted and gooey. Again, watch carefully to prevent burning.
- Remove the cooked quesadilla from the skillet and set aside.
- Repeat steps 3-10 with the remaining vegetable oil, tortillas, and cheese mixture, cooking one quesadilla at a time. Make sure to add the 1/2 tablespoon of oil to the skillet each time.
- Once all the quesadillas are cooked, cut each quesadilla into 8 wedges using a pizza cutter or a sharp knife.
- Serve the mini cheese quesadillas immediately, with salsa and sour cream on the side for dipping, if desired.
Expert Tips & Tricks
- Spice it Up: Feel free to adjust the amount of chili powder to your liking. For a smoky flavor, try adding a pinch of smoked paprika to the spice blend.
- Cheese Selection: While cheddar and Monterey Jack are a classic combination, don’t be afraid to experiment with other cheeses like pepper jack for a bit of heat, or Oaxaca for a lovely melt. A little cotija cheese sprinkled on top after cooking adds a salty, tangy note.
- Even Cooking: The key to evenly cooked quesadillas is to maintain a consistent medium heat. If the skillet gets too hot, the tortillas will burn before the cheese melts. If it’s not hot enough, the tortillas will become soggy.
- Make Ahead: You can prep the cheese mixture ahead of time and store it in the refrigerator for up to 2 days. This will save you time when you’re ready to cook the quesadillas.
- Prevent Sticking: Ensure the skillet is properly heated and lightly oiled before adding each quesadilla to prevent sticking. A non-stick skillet is a great option for easier cooking.
- Crispy Tortillas: For extra crispy tortillas, brush them lightly with melted butter or olive oil before placing them in the skillet.
- Uniform Wedges: Use a pizza cutter for clean, even slices when cutting the quesadillas into wedges.
- Flavor Boost: A sprinkle of finely chopped cilantro or green onions after cooking adds a fresh pop of flavor.
Serving & Storage Suggestions
Serve these mini cheese quesadillas immediately while they are still warm and the cheese is melted and gooey. They make a fantastic appetizer, snack, or light lunch. Arrange the wedges attractively on a platter and serve with bowls of salsa and sour cream for dipping.
Leftover quesadillas can be stored in an airtight container in the refrigerator for up to 3 days. To reheat, you can microwave them for a quick snack, but for the best results, reheat them in a skillet over medium heat until warmed through and the tortillas are crispy. You can also reheat them in a toaster oven or oven at 350°F (175°C) for about 5-10 minutes. While freezing is possible, the texture of the tortillas might change slightly upon thawing. If freezing, wrap the quesadillas individually in plastic wrap and then place them in a freezer-safe bag or container. They can be frozen for up to 2 months.
Nutritional Information
(Estimated per serving of 8 wedges)
| Nutrient | Amount per Serving | % Daily Value |
|---|---|---|
| Calories | 364 kcal | 18% |
| Total Fat | 18.6g | 28% |
| Saturated Fat | 9.8g | 49% |
| Cholesterol | 42.2mg | 14% |
| Sodium | 799mg | 33% |
| Total Carbohydrate | 33g | 11% |
| Dietary Fiber | 2.1g | 8% |
| Sugars | 1.4g | 5% |
| Protein | 15.8g | 31% |
Variations & Substitutions
- Gluten-Free Quesadillas: Use gluten-free tortillas to make this recipe suitable for those with gluten sensitivities.
- Vegan Quesadillas: Substitute the cheddar and Monterey Jack cheese with your favorite vegan cheese shreds. Nutritional yeast can also add a cheesy flavor.
- Spicy Quesadillas: Add a pinch of cayenne pepper to the spice mixture, or use pepper jack cheese for a spicy kick.
- Bean and Cheese Quesadillas: Add a layer of refried beans to the tortilla before adding the cheese.
- Chicken or Beef Quesadillas: Add shredded cooked chicken or ground beef to the quesadillas for a heartier meal.
- Vegetarian Quesadillas: Sauté some chopped vegetables like bell peppers, onions, and mushrooms and add them to the quesadillas along with the cheese.
- Different Spices: Experiment with different spice combinations. Try adding a pinch of garlic powder, onion powder, or smoked paprika to the spice mixture.
- Corn Tortillas: For a different flavor and texture, use corn tortillas instead of flour tortillas. Note that corn tortillas may be more fragile and require extra care when flipping.
FAQs (Frequently Asked Questions)
Q: Can I use pre-shredded cheese for this recipe?
A: Yes, pre-shredded cheese works perfectly well and saves time. Just be sure to check the expiration date for freshness.
Q: Can I make these quesadillas in the oven?
A: Yes, you can bake them. Place the assembled quesadillas on a baking sheet and bake in a preheated oven at 375°F (190°C) for about 10-12 minutes, or until the cheese is melted and the tortillas are golden brown.
Q: How do I prevent the quesadillas from sticking to the skillet?
A: Make sure the skillet is properly heated and lightly oiled before adding each quesadilla. A non-stick skillet is also a good option.
Q: Can I use different types of tortillas?
A: Absolutely! Feel free to experiment with different types of tortillas, such as whole wheat, spinach, or flavored tortillas.
Q: How do I keep the quesadillas warm if I’m making them ahead of time?
A: Place the cooked quesadillas on a baking sheet in a preheated oven at 200°F (95°C) to keep them warm until serving.
Final Thoughts
These Mini Cheese Quesadillas are more than just a recipe; they’re a culinary hug, a quick and easy way to bring a little comfort and joy to your day. Whether you’re whipping them up for a quick snack, a kid-friendly lunch, or a party appetizer, they’re sure to be a crowd-pleaser. So go ahead, grab your tortillas and cheese, and get cooking! Don’t forget to share your creations and any variations you try. I’d love to hear how you make this classic dish your own. And maybe, just maybe, you’ll create some warm, cheesy memories of your own along the way. Pair with a refreshing agua fresca for a complete and delightful experience!