
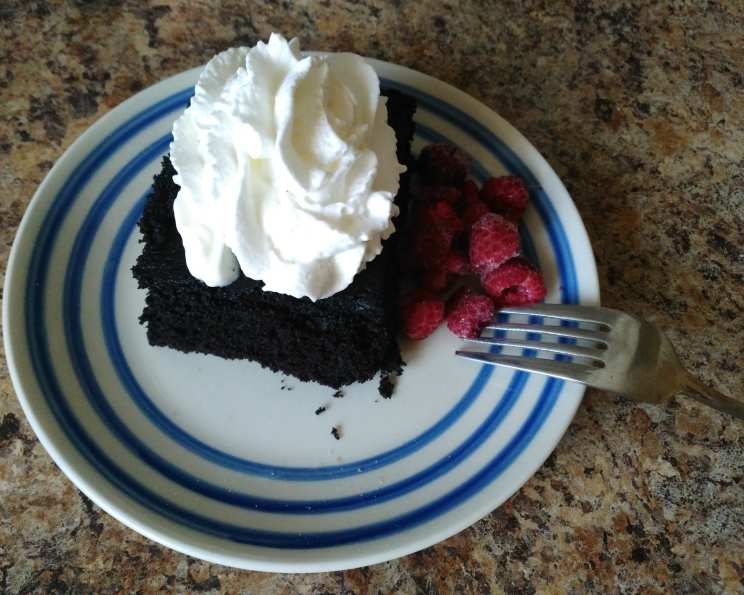
Moist and Rich Homemade Chocolate Cake
The aroma still transports me back to my wedding day. I remember standing in our tiny kitchen, surrounded by clouds of flour and the intoxicating scent of cocoa, meticulously layering this very cake. It wasn’t store-bought perfection, but a labor of love – slightly lopsided layers held together with buttercream and adorned with fresh cherries. Every bite tasted of shared dreams and a future filled with sweet moments, and to this day, that’s exactly what this cake represents to me.
Recipe Overview
- Prep Time: 30 minutes
- Cook Time: 25 minutes
- Total Time: 55 minutes
- Servings: 12
- Yield: One 3-layer cake or 3 1/2 dozen cupcakes
- Dietary Type: Not specified
Ingredients
- 3 cups cake flour
- 1 1/2 teaspoons baking powder
- 1 1/2 teaspoons baking soda
- 1/4 teaspoon salt
- 1 1/2 cups unsweetened cocoa
- 2 1/2 cups strong brewed coffee
- 1/2 cup unsalted butter (room temperature)
- 1/3 cup vegetable oil
- 1 1/2 cups superfine sugar (granulated works fine)
- 1 1/2 cups dark brown sugar
- 5 large eggs
- 1 teaspoon pure vanilla extract
- 2 teaspoons unsalted butter (room temperature), for greasing pans.
Equipment Needed
- Three 9-inch cake pans (or two larger cake pans)
- Parchment paper
- Mixer
- Mixing bowls
- Sifter
- Whisk
- Toothpick
- Muffin tins (optional, for cupcakes)
- Cupcake liners (optional, for cupcakes)
- Cooling rack
Instructions
-
Preheat your oven to 350 degrees Fahrenheit (175 degrees Celsius). This is crucial for even baking and a moist crumb.
-
Prepare your cake pans. Cut parchment paper circles to fit the bottom of three 9-inch cake pans. Alternatively, you can use two larger cake pans, depending on the size and style of cake you wish to create. Grease the pans with the 2 teaspoons of softened unsalted butter before placing the parchment. This ensures easy release of the cakes after baking.
-
For cupcakes: This recipe can also make about 3 1/2 dozen cupcakes. Simply line muffin tins with cupcake papers.
-
In a medium bowl, sift together the cake flour, baking powder, baking soda, and salt. Sifting ensures that these dry ingredients are evenly distributed, preventing lumps and contributing to a lighter, more tender cake. Set aside the sifted dry ingredients.
-
In a separate bowl, whisk together the unsweetened cocoa and strong brewed coffee until smooth and free of lumps. The hot coffee intensifies the chocolate flavor and creates a beautiful, rich batter. Set aside this cocoa-coffee mixture.
-
In a large mixer bowl, cream the 1/2 cup softened butter for about 1 minute until light and fluffy. Add the vegetable oil and beat for another minute, incorporating it well with the butter. This combination of butter and oil contributes to both flavor and moisture in the cake.
-
Gradually add the superfine sugar (or granulated sugar) and the dark brown sugar to the butter and oil mixture. Beat for a full 10 minutes on medium speed. This extended creaming process is essential for incorporating air into the batter, resulting in a light and airy cake. Don’t skimp on this step!
-
Add the eggs one at a time, beating for 5 minutes after the last egg is added. This thorough incorporation of the eggs is vital for the structure and richness of the cake.
-
Add the pure vanilla extract and beat until just blended. Vanilla enhances the overall flavor profile of the chocolate cake.
-
Alternately add the coffee and cocoa mixture and the dry ingredients to the butter mixture, beginning and ending with the dry ingredients. Mix after each addition, making sure to scrape the sides of the bowl often to ensure even incorporation of all ingredients. Overmixing at this stage can develop the gluten in the flour, leading to a tougher cake, so be careful.
-
Divide the batter evenly among the prepared cake pans.
-
Bake for about 25 minutes, or until a toothpick inserted into the center of the cake comes out clean. The baking time may vary depending on your oven, so start checking for doneness around 20 minutes.
-
For cupcakes, bake for about 20 minutes, or until a toothpick inserted into the center comes out clean.
-
Allow the cakes to cool in the pans for about 10 minutes before inverting them onto a wire cooling rack to cool completely.
-
Once the cakes are completely cool, you can assemble and frost them. Spread your favorite frosting (buttercream is classic) between the layers and over the entire cake.
-
Another delicious idea is to melt jam until it reaches a syrup consistency (if using raspberry jam, be sure to strain it to remove the seeds!). Brush the tops of the cake layers with the melted jam before frosting. This adds a layer of fruity sweetness and moisture to the cake.
Expert Tips & Tricks
- Room Temperature Ingredients: Ensure that your butter and eggs are at room temperature for better emulsification and a smoother batter.
- Coffee Temperature: The coffee should be hot when mixed with the cocoa to help it dissolve properly and bloom the cocoa’s flavor.
- Don’t Overbake: Overbaking is the enemy of moist cake. Use a toothpick to check for doneness, and err on the side of slightly underbaked if necessary. The cake will continue to set as it cools.
- Cake Strips: For perfectly level cake layers, use cake strips wrapped around the outside of the pans. These help to insulate the edges of the cake, preventing them from baking faster than the center.
- Frosting Tips: Chill your cake layers for about 30 minutes before frosting. This will make them easier to handle and prevent the frosting from melting.
Serving & Storage Suggestions
Serve this moist and rich chocolate cake chilled or at room temperature. It pairs beautifully with a scoop of vanilla ice cream, fresh berries, or a dusting of cocoa powder.
Store leftover cake in an airtight container at room temperature for up to 3 days, in the refrigerator for up to 5 days, or in the freezer for up to 3 months. Thaw frozen cake in the refrigerator overnight before serving.
Nutritional Information
| Nutrient | Amount per Serving | % Daily Value |
|---|---|---|
| Calories | 508.3 kcal | N/A |
| Calories from Fat | 163 g | 32% |
| Total Fat | 18.1 g | 27% |
| Saturated Fat | 7.6 g | 38% |
| Cholesterol | 99.5 mg | 33% |
| Sodium | 293.8 mg | 12% |
| Total Carbohydrate | 85.3 g | 28% |
| Dietary Fiber | 4.2 g | 16% |
| Sugars | 52 g | 208% |
| Protein | 7.7 g | 15% |
Note: Nutritional information is an estimate and may vary based on specific ingredients and serving sizes.
Variations & Substitutions
- Gluten-Free: Substitute the cake flour with a gluten-free all-purpose flour blend. Be sure to add a binder like xanthan gum to help with the texture.
- Dairy-Free: Use a dairy-free butter alternative and a dairy-free frosting to make this cake dairy-free.
- Different Flavors: Experiment with adding a teaspoon of peppermint extract for a chocolate mint cake, or a tablespoon of instant espresso powder to enhance the chocolate flavor.
- Frosting Variations: Try a chocolate ganache, cream cheese frosting, or even a peanut butter frosting for a different twist.
FAQs (Frequently Asked Questions)
Q: Can I use regular all-purpose flour instead of cake flour?
A: While you can, cake flour is recommended for its lower protein content, which results in a more tender and delicate crumb. If using all-purpose flour, reduce the amount by 2 tablespoons per cup.
Q: Why is coffee used in a chocolate cake recipe?
A: The coffee enhances the chocolate flavor, making it richer and more intense. You won’t taste the coffee itself.
Q: Can I make this cake ahead of time?
A: Absolutely! Bake the cake layers a day or two in advance, wrap them tightly in plastic wrap, and store them at room temperature or in the refrigerator. Frost the cake just before serving.
Q: How do I prevent the cake from sticking to the pan even with parchment paper?
A: Grease the pan thoroughly with butter or cooking spray before adding the parchment paper. This double layer of protection will ensure easy release.
Q: My cake sank in the middle. What happened?
A: This could be due to several factors, including overmixing the batter, not having the oven at the correct temperature, or opening the oven door too frequently during baking.
Final Thoughts
This chocolate cake is more than just a recipe; it’s an invitation to create memories. Whether you’re celebrating a special occasion or simply craving a decadent treat, I hope this recipe becomes a cherished part of your baking repertoire. Don’t be afraid to experiment with different frostings and toppings to make it your own. I encourage you to share your creations and any feedback you may have – happy baking!