
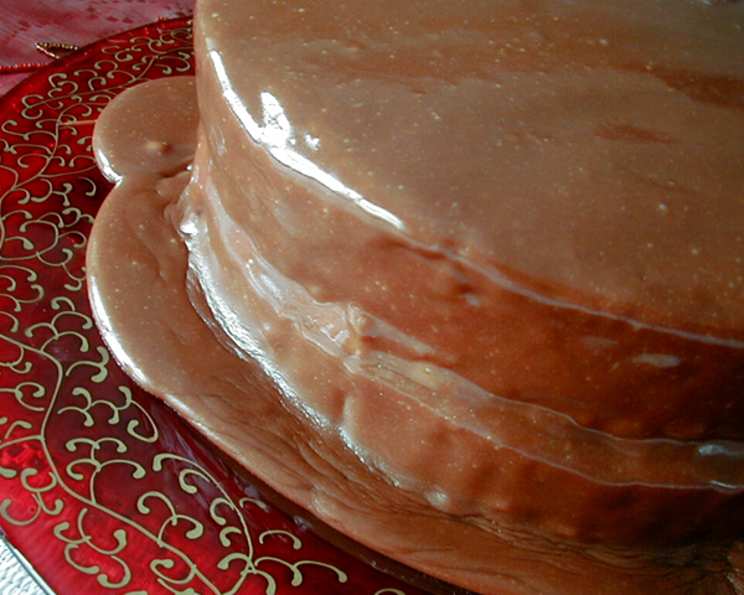
The “Perfect” Chocolate Frosting: A Fudgy Dream Come True
I’ll never forget the first time I tasted this frosting. It was slathered generously between the layers of a slightly lopsided chocolate cake my friend Leeann had made for a potluck. One bite, and I was transported back to childhood, to my grandmother’s kitchen filled with the aroma of freshly baked treats. The frosting was so rich, so intensely chocolatey, and so utterly decadent that it completely overshadowed the cake itself—in the best possible way. I badgered Leeann for the recipe until she finally relented, and it’s been my go-to chocolate frosting ever since.
Recipe Overview
- Prep Time: 10 minutes
- Cook Time: 5-6 minutes
- Total Time: 15 minutes
- Yields: Enough for a 2-layer 9-inch cake
- Dietary Type: Not specified (contains dairy)
Ingredients
- 6 ounces semisweet chocolate (I use 6 squares of Baker’s semisweet chocolate)
- 1/2 cup heavy cream
- 1 cup (2 sticks) unsalted butter, cut into tablespoon-sized pieces
- 2 1/2 cups confectioners’ sugar, sifted
- 1 Tablespoon light corn syrup (optional, for added shine)
Equipment Needed
- Medium-sized pot
- Large mixing bowl
- Electric mixer
- Whisk
- Rubber spatula
Instructions
-
Prepare an ice bath. Place a large bowl filled halfway with ice and water in the sink. Ensure the bowl is large enough to accommodate the pot in which you will be cooking the frosting, but be careful to prevent water from the ice bath from splashing into the frosting later.
-
In a medium-sized pot set over medium-low heat, combine the semisweet chocolate, heavy cream, and butter.
-
Stir the mixture constantly with a rubber spatula or wooden spoon until the butter and chocolate are completely melted and the mixture starts to thicken. This should take about 5-6 minutes.
-
Be vigilant! It is crucial not to let the mixture boil. Boiling can cause the chocolate to seize or the frosting to become grainy. Reduce the heat if necessary.
-
Remove the pot from the heat.
-
Add the sifted confectioners’ sugar to the warm chocolate mixture. Use a whisk to incorporate the sugar, stirring until the frosting is smooth and free of lumps. This should take approximately 1 minute. Sifting is important to prevent lumps in your final frosting.
-
Carefully place the pot on top of the bowl of ice and water, making sure no water splashes into the frosting.
-
Using an electric mixer, beat the frosting on low speed for 4-5 minutes, or until it becomes smooth, thick, and fudgy. The frosting will lighten in color as it’s whipped.
-
Remove the pot from the ice bath. The frosting is now ready to spread onto cooled cake layers.
-
Keep in mind that the frosting will continue to thicken as it cools and sets.
-
If the frosting becomes too firm to spread easily, gently warm it over low heat, stirring constantly, until it reaches your desired spreading consistency. Be careful not to overheat it, or the texture might change.
-
If adding light corn syrup, incorporate it with the heavy cream and chocolate mixture at the beginning of the cooking process. This will give the frosting an extra glossy finish.
Expert Tips & Tricks
- Quality Chocolate Matters: Use the best quality semisweet chocolate you can find. The higher the quality, the richer and more flavorful the frosting will be. I highly recommend using Baker’s brand chocolate squares.
- Sifting is Key: Don’t skip sifting the confectioners’ sugar! This ensures a smooth, lump-free frosting.
- Control the Heat: Keeping the heat low and stirring constantly is crucial for preventing the chocolate from scorching and ensuring even melting.
- Ice Bath Benefits: The ice bath helps to cool the frosting quickly and create a thick, fudgy consistency.
- Frosting Consistency: The texture of the frosting can be adjusted by either adding a small amount of milk or cream if too thick, or more confectioners’ sugar if too thin. Add gradually and mix well after each addition to achieve the desired consistency.
- Make Ahead: This frosting can be made a day or two in advance. Store it in an airtight container in the refrigerator. When ready to use, let it come to room temperature and then rewhip it with an electric mixer until light and fluffy.
- Troubleshooting: If your frosting appears greasy, it’s likely that the butter has separated. Try chilling the frosting for a short time and then re-whipping it. If this doesn’t work, try adding a tablespoon of confectioners’ sugar while mixing.
Serving & Storage Suggestions
This “Perfect” Chocolate Frosting is, well, perfect for frosting cakes (especially chocolate ones!), cupcakes, cookies, brownies, or even spreading on graham crackers for a quick and easy treat. It’s best used on cooled baked goods.
To store leftover frosting, place it in an airtight container and keep it in the refrigerator for up to a week. Before using, allow the frosting to come to room temperature and then re-whip it with an electric mixer until it’s smooth and fluffy again. The frosting can also be frozen for up to two months. Thaw it in the refrigerator overnight and rewhip before using.
Nutritional Information
(Estimated values – will vary based on exact ingredients used)
| Nutrient | Amount per Serving (Approx. 1/12 of recipe) | % Daily Value* |
|---|---|---|
| Calories | 510 kcal | 26% |
| Total Fat | 32g | 49% |
| Saturated Fat | 20g | 100% |
| Cholesterol | 54mg | 18% |
| Sodium | 143mg | 6% |
| Total Carbohydrate | 50g | 17% |
| Dietary Fiber | 2.4g | 9% |
| Sugars | 41g | N/A |
| Protein | 2.2g | 4% |
*Percent Daily Values are based on a 2,000 calorie diet.
Variations & Substitutions
- Dark Chocolate Frosting: Use dark chocolate instead of semisweet chocolate for a richer, more intense chocolate flavor.
- Milk Chocolate Frosting: Substitute milk chocolate for the semisweet chocolate for a sweeter, milder flavor.
- Mocha Frosting: Add 1-2 teaspoons of instant espresso powder to the chocolate mixture for a mocha-flavored frosting.
- Peppermint Frosting: Stir in 1/4 teaspoon of peppermint extract after removing the frosting from the ice bath.
- Salted Chocolate Frosting: Add a pinch of sea salt to the frosting for a delightful salty-sweet contrast.
- Dairy-Free Option: While this recipe uses dairy, a vegan version can be made by substituting a high-quality vegan butter alternative and full-fat coconut cream for the heavy cream. Note that the flavor and texture may vary slightly.
FAQs (Frequently Asked Questions)
Q: Why is my frosting grainy?
A: Grainy frosting is often caused by overheating the chocolate or not sifting the confectioners’ sugar properly. Make sure to keep the heat low while melting the chocolate and sift the sugar to remove any lumps.
Q: My frosting is too thick. What can I do?
A: If your frosting is too thick, add a tablespoon of milk or cream at a time, mixing well after each addition, until you reach the desired consistency.
Q: Can I use salted butter instead of unsalted?
A: While you can use salted butter, the frosting may be slightly saltier. If you do use salted butter, consider reducing the amount of salt you add to the cake recipe.
Q: How long will this frosting last?
A: This frosting will last for up to a week in the refrigerator or two months in the freezer. Be sure to store it in an airtight container.
Q: Can I use this frosting for decorating cupcakes?
A: Yes, this frosting is perfect for decorating cupcakes. It’s thick enough to hold its shape but still creamy enough to spread easily. You can use a piping bag and tips to create decorative swirls.
Final Thoughts
Now that you have the recipe for what I consider the “Perfect” Chocolate Frosting, I urge you to try it yourself. Whether you’re frosting a birthday cake, topping cupcakes, or simply looking for a decadent chocolate fix, this recipe is sure to impress. Don’t be afraid to experiment with variations to create your own signature chocolate frosting. And be sure to share your creations – and any feedback – with me! This frosting pairs beautifully with a rich chocolate cake, a cup of coffee, or even a glass of red wine. Happy baking!