
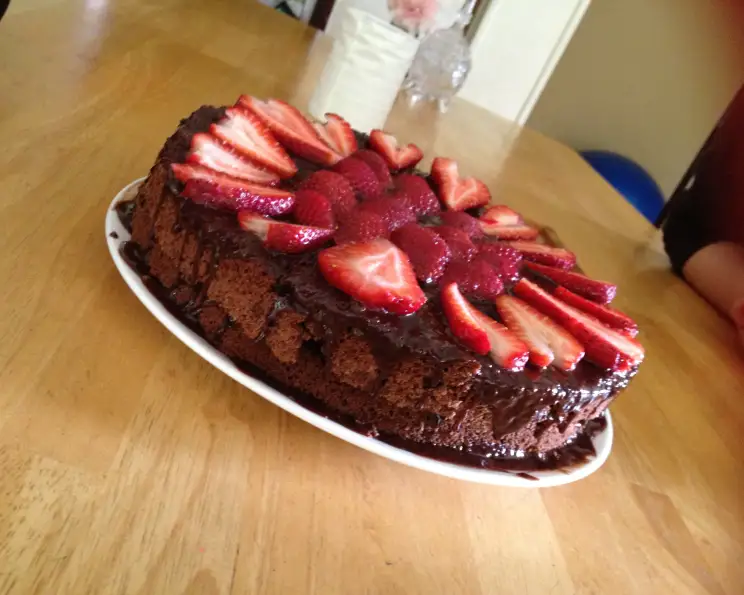
Mom’s Chocolate Chiffon Cake: A Slice of Nostalgia
The aroma alone transported me back to childhood. It was more than just a cake; it was the centerpiece of every birthday celebration, a symbol of Mom’s unwavering love and dedication. The deep, rich chocolate scent mingled with the sweet vanilla, creating an intoxicating fragrance that filled our home. Each tender, airy bite was a comforting embrace, a reminder of simpler times and cherished memories. Even now, decades later, the taste of this cake evokes a powerful wave of nostalgia, a bittersweet longing for those carefree days gathered around the kitchen table.
Recipe Overview
- Prep Time: 25 minutes
- Cook Time: 65 minutes
- Total Time: 1 hour 30 minutes
- Servings: 12-16
- Yield: 1 10-inch cake
- Dietary Type: Not Gluten-Free
Ingredients
- 3⁄4 cup boiling water
- 1⁄2 cup cocoa
- 1 3⁄4 cups flour, sifted
- 1 3⁄4 cups sugar
- 3 teaspoons baking powder
- 1 teaspoon salt
- 1⁄2 cup canola oil
- 7 eggs, separated
- 1 teaspoon vanilla
- 1⁄2 teaspoon cream of tartar
Equipment Needed
- Large mixing bowls
- Electric mixer
- Sifter
- 10-inch tube pan (ungreased)
- Rubber spatula
- Cooling rack
Instructions
- Preheat your oven to 325°F (160°C). It’s essential to have an accurate oven temperature for this cake.
- In a medium bowl, combine the boiling water and cocoa. Stir until smooth, ensuring there are no lumps of cocoa remaining. Set the mixture aside to cool completely. This step is crucial as adding hot cocoa to the other ingredients can affect the texture of the cake.
- In a large bowl, sift together the flour, sugar, baking powder, and salt. Sifting ensures that the dry ingredients are evenly distributed and helps create a lighter cake.
- Make a well in the center of the dry ingredients. Add the canola oil, egg yolks (separated from the whites), the cooled cocoa mixture, and vanilla to the well, in that order.
- Using an electric mixer or a whisk, beat the ingredients slightly with each addition. This incremental addition helps to incorporate everything smoothly.
- Once all the ingredients are added, beat the mixture until it’s smooth and well combined. Don’t overbeat at this stage; just ensure there are no lumps.
- In a separate, very clean large bowl, add the egg whites and cream of tartar.
- Using a clean electric mixer, beat the egg whites with cream of tartar until very stiff peaks form. The peaks should stand straight up when the beaters are lifted. This is a crucial step for creating the chiffon cake’s signature light and airy texture. Be patient and ensure the egg whites are properly whipped.
- Gently pour the chocolate mixture over the beaten egg whites in a thin, steady stream. It’s important to do this slowly and carefully to avoid deflating the egg whites.
- Using a rubber spatula, fold the chocolate mixture into the egg whites gently until just well blended. Be careful not to overmix, as this will deflate the egg whites and result in a denser cake. The batter should be light and airy.
- Pour the batter into an ungreased 10-inch tube pan. Do not grease the pan! The cake needs to cling to the sides of the pan as it rises.
- Bake in the preheated oven at 325°F (160°C) for 55 minutes.
- After 55 minutes, increase the oven temperature to 350°F (175°C) and bake for another 10 minutes. This increase in temperature helps to set the cake properly.
- To check for doneness, insert a cake tester or toothpick into the center of the cake. If it comes out clean, the cake is done.
- Immediately invert the pan and cool the cake completely upside down. This is crucial to prevent the cake from collapsing. Let it cool completely, usually for at least an hour or two.
- Once the cake is completely cooled, carefully run a thin knife or spatula around the edges of the pan to loosen the cake.
- Invert the cake onto a serving plate.
- Ice with chocolate icing, if desired. A simple chocolate ganache or buttercream frosting works beautifully.
Expert Tips & Tricks
- Sifting is key: Don’t skip the sifting step. It aerates the flour and ensures a lighter cake.
- Egg White Purity: Make sure your bowl and beaters are absolutely clean when whipping the egg whites. Any trace of fat will prevent them from reaching stiff peaks.
- Gentle Folding: When folding the chocolate mixture into the egg whites, use a light hand. Overmixing will deflate the batter and result in a dense cake.
- Oven Temperature: Oven temperatures can vary. Use an oven thermometer to ensure accuracy.
- Cooling Upside Down: Don’t be tempted to turn the cake right-side up before it’s completely cooled. Cooling upside down is essential for maintaining the cake’s height and airy texture.
- Make-Ahead Option: You can bake the cake a day ahead and store it, well-wrapped, at room temperature. Frost it just before serving.
Serving & Storage Suggestions
Serve Mom’s Chocolate Chiffon Cake as a centerpiece for special occasions or as a delightful everyday treat. A simple dusting of powdered sugar or a generous slathering of chocolate frosting elevates the presentation. Pair it with a scoop of vanilla ice cream, fresh berries, or a dollop of whipped cream.
For storage, keep leftover cake in an airtight container at room temperature for up to 3 days. For longer storage, refrigerate the cake for up to a week. You can also freeze individual slices, well-wrapped, for up to 2 months. To thaw, simply place the frozen slice in the refrigerator overnight or at room temperature for a few hours.
Nutritional Information
| Nutrient | Amount per Serving | % Daily Value |
|---|---|---|
| Calories | 316 kcal | 16% |
| Total Fat | 12.4g | 19% |
| Saturated Fat | 1.6g | 8% |
| Cholesterol | 108.5mg | 36% |
| Sodium | 327.2mg | 14% |
| Total Carbohydrate | 45.7g | 15% |
| Dietary Fiber | 1.2g | 5% |
| Sugars | 29.3g | – |
| Protein | 6.2g | 12% |
Note: Nutritional information is an estimate and may vary based on specific ingredients and serving size.
Variations & Substitutions
- Gluten-Free: Substitute the all-purpose flour with a gluten-free flour blend. Be sure to include xanthan gum for structure.
- Dairy-Free: While this recipe isn’t easily made dairy-free due to the eggs, you can use a dairy-free chocolate frosting.
- Spice it Up: Add a teaspoon of cinnamon or a pinch of cayenne pepper to the batter for a warm, spicy twist.
- Citrus Zest: Grate the zest of an orange or lemon into the batter for a bright, citrusy flavor.
- Coffee Enhancement: Dissolve a teaspoon of instant coffee granules in the boiling water for an intensified chocolate flavor.
FAQs (Frequently Asked Questions)
Q: Why is it important not to grease the tube pan?
A: The cake batter needs to cling to the sides of the pan as it rises. Greasing the pan prevents this, resulting in a cake that may collapse.
Q: Can I use a different type of oil instead of canola oil?
A: Yes, you can use other neutral-flavored oils like vegetable oil or sunflower oil. Avoid oils with strong flavors like olive oil.
Q: What if I don’t have cream of tartar?
A: Cream of tartar helps to stabilize the egg whites. If you don’t have it, you can omit it, but the egg whites may not whip up as stiffly.
Q: How do I prevent the cake from sticking to the pan when inverting it?
A: Ensure the cake is completely cooled before attempting to remove it from the pan. Run a thin knife or spatula around the edges of the pan to loosen the cake before inverting.
Q: My cake sank in the middle. What did I do wrong?
A: Possible causes include overmixing the batter, not whipping the egg whites to stiff peaks, or opening the oven door too frequently during baking.
Final Thoughts
Mom’s Chocolate Chiffon Cake is more than just a recipe; it’s a legacy of love and tradition. This recipe, passed down through generations, is now yours to create your own cherished memories. Bake it for a special occasion, share it with loved ones, and savor each delicious bite. We’d love to hear your variations and experiences! Perhaps pair it with a dark roast coffee or a sweet dessert wine for an unforgettable treat. Happy baking!