
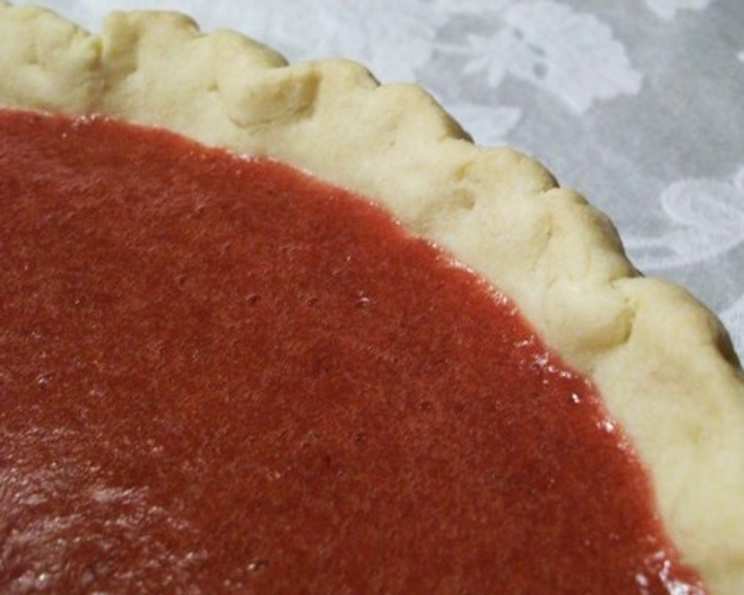
My Mother’s Perfect Pie Crust
The scent of baking pie crust always takes me back to my childhood kitchen, where my mom reigned supreme as the pie queen. I remember standing on a little stool, watching her nimble fingers transform humble ingredients into golden, flaky masterpieces. More than just a recipe, this pie crust is a taste of home, a reminder of the love and warmth that filled our kitchen, and a legacy I’m honored to share. I can almost hear the rolling pin thumping on the counter and the satisfied sigh after the first bite of a warm slice.
Recipe Overview
- Prep Time: 15 minutes
- Chill Time: 30 minutes
- Total Time: 45 minutes
- Yield: 1 pie crust
- Dietary Type: Vegetarian
Ingredients
- 1 cup all-purpose flour
- 1 dash salt
- 1/4 lb (1/2 cup) margarine, chilled
- 1 tablespoon icy cold water, plus more if needed
Equipment Needed
- Small Mixing Bowl (1.5 quart size)
- Rolling Pin
- Clean Countertop
- Pie Dish
Instructions
-
First, set out the chilled margarine stick on the kitchen counter for a brief time to soften it slightly. It should still be firm and cold, but not rock hard. This is important for creating the desired flaky texture.
-
In a small bowl, combine the flour, salt, and margarine. Now comes the crucial part: the mixing. You want to work quickly and efficiently to keep the mixture cold. My preferred method is to use one hand to mix the ingredients while using the other to hold the bowl steady. You can also use two knives or a pastry blender if you prefer.
-
Mix until you have a mixture of pea-sized pebbles. This is where the magic happens! Don’t overmix – you want to see distinct pieces of margarine within the flour. The cold margarine will create pockets of steam during baking, resulting in a light and flaky crust.
-
Chill the mixture for at least 30 minutes in the refrigerator. For an even better result, you can freeze it for a short time and then defrost it slightly before proceeding. This further chills the margarine and helps prevent gluten development, leading to a more tender crust.
-
Remove the bowl from the refrigerator. Now, add 1 tablespoon of icy cold water to the mixture. If needed, add a tiny bit more water, a teaspoon at a time, until the dough just comes together.
-
Mix with one hand until the mixture sticks together in a ball. Again, use the other hand only to hold the bowl steady. Avoid overworking the dough, as this will make it tough.
-
Lightly flour your countertop and rolling pin. This will prevent the dough from sticking.
-
Roll the dough into a circle large enough to fit your pie dish. Aim for an even thickness throughout, about 1/8 inch thick.
-
Gently transfer the rolled dough to your pie dish. Trim any excess dough and crimp the edges to create a decorative border.
-
Follow your pie filling recipe for baking instructions.
Expert Tips & Tricks
-
Keep everything cold: This is the key to a flaky crust. Use chilled margarine, icy cold water, and a cold bowl. If your kitchen is warm, consider chilling the flour and even the rolling pin before starting.
-
Don’t overmix: Overmixing develops the gluten in the flour, resulting in a tough crust. Mix just until the ingredients are combined.
-
Use a light touch: Handle the dough gently when rolling it out and transferring it to the pie dish. Avoid stretching or tearing the dough.
-
Blind Baking: For pies with a wet filling, blind bake the crust first to prevent it from becoming soggy. Prick the bottom of the crust with a fork, line it with parchment paper, and fill it with pie weights or dried beans. Bake at 375°F (190°C) for 15-20 minutes, or until lightly golden. Remove the weights and parchment paper and bake for another 5-10 minutes, or until the crust is golden brown.
-
Margarine Matters: While butter can be substituted, this recipe was developed with margarine in mind. The slightly higher water content in margarine contributes to steam during baking, promoting flakiness. Using European-style butter, with its higher fat content, will also yield excellent results.
Serving & Storage Suggestions
Serve your pie warm or at room temperature, depending on the filling. A dollop of whipped cream or a scoop of vanilla ice cream is always a welcome addition.
Leftover pie can be stored in the refrigerator for up to 3-4 days. Cover it loosely with plastic wrap or aluminum foil to prevent it from drying out. For longer storage, you can freeze the pie for up to 2-3 months. Wrap it tightly in plastic wrap and then aluminum foil. Thaw the pie in the refrigerator overnight before serving.
Nutritional Information
Please note that nutritional information will vary based on the specific margarine used and the size of the pie slices.
| Nutrient | Amount per Serving | % Daily Value |
|---|---|---|
| Calories | 250 kcal | 13% |
| Total Fat | 18g | 28% |
| Saturated Fat | 4g | 20% |
| Cholesterol | 0mg | 0% |
| Sodium | 250mg | 11% |
| Total Carbohydrate | 20g | 7% |
| Dietary Fiber | 1g | 4% |
| Sugars | 1g | 2% |
| Protein | 3g | 6% |
Variations & Substitutions
- Gluten-Free Crust: Substitute the all-purpose flour with a gluten-free blend designed for baking. You may need to adjust the amount of water slightly, as gluten-free flours tend to absorb more liquid.
- Butter Crust: Substitute the margarine with an equal amount of chilled, unsalted butter. The flavor will be richer, but the crust may be slightly less flaky.
- Vegan Crust: Ensure the margarine is vegan-friendly. Many brands offer plant-based alternatives.
- Sweet Crust: Add 1-2 tablespoons of granulated sugar to the flour mixture for a slightly sweeter crust, perfect for fruit pies.
- Herb Crust: Add 1-2 teaspoons of dried herbs, such as thyme or rosemary, to the flour mixture for a savory crust, ideal for quiches or pot pies.
FAQs (Frequently Asked Questions)
Q: Why is my pie crust tough?
A: Overmixing the dough is the most common cause of a tough pie crust. Avoid overworking the dough when mixing the ingredients and rolling it out.
Q: Can I make the dough ahead of time?
A: Absolutely! In fact, chilling the dough for at least 30 minutes is essential for developing a flaky crust. You can even make the dough a day or two in advance and store it in the refrigerator, wrapped tightly in plastic wrap.
Q: My pie crust shrinks when I bake it. What can I do to prevent this?
A: Make sure the dough is not stretched too thin when rolling it out. Also, allow the dough to rest in the pie dish for about 15-20 minutes before baking to allow the gluten to relax. Prick the bottom of the crust with a fork to prevent it from puffing up.
Q: Can I use a food processor to make the dough?
A: Yes, you can use a food processor, but be careful not to overprocess the dough. Pulse the ingredients until they resemble coarse crumbs, then add the water and pulse until the dough just comes together.
Q: What is the best way to crimp the edges of the pie crust?
A: There are many ways to crimp the edges of a pie crust. You can use a fork to press down around the edge, or you can use your fingers to create a decorative pattern. Get creative and have fun!
Final Thoughts
This pie crust recipe is more than just a set of instructions; it’s a connection to my past and a gift I’m excited to pass on to you. Don’t be intimidated – with a little practice, you’ll be creating beautiful, flaky pie crusts in no time. I encourage you to give it a try, experiment with different fillings, and share your creations with loved ones. And please, let me know how it turns out! I’d love to hear your feedback and see your pie-making adventures. Perhaps pair it with a homemade apple pie filling or a creamy chocolate ganache – the possibilities are endless! Happy baking!