
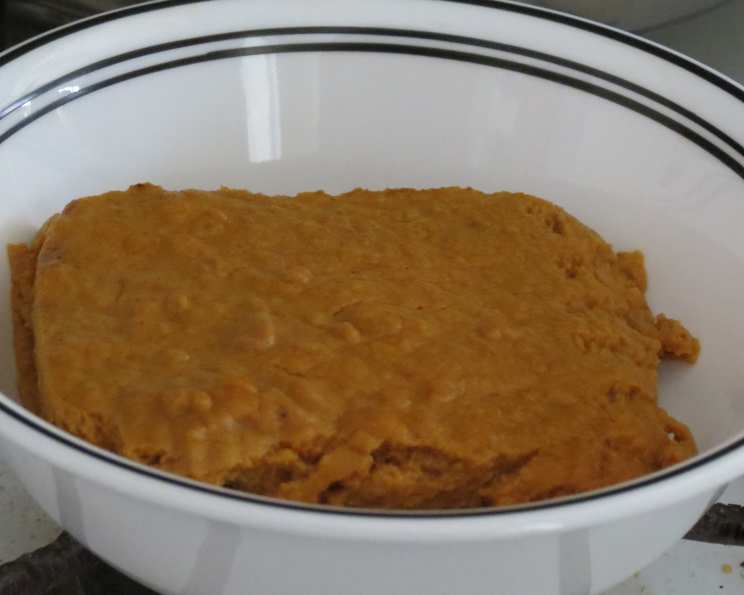
My Skinny Pumpkin Pie: Crustless, Low Fat, Low Sugar
Every Thanksgiving, amidst the towering displays of candied yams and the centerpiece turkey, my grandmother always presented her pumpkin pie. It was a masterpiece of flaky crust and rich, spiced filling. Yet, after years of indulgence, I craved a lighter version, one that wouldn’t leave me feeling weighed down but still capture the essence of that beloved holiday flavor. That’s when I embarked on a mission to create a “skinny” pumpkin pie – crustless, lower in fat, and with just a touch of sweetness, allowing the true pumpkin flavor to shine.
Recipe Overview
- Prep Time: 5 minutes
- Cook Time: 30 minutes
- Total Time: 35 minutes
- Servings: 4-6
- Yield: 1 pie
- Dietary Type: Low Fat, Low Sugar
Ingredients
- 3 large eggs (or 2 jumbo eggs)
- 1 cup unsweetened vanilla almond milk
- 1 1/4 – 1 1/2 teaspoons pumpkin pie spice
- 5 drops liquid stevia extract (or to taste)
- 1 tablespoon agave nectar (or to taste)
- 1 (15 ounce) can pumpkin puree
Equipment Needed
- 8-inch square baking pan
- Blender or whisk
- Mixing bowl
- Measuring cups and spoons
Instructions
- Preheat your oven to 375 degrees F (190 degrees C).
- In a blender or using a whisk in a large bowl, combine the almond milk and eggs. Blend or whisk until well combined and slightly frothy. This creates the base of your pie filling.
- Add the pumpkin pie spice to the milk and egg mixture. Stir thoroughly until the spices are evenly distributed. This ensures that every bite is filled with warm, comforting spice notes.
- Now, sweeten the mixture. Add the liquid stevia extract and agave nectar. Stir well to combine. Taste and adjust the amount of sweetener according to your preference. Remember that the more spice you use, the more sweetener you might need to balance the flavor.
- Add the pumpkin puree to the mixture a few spoonfuls at a time, blending or whisking after each addition until smooth. This gradual incorporation prevents lumps and creates a silky texture. Make sure the puree is well combined.
- Pour the pumpkin mixture into an ungreased 8-inch square baking pan. Avoid using a 9-inch round pie pan, as the batter may overflow.
- Bake in the preheated oven for approximately 30 minutes, or until a small knife inserted into the center comes out clean. The edges should be set, and the center should have a slight jiggle.
- Once baked, remove the pie from the oven and allow it to cool completely in the pan.
- After cooling, refrigerate the pie for at least 2 hours before serving. This allows the flavors to meld and the texture to firm up.
Expert Tips & Tricks
- Spice it right: Be cautious with the amount of pumpkin pie spice. Too much can overpower the pumpkin flavor and require excessive sweetener. Start with 1 1/4 teaspoons and adjust to your liking.
- Sweetness control: Stevia and agave nectar are excellent low-sugar sweeteners, but their intensity can vary. Start with a small amount and taste as you go. You can always add more, but you can’t take it away.
- Texture perfection: Achieving the right texture is crucial. If your pie seems too watery after baking, try adding a tablespoon of cornstarch to the batter before baking. This will help thicken the filling.
- Prevent cracking: To prevent cracking, you can bake the pie in a water bath (bain-marie). Place the baking pan inside a larger pan and add hot water until it reaches halfway up the sides of the pie pan. This provides gentle, even heat and helps prevent the pie from cracking.
- Spice variation: You can adjust the spice profile to suit your taste. Add a pinch of nutmeg, ginger, or cloves for a personalized touch.
- Blending: Using a blender ensures a perfectly smooth filling, free of any pumpkin clumps. If you don’t have a blender, make sure to whisk the pumpkin puree very thoroughly.
Serving & Storage Suggestions
This “skinny” pumpkin pie is best served chilled. You can enjoy it plain or add a dollop of light whipped cream or a sprinkle of cinnamon for extra flavor.
Storage:
- Refrigerator: Store leftover pie in an airtight container in the refrigerator for up to 3-4 days.
- Freezer: For longer storage, you can freeze the pie. Wrap it tightly in plastic wrap and then in aluminum foil. It can be frozen for up to 2-3 months. Thaw in the refrigerator overnight before serving.
Nutritional Information
Please note that the nutritional information is an estimate and may vary based on specific ingredients and serving sizes.
| Nutrient | Amount per Serving | % Daily Value |
|---|---|---|
| Calories | 90 kcal | 5% |
| Total Fat | 3g | 4% |
| Saturated Fat | 1g | 5% |
| Cholesterol | 70mg | 23% |
| Sodium | 55mg | 2% |
| Total Carbohydrate | 8g | 3% |
| Dietary Fiber | 1g | 4% |
| Sugars | 2g | 4% |
| Protein | 6g | 12% |
Variations & Substitutions
- Dairy-Free: This recipe is already dairy-free, using unsweetened almond milk. You can substitute it with any other plant-based milk, such as soy, oat, or cashew milk.
- Extra Richness: For a richer flavor, replace 1/4 cup of the almond milk with light coconut milk or a tablespoon of cream cheese.
- Sweetener Alternatives: If you prefer not to use stevia and agave, you can substitute them with other natural sweeteners like monk fruit sweetener, erythritol, or a small amount of maple syrup. Adjust the amount to taste.
- Spice Variations: Experiment with different spice combinations. Add a pinch of cardamom, allspice, or even a dash of black pepper for a unique flavor twist.
- Nutty Topping: Sprinkle chopped pecans or walnuts on top of the pie before baking for added texture and flavor.
FAQs (Frequently Asked Questions)
Q: Can I use a different size baking pan?
A: It’s best to stick with an 8-inch square pan, as the recipe is formulated for that size. Using a larger pan might result in a thinner pie, while a smaller pan could cause overflow.
Q: How can I tell when the pie is done?
A: The pie is done when the edges are set, and a small knife inserted into the center comes out clean or with just a few moist crumbs. The center should have a slight jiggle.
Q: Why is my pie watery?
A: If your pie is watery, it might not have been baked long enough, or the oven temperature might have been too low. Ensure your oven is properly preheated and bake until the center is set. You can also add a tablespoon of cornstarch to the batter to help thicken it.
Q: Can I make this pie ahead of time?
A: Yes, this pie is perfect for making ahead of time. In fact, it’s best to refrigerate it for at least 2 hours before serving to allow the flavors to meld and the texture to firm up.
Q: Is this pie suitable for people with diabetes?
A: This pie is lower in sugar than traditional pumpkin pie, but it still contains some natural sugars from the pumpkin puree and agave nectar. Individuals with diabetes should monitor their blood sugar levels and consult with a healthcare professional or registered dietitian to determine if this pie is appropriate for their dietary needs.
Final Thoughts
I hope this “Skinny Pumpkin Pie” recipe brings you the joy of fall flavors without the guilt. It’s a testament to the fact that deliciousness doesn’t always have to come with a hefty calorie price tag. So, go ahead, bake this treat, share it with your loved ones, and savor the warm, comforting taste of pumpkin spice. Feel free to experiment with the spices and sweeteners to create your perfect, personalized version. And don’t forget to let me know what you think! Happy baking!