
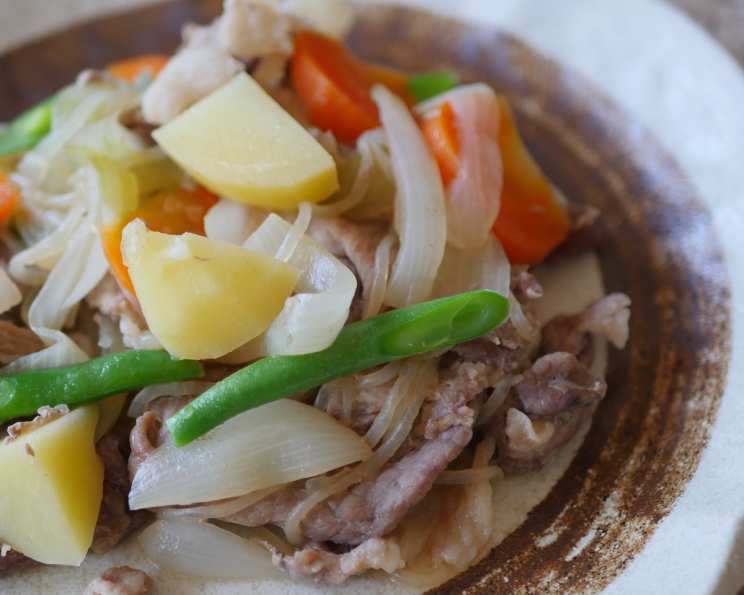
Nikujaga: A Heartwarming Taste of Home
The scent of simmering soy sauce, sweet mirin, and tender beef always transports me back to my childhood. My grandmother, a tiny but formidable woman, would spend hours in her kitchen, creating dishes that nourished both body and soul. Nikujaga, a humble yet deeply comforting Japanese stew, was a regular feature on her table, a symbol of warmth, family, and the simple joys of life. Each bite was a reminder of her unwavering love, her gentle smile, and the feeling of being utterly safe and cherished.
Recipe Overview
- Prep Time: 20 minutes
- Cook Time: 10 minutes
- Total Time: 30 minutes
- Servings: 2
- Dietary Type: Adaptable (can be made gluten-free with tamari)
Ingredients
- 200 g thinly sliced beef (beef scraps or “komagire”)
- 1 tablespoon sugar
- 1 tablespoon soy sauce
- 1 tablespoon sake
- 1 medium potato
- ½ piece carrot
- 1 onion
- 30 g shredded Konnyaku (shirataki)
- 6 pieces green beans
Equipment Needed
- Microwave pressure cooker
- Strainer
- Cutting board
- Knife
- Scissors (optional)
Instructions
-
Begin by preparing the beef. In a bowl, combine the thinly sliced beef with 1 tablespoon of sugar, 1 tablespoon of soy sauce, and 1 tablespoon of sake. Mix thoroughly to ensure the beef is evenly coated. Let this mixture marinate for approximately 15 minutes, allowing the flavors to meld and the beef to tenderize.
-
While the beef is marinating, prepare the vegetables. Peel the potato and carrot. Cut both the potato and carrot into bite-sized pieces, about 1-inch cubes. The size is important for even cooking within the limited cooking time.
-
Next, address the shirataki. This noodle, made from konjac yam, often has a distinct aroma that some find unpleasant. To mitigate this, drain the liquid from the package and place the shirataki in a strainer. Pour a generous amount of hot water over the shirataki to help neutralize the odor. If the strands are excessively long, use scissors to cut them into more manageable lengths.
-
Prepare the green beans. Remove any tough fibers along the sides of the green beans. Diagonally slice each green bean into 2-3 pieces, depending on its length. This not only makes them easier to eat but also adds visual appeal.
-
Now it’s time to combine the ingredients in the microwave pressure cooker. Place the chopped potato, carrot, onion, and shirataki into the cooker. Add the marinated beef, ensuring you include all the marinade, as this will form the base of the flavorful sauce. Mix all the ingredients together thoroughly.
-
Secure the lid of the microwave pressure cooker tightly, following the manufacturer’s instructions. Cook in the microwave for 8 minutes, using a power setting of 600W. This is a crucial step, and using the correct wattage is important for proper cooking and pressure regulation.
-
After the initial 8 minutes of cooking, do not immediately open the pressure cooker. Allow the pressure indicator to fully descend on its own. This usually takes a few minutes and is essential for safety. Once the pressure is released and the indicator is down, carefully open the cooker.
-
Add the sliced green beans to the top of the mixture. Replace the lid on the microwave pressure cooker, but do not reset the timer. Allow the residual steam within the cooker to gently cook the green beans for approximately 2 minutes. This method ensures they are tender-crisp and retain their vibrant color.
-
Finally, carefully open the microwave pressure cooker. Gently mix all the ingredients together, taking care not to mash the potatoes. Transfer the nikujaga to a serving plate and serve immediately as a hearty side dish or a comforting main course.
Expert Tips & Tricks
- For a richer flavor, consider adding a small piece of kombu (dried kelp) to the microwave pressure cooker during the cooking process. Remove it before serving.
- If you prefer a sweeter flavor profile, you can add a teaspoon of mirin alongside the sugar.
- Be careful not to overcook the potatoes, as they can become mushy. Check their tenderness by piercing them with a fork.
- If you don’t have a microwave pressure cooker, you can cook this dish on the stovetop. Use a heavy-bottomed pot and simmer the ingredients over low heat for about 20-25 minutes, or until the vegetables are tender.
- For a deeper, more developed flavor, brown the beef in a pan before adding it to the other ingredients. This will add an extra layer of umami to the dish.
Serving & Storage Suggestions
Nikujaga is best served warm, directly from the microwave pressure cooker or stovetop. Garnish with a sprinkle of toasted sesame seeds or chopped scallions for added visual appeal. It pairs beautifully with steamed rice, miso soup, and Japanese pickles (tsukemono).
Leftover nikujaga can be stored in an airtight container in the refrigerator for up to 3 days. Reheat gently in the microwave or on the stovetop until warmed through. You can also freeze nikujaga for longer storage (up to 1 month), but the texture of the potatoes may change slightly upon thawing.
Nutritional Information
| Nutrient | Amount per Serving | % Daily Value |
|---|---|---|
| Calories | 297.6 kcal | N/A |
| Calories from Fat | N/A | 48% |
| Total Fat | 15.8 g | 24% |
| Saturated Fat | 6.5 g | 32% |
| Cholesterol | 21.8 mg | 7% |
| Sodium | 518.8 mg | 21% |
| Total Carbohydrate | 32.1 g | 10% |
| Dietary Fiber | 3.8 g | 15% |
| Sugars | 10.2 g | 40% |
| Protein | 5.9 g | 11% |
Variations & Substitutions
- Vegan Nikujaga: Substitute the beef with firm tofu, cut into bite-sized pieces. You can also use shiitake mushrooms for added umami flavor.
- Gluten-Free Nikujaga: Replace the soy sauce with tamari, a gluten-free soy sauce alternative.
- Chicken Nikujaga: Use thinly sliced chicken thigh instead of beef. Adjust cooking time as needed.
- Spicy Nikujaga: Add a pinch of red pepper flakes or a small amount of gochujang (Korean chili paste) for a touch of heat.
- Vegetable Variations: Feel free to add other vegetables like burdock root (gobo) or snow peas for added texture and flavor.
FAQs (Frequently Asked Questions)
Q: Can I use regular potatoes instead of a specific type?
A: Yes, you can use any type of potato you prefer, but waxy potatoes like Yukon Gold will hold their shape better during cooking than starchy potatoes like Russets.
Q: What if I don’t have sake?
A: If you don’t have sake on hand, you can substitute it with dry sherry or rice wine vinegar. Use it sparingly, as these substitutes can have a stronger flavor.
Q: My nikujaga turned out too salty. What can I do?
A: If your nikujaga is too salty, you can add a small amount of water or dashi (Japanese soup stock) to dilute the sauce. You can also add a pinch of sugar to balance the flavors.
Q: How do I prevent the potatoes from sticking to the bottom of the microwave pressure cooker?
A: Make sure there is enough liquid in the cooker to prevent sticking. Also, avoid overcrowding the cooker.
Q: Can I make this ahead of time?
A: Yes, nikujaga can be made ahead of time and reheated. The flavors often meld together even more beautifully when it sits for a day or two.
Final Thoughts
Nikujaga, in its humble simplicity, is more than just a recipe; it’s a story told in flavors, a connection to family, and a reminder of the comfort that good food can bring. I encourage you to try this recipe and experience the warmth and nostalgia that this dish evokes. Feel free to experiment with variations and substitutions to make it your own. And if you do, please share your feedback – I’d love to hear your experience! Perhaps serve it alongside a crisp, dry sake or a chilled glass of green tea for a truly authentic Japanese experience. Bon appétit!