
Springfield Cashew Chicken: A Taste of the Ozarks
I’ll never forget the first time I tried Springfield Cashew Chicken. It was a rainy afternoon, the kind where the Ozark hills seem to disappear into the mist. I stumbled into a small, unassuming restaurant, drawn in by the aroma of something savory and slightly sweet. One bite, and I was hooked. The crispy chicken, the rich sauce, the satisfying crunch of the cashews – it was comfort food elevated, a symphony of textures and flavors that instantly warmed me from the inside out. This dish isn’t just food; it’s a taste of Springfield, a culinary hug that I’m excited to share with you.
Recipe Overview
- Prep Time: 20 minutes
- Cook Time: 25 minutes
- Total Time: 45 minutes
- Servings: 6
- Yield: About 8 cups
- Dietary Type: Not suitable for Gluten-Free or Vegan diets
Ingredients
- 4 cups boneless, skinless chicken, cut into 1-inch chunks
- 2 cups all-purpose flour
- 2 teaspoons baking soda
- 5 tablespoons cornstarch, divided
- 3 large eggs, beaten
- Peanut oil, for frying
- Cooked rice, for serving
Sauce
- 2 cups chicken broth
- 2 tablespoons oyster sauce
- 1 tablespoon granulated sugar
- 2 tablespoons soy sauce
- 1 teaspoon black pepper
Garnish
- 2 cups roasted cashews
- 1/8 cup green onion, chopped
Equipment Needed
- Large mixing bowls (at least 3)
- Deep fryer or large, heavy-bottomed pot
- Slotted spoon or spider
- Paper towels
- Large skillet or wok
- Whisk
- Measuring cups and spoons
Instructions
- In a large mixing bowl, combine the flour, baking soda, and 1 tablespoon of cornstarch. Whisk thoroughly to ensure even distribution of the baking soda. This mixture will be the coating for the chicken.
- In a separate bowl, place the beaten eggs. Make sure the eggs are well beaten to create a smooth, consistent dipping liquid.
- Now, it’s time to coat the chicken. Dip each chicken piece first into the flour mixture, ensuring it’s fully coated. Then, dip it into the beaten eggs, allowing any excess to drip off. Finally, dip the chicken back into the flour mixture, pressing lightly to ensure a thick, even coating. This double coating is crucial for achieving that signature crispy texture.
- Heat the peanut oil in a deep fryer or a large, heavy-bottomed pot to 350°F (175°C). If using a pot, ensure there’s enough oil to submerge the chicken pieces.
- Carefully add the coated chicken to the hot oil in batches, being careful not to overcrowd the fryer or pot. Overcrowding will lower the oil temperature and result in soggy chicken.
- Fry the chicken for approximately 5-7 minutes per batch, or until golden brown and cooked through. The internal temperature of the chicken should reach 165°F (74°C). Use a meat thermometer to ensure doneness.
- Remove the fried chicken with a slotted spoon or spider and place it on a plate lined with paper towels to drain excess oil.
- While the chicken is frying, prepare the sauce. In a large skillet or wok, combine the chicken broth, oyster sauce, sugar, soy sauce, pepper, and the remaining 4 tablespoons of cornstarch.
- Whisk the sauce ingredients together until the cornstarch is fully dissolved. This prevents lumps from forming during cooking.
- Bring the sauce to a simmer over medium heat, stirring constantly. Cook until the sauce thickens to your desired consistency, about 3-5 minutes. It should coat the back of a spoon.
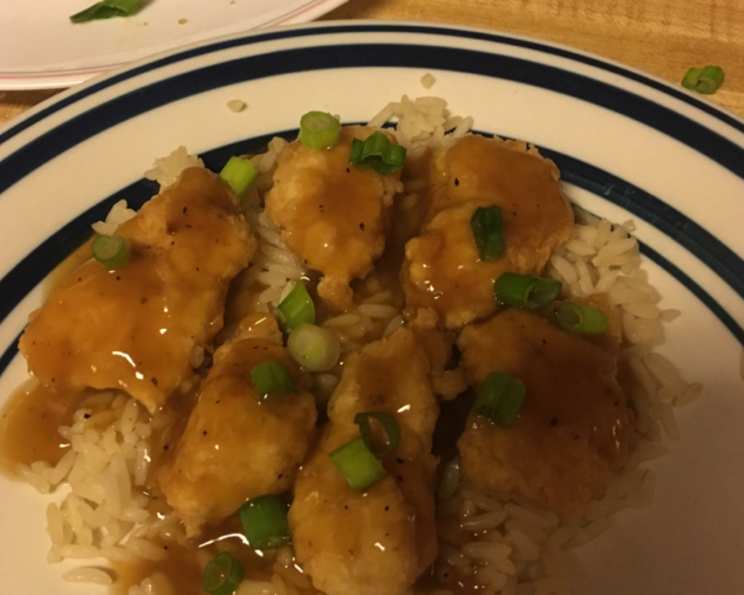
- To assemble the dish, place a generous serving of cooked rice on each plate.
- Top the rice with the fried chicken.
- Pour the sauce generously over the chicken.
- Garnish with roasted cashews and chopped green onion. Serve immediately.
Expert Tips & Tricks
- Crispy Chicken Secret: The double coating of flour is key for ultimate crispiness. Don’t skip this step!
- Oil Temperature: Maintaining the correct oil temperature is crucial. Too low, and the chicken will be greasy; too high, and it will burn before it cooks through. Use a thermometer to monitor the oil temperature.
- Make-Ahead Tip: You can prepare the sauce ahead of time and store it in the refrigerator. Simply reheat it before serving. You can also pre-cut the chicken into chunks and store it in the refrigerator. Just remember to bring it to room temperature before cooking.
- Sauce Consistency: Adjust the amount of cornstarch in the sauce to achieve your preferred thickness. For a thinner sauce, reduce the cornstarch by a tablespoon. For a thicker sauce, add an extra tablespoon.
- Cashew Toasting: For extra flavor, lightly toast the cashews in a dry skillet before garnishing. Be careful not to burn them!
Serving & Storage Suggestions
Springfield Cashew Chicken is best served immediately, while the chicken is still crispy and the sauce is hot. Serve it alongside a simple side dish like steamed broccoli or stir-fried vegetables.
Leftovers can be stored in an airtight container in the refrigerator for up to 3 days. Reheat gently in a skillet or microwave. Note that the chicken will lose some of its crispness upon reheating. To try and revive the chicken crispness, you can reheat it in an air fryer.
Unfortunately, this dish doesn’t freeze well due to the sauce and the fried chicken. The texture will change significantly.
Nutritional Information
| Nutrient | Amount per Serving | % Daily Value |
|---|---|---|
| Calories | 504 kcal | N/A |
| Calories from Fat | N/A | 44% |
| Total Fat | 24.5 g | 37% |
| Saturated Fat | 5.2 g | 25% |
| Cholesterol | 93 mg | 31% |
| Sodium | 1497.2 mg | 62% |
| Total Carbohydrate | 56.8 g | 18% |
| Dietary Fiber | 2.8 g | 11% |
| Sugars | 5 g | N/A |
| Protein | 16.9 g | 33% |
Note: Nutritional information is an estimate and may vary based on specific ingredients and cooking methods.
Variations & Substitutions
- Gluten-Free: Unfortunately, this recipe is heavily reliant on gluten-containing ingredients. Substituting gluten-free flour will affect the texture significantly.
- Spicy Kick: Add a pinch of red pepper flakes to the sauce for a touch of heat.
- Vegetarian Option: While not truly authentic, you could substitute the chicken with fried tofu or cauliflower florets. Adjust the cooking time accordingly.
- Nut Allergy: If you have a nut allergy, omit the cashews or substitute them with sunflower seeds.
- Healthier Sauce: Reduce the amount of sugar in the sauce or use a sugar substitute. You can also use low-sodium soy sauce to reduce the sodium content.
FAQs (Frequently Asked Questions)
Q: Can I use chicken thighs instead of chicken breasts?
A: Yes, you can! Chicken thighs will result in a richer flavor and more tender texture. Just make sure to trim any excess fat before cutting them into chunks.
Q: Can I bake the chicken instead of frying it?
A: While frying is traditional, you can bake the chicken for a healthier option. Preheat your oven to 400°F (200°C), place the coated chicken on a baking sheet, and bake for 20-25 minutes, or until cooked through. It won’t be as crispy as fried chicken, but it will still be delicious.
Q: Can I make the sauce ahead of time?
A: Absolutely! The sauce can be made up to 2-3 days in advance and stored in an airtight container in the refrigerator. Simply reheat it before serving.
Q: My sauce is too thick. What can I do?
A: Add a little bit of chicken broth or water, one tablespoon at a time, until you reach your desired consistency.
Q: Can I use different types of nuts besides cashews?
A: While cashews are traditional, you can experiment with other nuts like peanuts or almonds. Just be sure to roast them beforehand for the best flavor.
Final Thoughts
Springfield Cashew Chicken is more than just a recipe; it’s a culinary experience, a taste of the Ozarks that you can recreate in your own kitchen. Don’t be intimidated by the frying – with a little practice, you’ll be whipping up this regional favorite in no time. I encourage you to try this recipe, experiment with variations, and make it your own. Share your creations and feedback, and consider pairing it with a crisp, dry Riesling to complement the sweet and savory flavors. Happy cooking!