
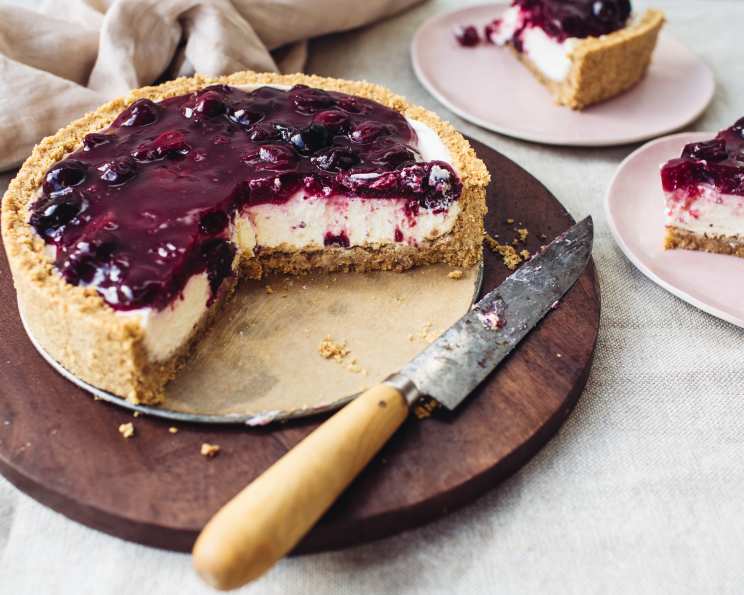
No-Bake Cherry Cheesecake Pie: A Slice of Nostalgia
My earliest memories of family gatherings are filled with the vibrant red of cherry pie filling, always a comforting presence on the dessert table. This No-Bake Cherry Cheesecake Pie evokes that same sense of warmth and simplicity. It’s the kind of dessert that doesn’t demand perfection, only enjoyment, a sweet reminder of carefree afternoons spent with loved ones. It’s a no-fuss dessert that always brings a smile.
Recipe Overview
- Prep Time: 15 minutes
- Cook Time: 0 minutes
- Total Time: 3 hours 15 minutes
- Servings: 8
- Yield: 1 pie
- Dietary Type: Vegetarian
Ingredients
- 1 prepared graham cracker crust
- 1 (8 ounce) package cream cheese, softened
- 1/2 cup sugar
- 1 (8 ounce) container frozen dessert topping (like Cool Whip), thawed
- 1 (19 ounce) can cherry pie filling (like Comstock)
Equipment Needed
- Mixing Bowl
- Electric Mixer (handheld or stand mixer)
- Rubber Spatula
- Measuring Cups
- Measuring Spoons
Instructions
- In a medium-sized mixing bowl, combine the softened cream cheese and sugar.
- Using an electric mixer, blend the cream cheese and sugar together until smooth and creamy. Ensure there are no lumps of cream cheese remaining.
- Gently fold in the thawed frozen dessert topping (like Cool Whip) into the cream cheese mixture using a rubber spatula. Be careful not to overmix; fold until just combined to maintain the light and airy texture.
- Press the cream cheese mixture into the prepared graham cracker crust. Use the spatula to spread the mixture evenly across the bottom of the crust and up the sides.
- Make sure the bottom of the graham cracker crust is completely covered. Then, create a ring of the cream cheese mixture about 1 inch wide around the edge of the pie, leaving an open space in the center. This ring will act as a dam to hold the cherry pie filling.
- Pour the cherry pie filling into the center of the cream cheese mixture, filling the open space. Spread the cherry pie filling evenly.
- Chill the pie in the refrigerator for at least 3 hours, or preferably overnight, to allow the cream cheese filling to firm up and set completely. This step is crucial for a well-formed cheesecake pie.
Expert Tips & Tricks
- Soften the Cream Cheese Completely: This is key to a smooth and lump-free filling. Leave the cream cheese at room temperature for at least an hour, or even longer, before using. You can also microwave it in 15-second intervals, but be careful not to melt it.
- Don’t Overmix: Overmixing after adding the whipped topping can deflate it, resulting in a less airy filling. Fold gently until just combined.
- Graham Cracker Crust Options: While a store-bought crust is convenient, you can easily make your own. Simply combine graham cracker crumbs, melted butter, and sugar, then press into a pie plate and chill before filling.
- Get Creative with Toppings: While cherry is classic, feel free to experiment with other pie fillings like blueberry, strawberry, or even a chocolate ganache drizzle.
- For a Firmer Pie: If you prefer a firmer cheesecake, you can add a tablespoon of gelatin to the cream cheese mixture. Bloom the gelatin in cold water first, then melt it before incorporating it.
- Prevent a Soggy Crust: Brushing the bottom of the graham cracker crust with melted chocolate or a thin layer of jam before adding the filling can help prevent it from becoming soggy.
- Make Ahead: This pie is perfect for making ahead of time. It can be assembled and stored in the refrigerator for up to 2 days before serving.
Serving & Storage Suggestions
To serve, slice the chilled No-Bake Cherry Cheesecake Pie into wedges and present on dessert plates. For an extra touch, garnish with a dollop of whipped cream and a fresh cherry. This pie is best served cold, straight from the refrigerator.
Leftovers should be stored in an airtight container in the refrigerator. It will keep well for up to 3 days. While you can technically freeze this pie, the texture of the cream cheese and whipped topping may change upon thawing, so it’s best enjoyed fresh or within a few days of making. We do not recommend leaving it at room temperature for more than 2 hours, as the cream cheese can spoil.
Nutritional Information
| Nutrient | Amount per Serving | % Daily Value |
|---|---|---|
| Calories | 460.7 kcal | N/A |
| Calories from Fat | 219 g | 48% |
| Total Fat | 24.4 g | 37% |
| Saturated Fat | 13.2 g | 66% |
| Cholesterol | 31.2 mg | 10% |
| Sodium | 281.1 mg | 11% |
| Total Carbohydrate | 58.5 g | 19% |
| Dietary Fiber | 0.8 g | 3% |
| Sugars | 31.4 g | 125% |
| Protein | 3.5 g | 7% |
Variations & Substitutions
- Gluten-Free: Use a gluten-free graham cracker crust. Many brands are available in stores or online, or you can make your own using gluten-free graham-style crackers.
- Dairy-Free: Substitute the cream cheese with a plant-based cream cheese alternative and the frozen dessert topping with a dairy-free whipped topping (like coconut whipped cream or a soy-based topping).
- Different Fruit Fillings: Get creative with your favorite fruit fillings! Blueberry, strawberry, raspberry, or even a mixed berry filling would be delicious. You can also use a homemade fruit compote for a more rustic touch.
- Chocolate Crust: Use a chocolate graham cracker crust for a richer flavor.
- Citrus Zest: Add a teaspoon of lemon or orange zest to the cream cheese mixture for a bright and zesty twist.
- Amaretto Flavor: Add a teaspoon of amaretto extract to the cream cheese mixture for a subtle almond flavor that pairs well with cherries.
- Different Extracts: Try vanilla, almond, or even rum extract for a twist.
FAQs (Frequently Asked Questions)
Q: Can I use a homemade graham cracker crust?
A: Absolutely! A homemade graham cracker crust is a great way to customize the flavor and texture of your pie. Simply combine graham cracker crumbs, melted butter, and sugar, then press into a pie plate and chill before filling.
Q: How do I prevent the crust from getting soggy?
A: Brushing the bottom of the graham cracker crust with melted chocolate or a thin layer of jam before adding the filling can help create a barrier and prevent it from becoming soggy.
Q: Can I use fresh cherries instead of canned pie filling?
A: Yes, you can use fresh cherries, but you’ll need to pit them and cook them down into a pie filling consistency with sugar and a thickening agent like cornstarch or tapioca starch. Make sure the filling has cooled before adding it to the cheesecake.
Q: How long does this pie last in the refrigerator?
A: This pie will keep well in the refrigerator for up to 3 days, stored in an airtight container.
Q: Can I freeze this pie?
A: While you can freeze this pie, the texture of the cream cheese and whipped topping may change upon thawing. If you do freeze it, wrap it tightly in plastic wrap and then in foil. Thaw it in the refrigerator overnight before serving.
Final Thoughts
This No-Bake Cherry Cheesecake Pie is a guaranteed crowd-pleaser, perfect for potlucks, summer gatherings, or a simple weeknight dessert. Its ease of preparation makes it accessible to bakers of all levels, and its delightful flavor will transport you back to carefree days. Don’t hesitate to experiment with different fruit fillings or crust variations to create your own signature version. Share your creations and feedback, and let’s spread the joy of this timeless treat! Consider serving it with a scoop of vanilla ice cream or a refreshing glass of lemonade for the ultimate dessert experience.