
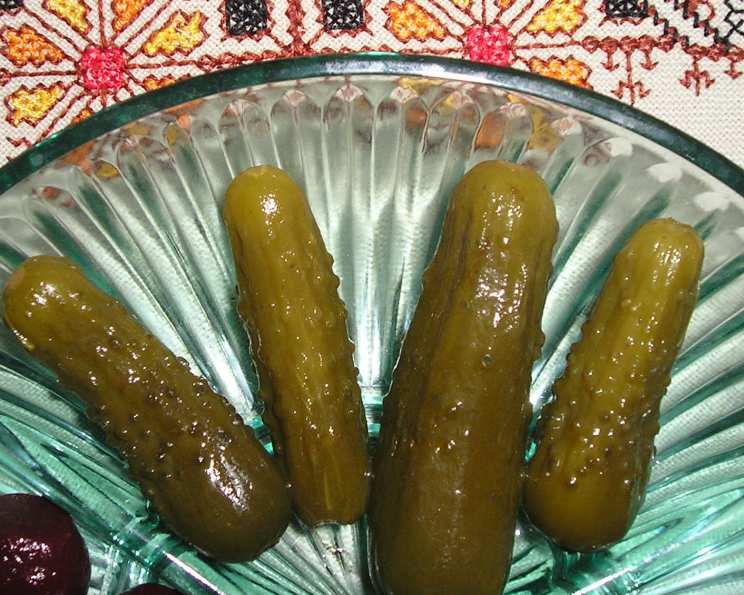
Lacto-Fermented Dill Pickles: A No-Vinegar Delight
My grandmother’s kitchen was a place of endless fascination, but the giant crock in the corner, bubbling away with something mysterious, was particularly intriguing. That crock held her famous dill pickles, brined in nothing but salt, water, and a generous handful of spices. The tangy, complex flavor of those pickles was unlike anything store-bought, a testament to the magic of lacto-fermentation. They had a depth, a zing, a certain je ne sais quoi that I’ve been chasing in my own kitchen ever since. This recipe is my tribute to her, adapted to the modern kitchen, but holding true to the principles of simple, natural fermentation.
Recipe Overview
- Prep Time: 30 minutes
- Fermentation Time: 6 weeks
- Total Time: 6 weeks, 30 minutes
- Yield: 1 quart
- Dietary Type: Vegan, Gluten-Free, Dairy-Free
Ingredients
- 2 tablespoons kosher salt
- 1 tablespoon mixed pickling spices
- 1 clove garlic (optional)
- 1 quart fresh small pickling cucumbers
- 1-2 heads of fresh green dill seed
- Filtered water, at room temperature
Equipment Needed
- Large pot
- Sterilized quart jar
- Sterilized lid and ring
- Soft brush
- Newspaper
Instructions
- Begin by sterilizing your quart jar. Place the jar in a large pot, cover it completely with water, and bring the water to a rolling boil.
- Boil the jar for 10 minutes to ensure it’s free from any unwanted bacteria that could interfere with the fermentation process.
- Carefully remove the sterilized jar from the boiling water and empty it. Set aside to cool slightly.
- Now, prepare your brine base. Add the kosher salt, pickling spices, and optional garlic clove to the bottom of the sterilized quart jar. The garlic adds a subtle pungent note that complements the dill beautifully.
- Introduce a small amount of filtered water to the jar and stir vigorously to dissolve the salt. This creates a concentrated brine that will help kickstart the fermentation.
- The key to great pickles lies in the cucumbers. Thoroughly wash your pickling cucumbers under cold running water. Then, take a soft brush and meticulously scrub each cucumber to remove any dirt, grit, or lingering dried flower blossoms. This step is crucial, as any impurities can negatively impact the flavor and texture of your pickles.
- Once your cucumbers are pristine, pack them tightly into the prepared jar, alternating with the dill heads. Aim to fit as many cucumbers as possible without breaking or bruising them. The tighter the pack, the better the cucumbers will stay submerged during fermentation.
- Leave a little headroom at the top of the jar. This space is essential for the gases produced during fermentation.
- Fill the jar to the top with filtered water, leaving approximately 1 inch of headroom between the water level and the jar’s rim.
- Cover the jar lightly with a sterilized lid and ring. Do not tighten completely. This allows gases to escape while preventing unwanted contaminants from entering.
- Let the jar sit at room temperature for 24 hours.
- After 24 hours, tighten the lid and store the jar in a cool, dark place, such as a basement or pantry, for 6 weeks. This extended fermentation period is essential for developing the characteristic tangy flavor of no-vinegar dill pickles.
- It’s advisable to place the jars on newspaper during fermentation, as some leakage may occur.
- After 6 weeks, your pickles are ready to enjoy! Store them in the refrigerator to slow down the fermentation process and maintain their crispness.
Expert Tips & Tricks
- Cucumber Selection: Smaller pickling cucumbers tend to stay crisper during fermentation. Look for varieties specifically labeled for pickling.
- Brine Strength: The salt concentration is critical for successful fermentation. Too little salt can lead to spoilage, while too much can inhibit fermentation. Use the specified amount of kosher salt for best results.
- Dill Abundance: Don’t skimp on the dill! Fresh green dill seed is what gives these pickles their signature flavor. If you can’t find dill seed, you can use fresh dill sprigs, but the flavor will be slightly different.
- Burping the Jar: During the first week of fermentation, you might notice bubbles forming in the jar. This is a sign that the fermentation process is underway. If you’re using a tightly sealed lid, “burp” the jar daily by briefly opening it to release excess pressure.
- Weighting the Cucumbers: To ensure the cucumbers stay submerged in the brine, you can use a fermentation weight or a small, clean glass jar filled with water to press them down. This helps prevent mold growth.
Serving & Storage Suggestions
These lacto-fermented dill pickles are a fantastic addition to sandwiches, burgers, and charcuterie boards. They’re also delicious as a simple snack straight from the jar. Once opened, store your pickles in the refrigerator for up to several months. The cold temperature will slow down the fermentation process and help maintain their crispness and flavor. Avoid storing them at room temperature, as this can lead to over-fermentation and spoilage.
Nutritional Information
Please note that the nutritional information is an estimate and can vary based on specific ingredients and portion sizes.
| Nutrient | Amount per Serving | % Daily Value |
|---|---|---|
| Calories | 5 kcal | 0% |
| Total Fat | 0g | 0% |
| Saturated Fat | 0g | 0% |
| Cholesterol | 0mg | 0% |
| Sodium | 230mg | 10% |
| Total Carbohydrate | 1g | 0% |
| Dietary Fiber | 0g | 0% |
| Sugars | 0g | 0% |
| Protein | 0g | 0% |
Variations & Substitutions
- Spicy Pickles: Add a pinch of red pepper flakes or a sliced jalapeno pepper to the jar for a spicy kick.
- Garlic Lovers: Increase the amount of garlic to your liking. You can even use roasted garlic for a sweeter, more mellow flavor.
- Different Spices: Experiment with different pickling spices, such as mustard seeds, coriander seeds, or black peppercorns.
- Sweet Pickles: Add a small amount of sugar or honey to the brine for a slightly sweeter pickle. Start with 1 teaspoon and adjust to taste.
- Herbed Pickles: Include other herbs, like bay leaf, mustard seed or celery seed.
FAQs (Frequently Asked Questions)
Q: Why don’t you use vinegar in this pickle recipe?
A: This recipe relies on lacto-fermentation, a natural process that uses beneficial bacteria to create lactic acid, which preserves the cucumbers and gives them their tangy flavor. Vinegar pickles get their sour flavor from vinegar, while lacto-fermented pickles rely on the sourness produced by the fermentation process.
Q: How long do these pickles last?
A: When stored properly in the refrigerator, these pickles can last for several months. However, their texture may soften slightly over time.
Q: Can I use large cucumbers for this recipe?
A: While you can use larger cucumbers, smaller pickling cucumbers tend to stay crisper during fermentation. If using larger cucumbers, cut them into spears or slices to fit in the jar.
Q: What if my pickles get moldy?
A: Mold growth indicates that the fermentation process has gone wrong. Discard the entire batch if you notice any signs of mold. Ensure cucumbers stay submerged during fermentation to prevent mold.
Q: My pickles are soft. What did I do wrong?
A: Soft pickles can result from various factors, including using cucumbers that are not fresh, insufficient salt in the brine, or fermentation at too high a temperature. Ensure you use fresh, firm pickling cucumbers and adhere to the specified salt measurement.
Final Thoughts
Making your own lacto-fermented dill pickles is a rewarding experience that connects you to the traditions of preserving and fermenting foods. The tangy, complex flavor of these pickles is unlike anything you can find in a store, and the process is surprisingly simple. So, gather your ingredients, grab a jar, and embark on your pickling adventure! Share your results and variations – I’d love to hear about them. These pickles are perfect alongside a hearty Reuben sandwich or a crisp, refreshing lager. Happy pickling!