
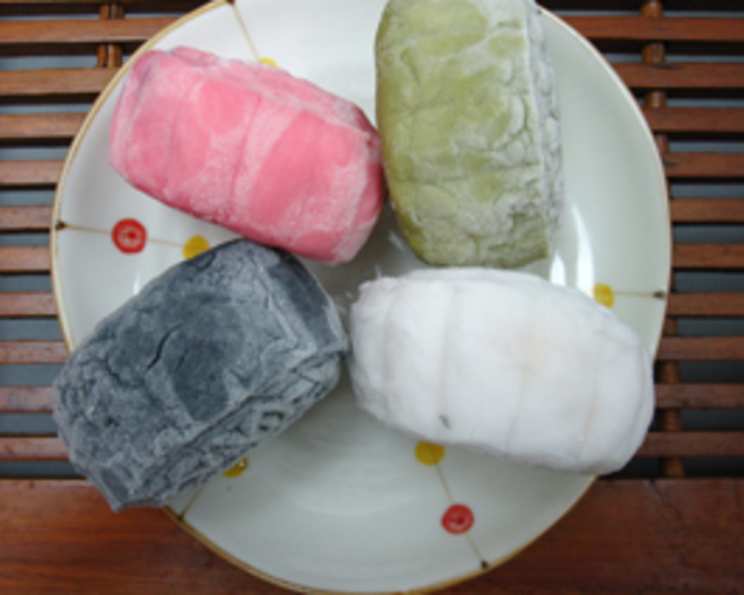
Dutch Duo Penotti Chocolate Hazelnut Meets Chinese Snowy Mooncake: A Delicious Fusion
The Mid-Autumn Festival was always a time of wonder for me as a child. The lanterns, the family gatherings, but most importantly, the mooncakes! I remember one year, my adventurous uncle, back from a trip to Europe, decided to introduce a new ingredient: a jar of Dutch chocolate hazelnut spread. At first, we were skeptical, but the rich, nutty flavor of the spread, swirled into the traditional fillings, was an instant hit. It was a delicious collision of cultures, a testament to the endless possibilities in the kitchen. Now, I love recreating those memories with my own family, adding my own little twist to this beloved treat.
Recipe Overview
- Prep Time: 30 minutes
- Cook Time: 0 minutes (no baking required)
- Total Time: 1 hour 30 minutes (including chilling)
- Yields: 8 (60g) mooncakes
- Dietary Type: Vegetarian
Ingredients
Snow-Skin Ingredients:
- 100 g rice powder
- 120 g hot water
- Vegetable oil (adequate amount)
- Green tea powder or Cafe 99 instant coffee powder (for coloring)
Coffee with Chocolate Hazelnut Filling:
- 80 g Duo Penotti Chocolate Hazelnut Spread
- 5-10 g Cafe 99 no sugar instant coffee powder
- 200 g mashed sesame or mashed bean
Traditional Mashed Bean with Chocolate Hazelnut Filling:
- 80 g Duo Penotti Chocolate Hazelnut Spread
- 200 g mashed green beans
Note: You can use any type of mashed beans you prefer for the fillings. The vegetable oil is used to create a smooth texture for the snow skin.
Equipment Needed
- Mixing bowls
- Spatula
- Steamer (optional, for a softer snow skin)
- Mooncake mold (60g size)
- Plastic wrap
- Measuring scales
Instructions
- Prepare the Snow Skin: In a heatproof bowl, combine the rice powder with the hot water. Stir the mixture until it forms a smooth batter.
- Add Oil and Color: Add an adequate amount of vegetable oil to the batter and stir until fully incorporated. At this stage, incorporate your chosen coloring: either green tea powder, Cafe 99 coffee powder, or bamboo charcoal powder, gradually mixing until you achieve your desired color intensity. Ensure the mixture remains smooth.
- Rest the Dough: Cover the snow-skin dough with plastic wrap and let it rest at room temperature for 10 minutes. This allows the gluten in the rice flour to relax, resulting in a more pliable skin.
- Divide the Dough and Fillings: While the dough rests, prepare your fillings. Divide the snow skin dough into 8 equal portions, each weighing approximately 25g. Similarly, divide each of the fillings (Coffee with Chocolate Hazelnut and Traditional Mashed Bean with Chocolate Hazelnut) into 8 equal portions, each weighing approximately 25g.
- Assemble the Mooncakes: Take one portion of the snow-skin dough and flatten it into a thin, circular disc using your fingers or a rolling pin (work on a lightly floured surface to prevent sticking). Place one portion of the chosen filling (either the Coffee with Chocolate Hazelnut or the Traditional Mashed Bean with Chocolate Hazelnut) in the center of the flattened dough.
- Seal the Mooncakes: Carefully wrap the dough around the filling, pinching the edges together to completely seal the filling inside. Gently roll the sealed mooncake between your palms to form a smooth, round ball.
- Mold the Mooncakes: Lightly dust the inside of your mooncake mold with fried glutinous rice flour (this will prevent sticking). Place the filled mooncake into the mold.
- Press and Release: Press the mooncake mold firmly onto a flat surface (like a table) to imprint the design onto the mooncake. Carefully release the molded mooncake from the mold.
- Chill and Serve: Repeat steps 5-8 with the remaining dough and fillings. Place the finished mooncakes in an airtight container and chill in the refrigerator for at least 30 minutes before serving. Chilling helps the mooncakes firm up and enhances their texture.
Expert Tips & Tricks
- Steaming the Dough: For an even softer and more translucent snow skin, you can steam the dough for about 15 minutes after step 2. Allow it to cool completely before proceeding with the rest of the recipe.
- Preventing Stickiness: If the dough is too sticky, add a little more rice flour, one teaspoon at a time, until you achieve the desired consistency. Similarly, lightly flour your hands and work surface to prevent sticking.
- Flavor Variations: Don’t be afraid to experiment with other fillings! Try using different nut butters, jams, or even ice cream.
- Coloring Techniques: For vibrant colors, use gel food coloring instead of powders. Add a small amount at a time until you reach your desired shade.
- Even Distribution of Filling: Using a small cookie scoop to portion out the filling can help ensure each mooncake has an equal amount.
- Making ahead: These can be made 1-2 days ahead of time and stored in the refrigerator.
Serving & Storage Suggestions
Serve the mooncakes chilled, directly from the refrigerator. They are best enjoyed within 2-3 days of making. Store leftover mooncakes in an airtight container in the refrigerator. While they can be frozen, the texture of the snow skin may change slightly upon thawing. To reheat (though not generally recommended), allow to thaw in the refrigerator. These mooncakes are a great accompaniment to Chinese tea!
Nutritional Information
| Nutrient | Amount per Serving (approx.) | % Daily Value* |
|---|---|---|
| Calories | 260 kcal | 13% |
| Total Fat | 18.4 g | 28% |
| Saturated Fat | 7.4 g | 37% |
| Cholesterol | 0 mg | 0% |
| Sodium | 12.7 mg | 1% |
| Total Carbohydrate | 20.3 g | 7% |
| Dietary Fiber | 4.7 g | 19% |
| Sugars | 11.7 g | 23% |
| Protein | 6 g | 12% |
*Based on a 2,000 calorie diet. Values are approximate and may vary based on specific ingredients used.
Variations & Substitutions
- Gluten-Free: This recipe is naturally gluten-free due to the use of rice flour.
- Vegan: While the base recipe is vegetarian, ensure the Duo Penotti spread you are using is vegan-friendly (some may contain dairy). Substitute with a vegan chocolate hazelnut spread if necessary. Also be sure to check the ingredients of any pre-made bean pastes.
- Flavor Infusions: Infuse the hot water with herbs like pandan leaves or osmanthus flowers for added flavor in the snow skin.
- Seasonal Fruits: Incorporate seasonal fruits into the filling, such as diced mangoes or strawberries.
- Nut Variations: Instead of mashed sesame or green beans, try using other nut butters or finely ground nuts like almonds or walnuts.
FAQs (Frequently Asked Questions)
Q: Why is my snow skin dough sticky?
A: The dough might be sticky due to excessive water. Add a tablespoon of rice flour at a time until it reaches a manageable consistency.
Q: Can I use other types of filling?
A: Absolutely! The possibilities are endless. Try red bean paste, lotus seed paste, or even a savory filling.
Q: How long do these mooncakes last?
A: They are best enjoyed within 2-3 days when stored in the refrigerator. The snow skin can dry out over time.
Q: Can I freeze these mooncakes?
A: Freezing is possible, but the texture of the snow skin may change upon thawing. Wrap them tightly in plastic wrap before freezing.
Q: Where can I find mooncake molds?
A: Mooncake molds are available online or at Asian grocery stores. They come in various shapes and sizes.
Final Thoughts
This Dutch Duo Penotti Chocolate Hazelnut meets Chinese Snowy Mooncake recipe is more than just a dessert; it’s a celebration of culture, creativity, and delicious flavor. Don’t be intimidated by the process – it’s easier than it looks! Gather your family, experiment with different fillings, and create your own unique mooncake traditions. I’d love to hear about your variations and experiences. Share your photos and feedback! Perhaps, enjoy your creation with a cup of green tea on a full moon night!