
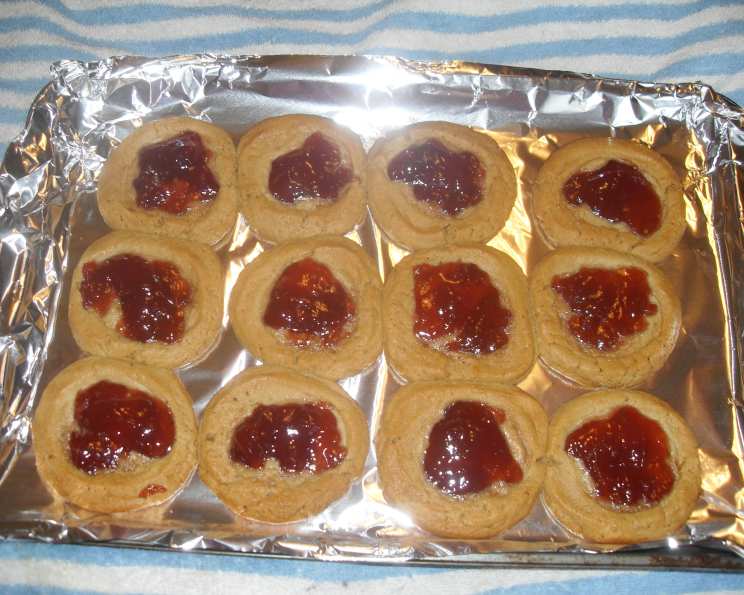
Quick & Easy Peanut Butter and Jelly Cookies: A Childhood Classic, Elevated
The scent of peanut butter cookies baking always takes me back to Mrs. Henderson’s after-school daycare. Sunlight streamed through her kitchen window, illuminating dust motes dancing in the air as we crowded around the table, sticky fingers reaching for warm, peanut-y goodness. But the real magic happened when she pulled out the jar of homemade raspberry jam, adding a vibrant jewel-toned crown to each golden cookie. These weren’t just cookies; they were miniature masterpieces, bursts of flavor that made even the dreariest Monday feel a little brighter. Today, I’m sharing a similar recipe that captures that nostalgic charm with minimal fuss.
Recipe Overview
- Prep Time: 15 minutes
- Cook Time: 25 minutes
- Total Time: 40 minutes
- Servings: 25
- Yield: 25 cookies
- Dietary Type: Vegetarian
Ingredients
- 1 cup peanut butter (plain or chunky)
- 1 cup sugar
- 1 egg, beaten
- ½ cup jam (more or less for garnish) or ½ cup jelly (more or less for garnish)
Equipment Needed
- Medium mixing bowl
- Cookie sheet
- Oven
- Measuring cups
- Teaspoon
- Fork or wooden spoon handle (for creating dimples)
Instructions
-
Begin by preheating your oven to 350°F (175°C). This ensures even baking and prevents the cookies from spreading too thin.
-
In a medium mixing bowl, combine the peanut butter, sugar, and beaten egg. Use a sturdy spoon or electric mixer to thoroughly mix these ingredients until they are well blended and form a cohesive dough. Don’t overmix, as this can result in a tougher cookie.
-
Once the dough is mixed, form it into ping pong ball-sized portions. Roll each portion between your palms to create smooth, round balls.
-
Place the dough balls onto an ungreased cookie sheet, spacing them about 1 inch apart. This allows for proper air circulation and prevents the cookies from sticking together during baking.
-
Gently flatten each cookie slightly with the palm of your hand or the back of a spoon. This creates a more even surface for baking and ensures that the cookies bake uniformly.
-
Now for the fun part! Using your finger or the handle of a wooden spoon, poke a dimple into the top of each cookie. This indentation will hold the jam or jelly after baking. Make sure the dimple is deep enough to hold a generous amount of filling, but not so deep that it goes all the way through the cookie.
-
Bake in the preheated oven for approximately 25 minutes, or until the edges of the cookies are light brown and the centers are firm to the touch. Keep a close eye on them, as baking times may vary depending on your oven.
-
Once baked, remove the cookies from the oven and allow them to cool to room temperature on the cookie sheet. This is crucial, as the cookies will continue to firm up as they cool. Trying to move them while they are still hot can cause them to break.
-
When the cookies have cooled completely, fill each dimple with approximately 1/4 teaspoon of your favorite jam or jelly. Get creative with your fillings! Try different flavors of jam or jelly to create a variety of flavor combinations.
-
Finally, serve these delightful cookies as a sweet snack with a refreshing glass of milk or enjoy them as a satisfying dessert after a meal.
Expert Tips & Tricks
- For a chewier cookie, use creamy peanut butter. For a more textured cookie, opt for chunky peanut butter.
- Don’t have time to make individual dimples? Flatten the cookies slightly and, after baking and cooling, spread a thin layer of jam or jelly over the entire surface of each cookie.
- If your dough is too sticky, chill it in the refrigerator for 15-20 minutes before rolling into balls.
- To prevent the cookies from spreading too thin, ensure that your oven is properly preheated and that you are using the correct amount of sugar.
- Want to elevate the presentation? Drizzle melted chocolate over the cookies after they have been filled with jam or jelly.
- For a peanut-free version, try using almond butter or sunflower seed butter instead of peanut butter.
Serving & Storage Suggestions
These Peanut Butter and Jelly Cookies are best served at room temperature. Arrange them attractively on a platter or in a cookie jar for easy access.
To store any leftover cookies, place them in an airtight container at room temperature. They will stay fresh for up to 3-4 days. For longer storage, you can freeze the cookies for up to 2 months. Thaw them at room temperature before serving. Note that the jam or jelly may become slightly softer after freezing and thawing.
Nutritional Information
(Approximate values per cookie. Will vary based on specific ingredients used)
| Nutrient | Amount per Serving | % Daily Value |
|---|---|---|
| Calories | 112 kcal | 6% |
| Total Fat | 5.4g | 8% |
| Saturated Fat | 1.1g | 5% |
| Cholesterol | 7.4mg | 2% |
| Sodium | 52.3mg | 2% |
| Total Carbohydrate | 14.4g | 4% |
| Dietary Fiber | 0.7g | 2% |
| Sugars | 12.1g | N/A |
| Protein | 2.9g | 5% |
Variations & Substitutions
- Gluten-Free: Use gluten-free all-purpose flour blend for a completely gluten-free version. You may need to add a tablespoon or two of milk to achieve the right consistency.
- Vegan: Replace the egg with a flax egg (1 tablespoon of ground flaxseed mixed with 3 tablespoons of water, let sit for 5 minutes). Ensure your jam or jelly is also vegan.
- Different Nut Butters: Experiment with almond butter, cashew butter, or sunflower seed butter for unique flavor profiles.
- Spice it Up: Add a pinch of cinnamon or nutmeg to the dough for a warm, comforting flavor.
- Chocolate Peanut Butter: Add 1/4 cup of cocoa powder to the dough for a chocolatey twist.
- Seasonal Jams: Use seasonal jams or preserves for a taste of the current season. Consider using apple butter in the fall or strawberry jam in the summer.
FAQs (Frequently Asked Questions)
Q: Can I use Splenda or another sugar substitute in this recipe?
A: Yes, you can substitute Splenda or another granulated sugar substitute for the sugar in this recipe. Keep in mind that this may affect the texture and browning of the cookies.
Q: Can I use sugar-free jam or jelly?
A: Absolutely! Using sugar-free jam or jelly is a great way to reduce the sugar content of these cookies.
Q: My dough is too crumbly. What should I do?
A: Add a teaspoon of milk or water at a time until the dough comes together. Be careful not to add too much liquid, as this can make the cookies spread too thin.
Q: Can I freeze the cookie dough?
A: Yes, you can freeze the cookie dough. Form the dough into balls, place them on a baking sheet, and freeze until solid. Then, transfer the frozen dough balls to a freezer bag and store for up to 2 months. Bake directly from frozen, adding a few extra minutes to the baking time.
Q: My cookies are spreading too thin. What went wrong?
A: This could be due to a few factors, such as using too much sugar, not chilling the dough, or an oven that is not properly preheated. Make sure your oven is at the correct temperature, chill the dough if needed, and double-check your ingredient measurements.
Final Thoughts
These Quick & Easy Peanut Butter and Jelly Cookies are a simple yet satisfying treat that is perfect for any occasion. Whether you’re looking for a nostalgic snack, a crowd-pleasing dessert, or a fun baking project with the kids, this recipe is sure to deliver. So, gather your ingredients, preheat your oven, and get ready to create some unforgettable memories. And don’t forget to share your creations and feedback – I’d love to hear about your baking adventures! Consider pairing these cookies with a tall glass of cold milk or a scoop of vanilla ice cream for the ultimate indulgence. Happy baking!