
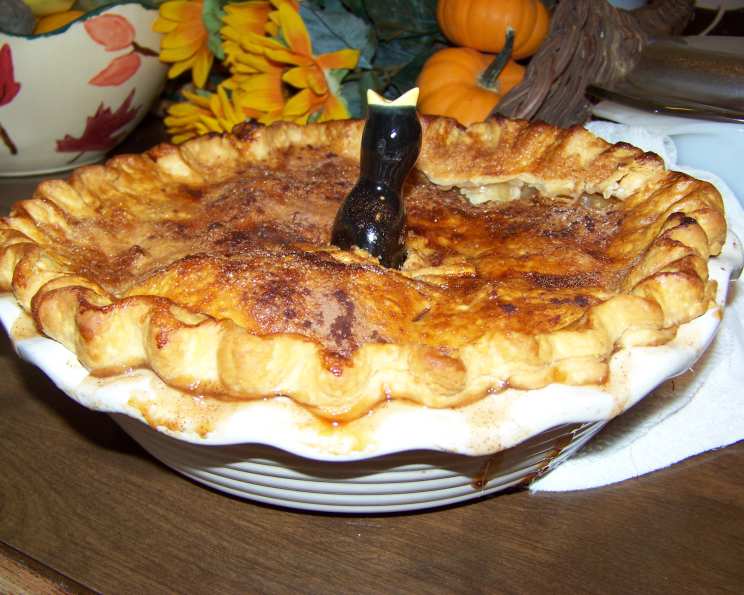
Old Fashioned Apple Pie: A Timeless Classic
The scent of baking apples, cinnamon, and butter has a magical way of transporting me back to my grandmother’s kitchen. I can almost see her now, standing at her worn wooden table, deftly rolling out the pie dough with a practiced hand. Her apple pies were legendary, the kind that made holidays feel truly special. While I never quite managed to replicate her exact touch, this recipe comes remarkably close to capturing that nostalgic warmth and comforting flavor. It’s more than just a pie; it’s a slice of my childhood.
Recipe Overview
- Prep Time: 30 minutes
- Cook Time: 1 hour
- Total Time: 1 hour 30 minutes
- Servings: 6
- Yield: 1 pie
- Dietary Type: Vegetarian
Ingredients
- 4 apples (20 oz), such as Gala or Honeycrisp
- 2 tablespoons lemon juice
- 2/3 cup granulated sugar
- 1/3 cup brown sugar
- 3 tablespoons flour
- 1 1/2 teaspoons cinnamon
- 1/4 teaspoon ground nutmeg
- 1/4 teaspoon ground cloves
- 2 tablespoons butter, cut into small pieces
- One double-crust pie pastry (store-bought or homemade)
Equipment Needed
- Pie dish (9-inch)
- Mixing bowl
- Measuring cups and spoons
- Paring knife
- Cutting board
- Pastry blender or food processor (if making homemade crust)
- Rolling pin (if making homemade crust)
Instructions
- Begin by preparing the apples. Peel, core, and slice them into 1/4-inch thick slices. It’s important to keep the slices relatively uniform in thickness so they cook evenly.
- Place the sliced apples in a large mixing bowl and toss with the lemon juice. This will prevent the apples from browning and add a touch of brightness to the filling.
- In a separate bowl, blend together the granulated sugar, brown sugar, flour, cinnamon, nutmeg, and cloves. Make sure there are no lumps in the flour or sugar.
- Pour the sugar mixture over the apples and toss gently to coat them evenly. Ensure that all the apple slices are well coated with the spices and sugars.
- Preheat your oven to 425 degrees Fahrenheit (220 degrees Celsius). While the oven is preheating, prepare the pie crust.
- Line your pie dish with the bottom pie crust. Crimp the edges as desired, or create a decorative edge using a fork.
- Pile the apple mixture into the unbaked pie shell. The pie filling should mound slightly in the center.
- Dot the top of the apple filling with the butter, distributing the pieces evenly across the surface. This adds richness and helps to prevent the apples from drying out during baking.
- Top the pie with the second pie crust. Crimp the edges to seal the top and bottom crusts together.
- Score the top crust in several places to allow steam to escape during baking. This prevents the crust from puffing up and potentially cracking. You can create a simple X pattern or get creative with your scoring design.
- Bake the pie at 425 degrees Fahrenheit (220 degrees Celsius) for 15 minutes. This initial high heat helps to set the crust quickly.
- Reduce the oven temperature to 350 degrees Fahrenheit (175 degrees Celsius) and continue baking for 45 minutes. The pie is done when the crust is golden brown and the filling is bubbling. If the crust starts to brown too quickly, you can loosely cover it with foil.
- Remove the pie from the oven and let it cool completely on a wire rack before slicing and serving. This allows the filling to set and prevents it from being too runny. Cooling the pie completely is crucial for a clean slice.
Expert Tips & Tricks
- Choose the right apples: A blend of tart and sweet apples like Granny Smith and Honeycrisp provides the best flavor and texture.
- Prevent a soggy bottom crust: Blind bake the bottom crust for 10-15 minutes before adding the filling for an extra-crisp base.
- Use cold butter for a flaky crust: Whether you’re making your own crust or using store-bought, ensure the butter is very cold for the best results.
- Egg Wash: Before baking, brush the top crust with an egg wash (1 egg yolk beaten with 1 tablespoon of water) for a beautiful golden sheen.
- For a deeper flavor, consider adding a tablespoon of apple cider vinegar to the filling.
Serving & Storage Suggestions
Serve the apple pie warm or at room temperature. It’s delicious on its own or with a scoop of vanilla ice cream or a dollop of whipped cream. Leftovers can be stored in the refrigerator for up to 3-4 days. To reheat, simply warm a slice in the microwave or oven. You can also freeze the baked pie for up to 2-3 months. Wrap it tightly in plastic wrap and then in foil before freezing. Thaw overnight in the refrigerator before reheating.
Nutritional Information
| Nutrient | Amount per Serving | % Daily Value |
|---|---|---|
| Calories | 350 kcal | 18% |
| Total Fat | 15g | 23% |
| Saturated Fat | 8g | 40% |
| Cholesterol | 30mg | 10% |
| Sodium | 150mg | 7% |
| Total Carbohydrate | 50g | 17% |
| Dietary Fiber | 3g | 12% |
| Sugars | 30g | – |
| Protein | 3g | 6% |
Note: Nutritional information is an estimate and may vary based on specific ingredients and portion sizes.
Variations & Substitutions
- Gluten-Free: Use a gluten-free pie crust recipe or a store-bought gluten-free crust.
- Vegan: Use a vegan pie crust and substitute the butter with a plant-based butter alternative.
- Spice it Up: Add a pinch of ground ginger or cardamom to the apple filling for a different flavor profile.
- Caramel Apple Pie: Drizzle caramel sauce over the apples before adding the top crust.
- Apple Crumble Pie: Replace the top crust with a crumble topping made from flour, butter, sugar, and oats.
FAQs (Frequently Asked Questions)
Q: Can I use different types of apples?
A: Absolutely! A mix of sweet and tart apples works best. Consider using a combination of Granny Smith, Honeycrisp, and Gala.
Q: How do I prevent the pie crust from burning?
A: If the crust starts to brown too quickly, loosely cover it with foil during the last 15-20 minutes of baking.
Q: Can I make the pie ahead of time?
A: Yes, you can bake the pie a day ahead and store it at room temperature. You can also freeze the baked pie for longer storage.
Q: My apple pie filling is too runny. What did I do wrong?
A: Make sure to use enough flour to thicken the filling and allow the pie to cool completely before slicing.
Q: Can I use frozen apples for the filling?
A: Yes, but thaw them completely and drain any excess liquid before using them in the recipe.
Final Thoughts
This Old Fashioned Apple Pie is a testament to the simple pleasures of baking. It’s a recipe that’s been passed down through generations, a reminder of cozy kitchens and shared meals. I encourage you to give it a try, and don’t be afraid to put your own spin on it. Whether you’re a seasoned baker or just starting out, this pie is sure to bring joy to your table. Pair it with a warm cup of tea or a scoop of vanilla ice cream for the perfect comforting treat. I’d love to hear about your baking adventures and any tweaks you make to the recipe! Enjoy!