
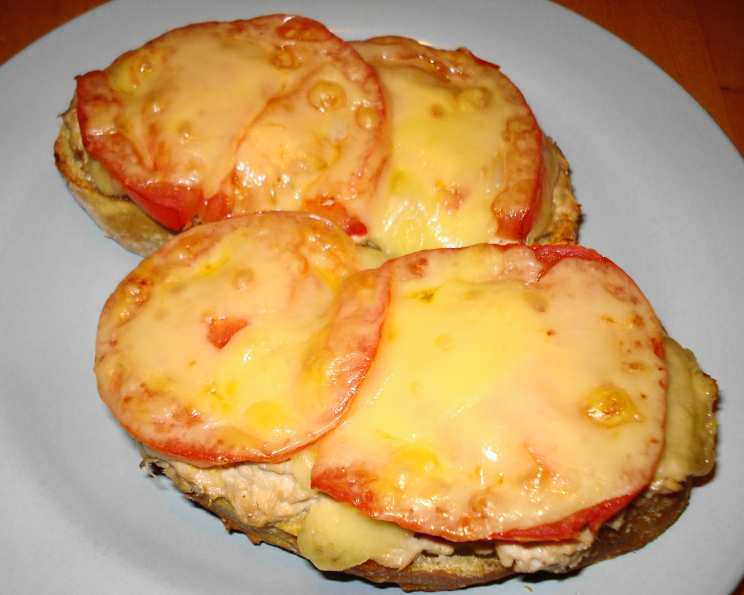
Open Face Tuna Melt Sandwich: A Culinary Classic Elevated
The aroma of a tuna melt toasting under the broiler – it’s a scent that instantly transports me back to my college days. Late-night study sessions fueled by this simple yet satisfying creation were a common occurrence. There was something so comforting about the combination of flaky tuna, creamy mayonnaise, and that sharp, tangy cheese all bubbling away on a slice of toasted bread. It was quick, easy, and utterly delicious – a perfect antidote to academic stress. Now, as a professional chef, I still find myself craving that nostalgic flavor, and I’ve perfected my own version of this beloved sandwich, ensuring every bite is a symphony of taste and texture.
Recipe Overview
- Prep Time: 10 minutes
- Cook Time: 5 minutes
- Total Time: 15 minutes
- Servings: 4
- Yields: 4 open-face sandwiches
- Dietary Type: Pescatarian
Ingredients
- 8 slices saloio bread, cut about ¾ inch thick and toasted lightly (ciabatta can be substituted)
- 3 (6 ounce) cans tuna in water, drained well
- ½ cup mayonnaise (can use light, adjust amount as needed)
- ¼ cup finely chopped onion
- 1 tablespoon lemon juice
- 1 tablespoon Old Bay Seasoning
- Salt and pepper to taste
- 2 tomatoes, sliced
- 8 slices piquante provolone cheese (or swiss)
Equipment Needed
- Mixing bowl
- Cookie sheet
- Broiler
Instructions
- Preheat your broiler. Ensure the rack is positioned not too close to the broiler element, ideally on the second rack down. This prevents the cheese from burning before the tuna mixture is heated through.
- In a medium mixing bowl, combine the drained tuna, mayonnaise, finely chopped onion, lemon juice, and Old Bay Seasoning.
- Season generously with salt and pepper. Remember that Old Bay already contains salt, so taste before adding more.
- Mix all ingredients thoroughly until well combined. The consistency should be creamy and easily spreadable.
- Take the lightly toasted slices of saloio bread. Evenly distribute the tuna mixture onto each slice, spreading it to cover the entire surface.
- Top each tuna-laden slice with slices of fresh tomato. If the tomato slices are small, use two slices per sandwich to ensure good coverage.
- Finally, add a slice of piquante provolone (or swiss) cheese on top of the tomato. If using larger bread slices, you might need two slices of cheese to adequately cover the tuna and tomato.
- Arrange the open-face sandwiches on a cookie sheet. Make sure the sandwiches are not overcrowded so that the hot air can circulate evenly.
- Broil the sandwiches until the cheese is melted, bubbly, and golden brown. This should take approximately 3-5 minutes, but keep a close eye on them to prevent burning. The exact time will depend on the strength of your broiler.
- Once the cheese is nicely browned and the tuna filling is heated through, remove the cookie sheet from the oven. Let the sandwiches cool slightly before serving.
Expert Tips & Tricks
- Elevate the Tuna Salad: For a richer flavor, try adding a tablespoon of Dijon mustard or a dash of hot sauce to the tuna mixture. A pinch of celery seed can also add a pleasant savory note.
- Bread Matters: While saloio bread provides a delightful texture, other sturdy breads like sourdough, rye, or even a good-quality whole wheat will work well. Ensure the bread is thick enough to hold the filling without becoming soggy.
- Cheese Choices: While provolone and Swiss are classic choices, don’t be afraid to experiment. Sharp cheddar, Gruyere, or even a pepper jack can add a unique twist.
- Prevent Soggy Bread: Lightly toasting the bread before adding the tuna mixture creates a barrier that prevents the bread from becoming soggy.
- Broiling Technique: Keep a close watch on the sandwiches while broiling, as they can burn quickly. The ideal distance from the broiler element is crucial for even browning.
- Make-Ahead Prep: The tuna salad can be made a day in advance and stored in the refrigerator. This allows the flavors to meld together even more.
Serving & Storage Suggestions
Serve your open-face tuna melts immediately while the cheese is still warm and gooey. They pair perfectly with a side of crisp coleslaw, a simple green salad, or some dill pickles. For a heartier meal, consider serving them alongside a bowl of tomato soup or a cup of your favorite vegetable soup.
Leftover tuna melts are best stored in the refrigerator. Wrap them individually in plastic wrap or store them in an airtight container. They will last for up to 2 days. Reheat them in a toaster oven or under the broiler until the cheese is melted and bubbly. Note that the bread may not be as crisp as when freshly made. It is not recommended to freeze these sandwiches, as the texture of the mayonnaise and bread will be compromised.
Nutritional Information
| Nutrient | Amount per Serving | % Daily Value |
|---|---|---|
| Calories | 315.9 kcal | – |
| Calories from Fat | 137 g | 43% |
| Total Fat | 15.2 g | 23% |
| Saturated Fat | 6.2 g | 31% |
| Cholesterol | 51.2 mg | 17% |
| Sodium | 774 mg | 32% |
| Total Carbohydrate | 18.6 g | 6% |
| Dietary Fiber | 1.1 g | 4% |
| Sugars | 3.2 g | – |
| Protein | 25.3 g | 50% |
Note: Nutritional information is an estimate and can vary based on specific ingredients and portion sizes.
Variations & Substitutions
- Spicy Tuna Melt: Add a tablespoon of sriracha or a pinch of red pepper flakes to the tuna mixture for a spicy kick.
- Mediterranean Tuna Melt: Incorporate Kalamata olives, sun-dried tomatoes, and feta cheese into the tuna mixture for a Mediterranean twist.
- Vegetarian Option: Substitute the tuna with mashed chickpeas seasoned with Old Bay and lemon juice for a vegetarian alternative.
- Gluten-Free: Use gluten-free bread slices to make this recipe suitable for those with gluten sensitivities.
- Dairy-Free: Use a dairy-free cheese alternative to make this recipe dairy-free.
- Herby Tuna Melt: Add fresh herbs like dill, parsley, or chives to the tuna salad for a burst of flavor.
- Avocado Tuna Melt: Add thin slices of avocado on top of the tuna before broiling for a creamy and healthy addition.
FAQs (Frequently Asked Questions)
Q: Can I use oil-packed tuna instead of water-packed tuna?
A: Yes, you can, but make sure to drain the tuna very well. You may also want to reduce the amount of mayonnaise slightly, as oil-packed tuna is already richer.
Q: Can I make these ahead of time and bake them later?
A: It’s best to assemble and bake these just before serving for the best texture. However, you can prepare the tuna salad mixture ahead of time and store it in the refrigerator until you’re ready to assemble the sandwiches.
Q: What if I don’t have Old Bay Seasoning?
A: You can substitute it with a mixture of paprika, celery salt, and black pepper. A seafood seasoning blend would also work.
Q: Can I grill these sandwiches instead of broiling them?
A: Yes, you can grill them over medium heat, flipping occasionally, until the cheese is melted and the bread is golden brown. Watch carefully to prevent burning.
Q: My cheese isn’t melting properly. What am I doing wrong?
A: Make sure your broiler is preheated and that the rack is positioned at the correct distance from the broiler element. You may also need to broil for a longer period, but keep a close eye on the sandwiches to prevent burning. Using freshly shredded cheese (if possible) may also melt more smoothly than pre-shredded versions, which can contain cellulose.
Final Thoughts
The open-face tuna melt sandwich is more than just a quick and easy meal; it’s a culinary canvas for creativity and flavor exploration. Whether you stick to the classic recipe or experiment with different ingredients and variations, this dish is sure to become a staple in your kitchen. So, gather your ingredients, preheat your broiler, and get ready to enjoy a warm, comforting, and utterly delicious sandwich that’s perfect for any occasion. Don’t hesitate to share your feedback and creative twists with me – I’m always eager to hear about your culinary adventures! Consider pairing it with a glass of crisp white wine or a refreshing iced tea for a complete and satisfying meal. Happy cooking!