
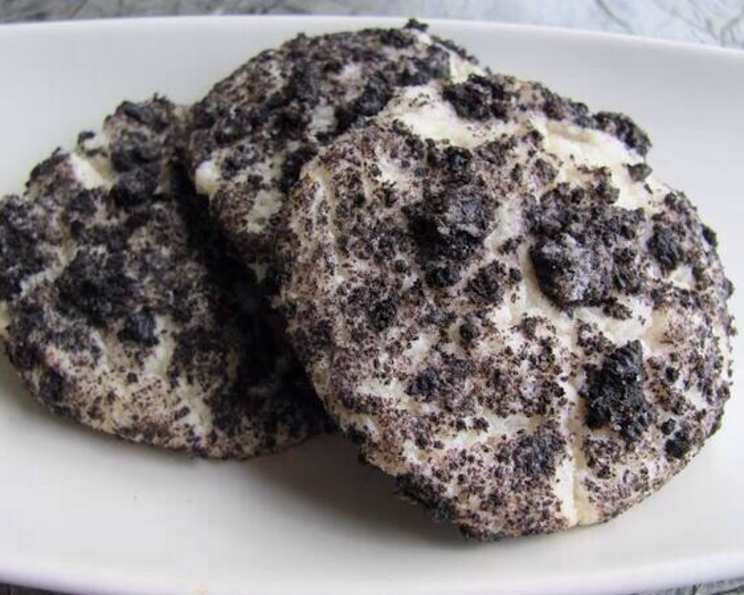
Oreo Cheesecake Cookies: A Decadent Delight
I remember the first time I tasted an Oreo cheesecake cookie. It was at a local bake sale, and I was immediately transported back to my childhood. The combination of creamy cheesecake filling and the iconic crunch of Oreos was pure bliss. I knew I had to recreate this magic in my own kitchen, and after many attempts, I finally perfected the recipe. These cookies are now a staple in my baking repertoire, and I’m thrilled to share them with you.
Recipe Overview
- Prep Time: 15 minutes
- Cook Time: 14-15 minutes
- Total Time: 30 minutes
- Yields: Approximately 36 cookies
- Serves: 36
- Dietary Type: Not suitable for vegans or those with gluten intolerance. Can be modified – see variations section.
Ingredients
- 1 cup butter, room temperature
- 8 ounces cream cheese, room temperature
- 2 cups sugar
- 2 teaspoons vanilla
- 2 cups all-purpose flour
- 3 cups Oreo cookie crumbs, divided
Equipment Needed
- Baking sheet
- Parchment paper
- Stand mixer (or hand mixer)
- Mixing bowls
- Measuring cups and spoons
- Cooling rack
Instructions
-
Preheat your oven to 375°F (190°C). It’s important to have the oven at the correct temperature for even baking.
-
Line a baking sheet with parchment paper. I cannot stress enough the importance of parchment paper when baking these cookies. It prevents sticking and ensures easy removal.
-
In the bowl of a stand mixer fitted with the paddle attachment, cream together the butter and cream cheese until well combined and fluffy. Room temperature ingredients are crucial here; they’ll blend together much more smoothly. If you don’t have a stand mixer, a hand mixer will also work, but it may require a little more effort.
-
Add in the sugar and vanilla, and mix well until everything is fully incorporated and the mixture is light and airy. This step is key to achieving the perfect cookie texture.
-
With the mixer on low speed, add the flour one cup at a time, mixing until just combined. Be careful not to overmix the dough, as this can lead to tough cookies. Mix until there are no more streaks of flour visible.
-
Stir in 1 cup of the Oreo cookie crumbs into the cookie mix. This will add a delightful Oreo flavor and texture to the inside of the cookies.
-
Pour the remaining 2 cups of Oreo cookie crumbs into a separate bowl.
-
Roll the cookie dough into 1.5-inch balls. A cookie scoop can help ensure uniform size. Then, roll each ball into the bowl of Oreo crumbles, making sure to coat each ball thoroughly. This coating helps hold the cookie together as it cooks and adds a beautiful Oreo crust.
-
Place the cookies 1-2 inches apart on the prepared baking sheet. This spacing allows for proper air circulation and prevents the cookies from merging during baking.
-
Bake on the center rack of the preheated oven for 14-15 minutes, or until the bottom edges just start to brown. Keep a close eye on them – ovens can vary, and you want to avoid overbaking.
-
Allow the cookies to cool on the baking sheet for a few minutes before transferring them to a wire rack to cool completely. This prevents them from breaking apart while they are still soft.
Expert Tips & Tricks
- Room Temperature is Key: Ensuring your butter and cream cheese are at room temperature is essential for a smooth and well-combined dough. If you forget to take them out in advance, you can microwave them in short bursts (5-10 seconds) until softened, but be careful not to melt them.
- Don’t Overmix: Overmixing the dough develops the gluten in the flour, resulting in tough cookies. Mix until just combined.
- Chill the Dough: For even thicker cookies with less spread, chill the dough for 30 minutes before rolling. This will help them hold their shape better during baking.
- Even Baking: To ensure even baking, rotate the baking sheet halfway through the baking time.
- Oreo Variety: Experiment with different Oreo flavors! Golden Oreos, mint Oreos, or even limited-edition flavors can add a unique twist to your cookies.
Serving & Storage Suggestions
These Oreo Cheesecake Cookies are delicious served warm or at room temperature. They pair perfectly with a glass of cold milk, a scoop of vanilla ice cream, or a cup of coffee.
- Storage: Store leftover cookies in an airtight container at room temperature for up to 3 days.
- Refrigeration: For longer storage, you can refrigerate the cookies for up to a week. Bring them to room temperature before serving.
- Freezing: These cookies freeze well. Place them in a single layer on a baking sheet and freeze until solid, then transfer them to a freezer-safe bag or container. They can be frozen for up to 2 months. Thaw at room temperature before serving.
Nutritional Information
Note: Nutritional information is an estimate and may vary based on specific ingredients and portion sizes.
| Nutrient | Amount per Serving | % Daily Value |
|---|---|---|
| Calories | 102 kcal | 5% |
| Total Fat | 5.5 g | 7% |
| Saturated Fat | 3.4 g | 17% |
| Cholesterol | 15.4 mg | 5% |
| Sodium | 49.2 mg | 2% |
| Total Carbohydrate | 12.5 g | 5% |
| Dietary Fiber | 0.1 g | 0% |
| Sugars | 8.5 g | 17% |
| Protein | 0.9 g | 2% |
Variations & Substitutions
- Gluten-Free: Use a gluten-free all-purpose flour blend and gluten-free Oreos to make these cookies gluten-free.
- Lower Sugar: Reduce the sugar by 1/4 cup for a slightly less sweet cookie.
- Different Cookies: While Oreos are classic, you can substitute other sandwich cookies like chocolate cream cookies or even peanut butter cookies. Just adjust the amount of cookie crumbs accordingly.
- Chocolate Chips: Add 1/2 cup of chocolate chips to the dough for an extra chocolatey treat.
- Extracts: Experiment with different extracts, such as almond extract or peppermint extract, to change the flavor profile.
- Vegan: This recipe would require significant alterations to be vegan, as the butter and cream cheese are dairy-based ingredients, and the Oreo filling typically contains dairy as well. If you want to try to make this recipe vegan, substitute vegan butter, cream cheese, and Oreos.
FAQs (Frequently Asked Questions)
Q: Can I use low-fat cream cheese?
A: While you can use low-fat cream cheese, the texture of the cookies may be slightly different. Full-fat cream cheese provides the best creamy texture.
Q: My cookies spread too thin. What did I do wrong?
A: The most common cause of cookies spreading too thin is using butter that is too soft or overmixing the dough. Try chilling the dough before baking and ensuring your butter is at a cool room temperature.
Q: Can I make the dough ahead of time?
A: Yes, you can make the dough ahead of time and store it in the refrigerator for up to 2 days. Be sure to wrap it tightly to prevent it from drying out. Let the dough come to room temperature slightly before rolling.
Q: How do I know when the cookies are done?
A: The cookies are done when the edges are lightly golden brown and the bottoms are just beginning to brown. The centers will still appear slightly soft.
Q: Can I add a glaze or frosting?
A: Absolutely! A simple powdered sugar glaze or a cream cheese frosting would be a delicious addition to these cookies.
Final Thoughts
Now it’s your turn to create these incredible Oreo Cheesecake Cookies in your own kitchen! Don’t be afraid to experiment with different flavors and variations to make them your own. Whether you’re baking for a special occasion or simply satisfying a sweet craving, these cookies are guaranteed to be a hit. Share your creations and let me know what you think! These cookies are also delightful paired with a rich, dark roast coffee or a scoop of vanilla bean ice cream for an extra decadent experience. Happy baking!