
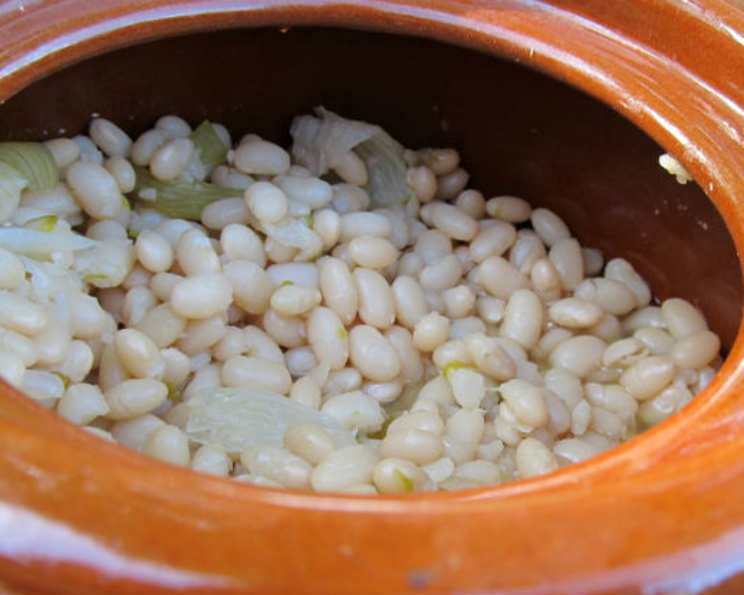
Oven-Baked Beans: A Simpler, Softer Way to Bean Bliss
I remember the first time I attempted to make beans from scratch. I envisioned a cozy afternoon stirring a pot on the stovetop, the aroma filling the kitchen with warmth. Instead, I got a mushy mess after hours of babysitting the pot! Determined to unlock the secret to perfect, creamy beans, I experimented with different methods. Then, I discovered the magic of oven-baking beans, and all my bean-cooking woes vanished. This method is incredibly hands-off, freeing you from the constant monitoring required on the stovetop, and yields incredibly tender beans every time.
Recipe Overview
- Prep Time: 5 minutes
- Cook Time: 1 hour 15 minutes to 2 hours+ (depending on the bean and oven)
- Total Time: 1 hour 20 minutes to 2 hours 5 minutes+
- Servings: 11
- Yield: 5 1/2 cups
- Dietary Type: Vegan, Gluten-Free, Dairy-Free
Ingredients
- 1 lb dried beans (such as navy, pinto, kidney, or black beans)
- Water
- 2 teaspoons salt
Equipment Needed
- Dutch oven or large oven-safe pot with a tight-fitting lid
Instructions
-
Preheat your oven to 325 degrees F (160 degrees C). This low and slow cooking method is key to evenly cooked, creamy beans.
-
Place the dried beans in your Dutch oven or other large oven-safe pot. Make sure it has a lid that fits snugly, as this will trap the steam and help the beans cook evenly.
-
Add the salt. This is important for seasoning the beans throughout the cooking process. Don’t skimp on the salt!
-
Pour water over the beans until the water level is approximately 1 inch above the top of the beans. The beans will absorb a significant amount of water as they cook, so ensure there’s enough to keep them submerged.
-
Cover the pot tightly with the lid. This helps to create a steamy environment, which is essential for even cooking and tender results.
-
Bake in the preheated oven for about 75 minutes.
-
Remove the pot from the oven (carefully, as it will be hot!) and stir the beans gently. Check for tenderness. The beans should be easily pierced with a fork and have a creamy texture.
-
If the beans are not yet tender, return the pot to the oven and continue baking in 15-minute intervals, checking for tenderness each time. This gradual approach allows you to achieve the perfect texture without overcooking the beans.
-
If the water level drops significantly during cooking and the beans start to look dry, add more water to keep them covered. Maintaining a sufficient water level is crucial for preventing the beans from drying out and cooking unevenly.
-
Once the beans are tender to your liking, remove the pot from the oven and let them cool slightly before using them in your favorite recipes.
Expert Tips & Tricks
- Bean Variety Matters: Different types of beans will have slightly different cooking times. Navy beans tend to cook faster than kidney beans, for example. Adjust the cooking time accordingly, always checking for tenderness at regular intervals.
- Salt Timing: Adding salt at the beginning helps the beans absorb it more evenly. You can always adjust the seasoning at the end, but starting with enough salt is crucial.
- Water Quality: Use filtered water for the best flavor. Tap water can sometimes contain minerals that can affect the taste and texture of the beans.
- The Lid is Key: A tight-fitting lid is essential for trapping steam and ensuring even cooking. If your pot doesn’t have a tight-fitting lid, you can use a double layer of aluminum foil tightly sealed over the top of the pot before placing the lid on.
- Don’t Overcrowd: Be sure to use a pot that is large enough to hold the beans and the water without overcrowding. Overcrowding can lead to uneven cooking.
- Adjust for Altitude: If you live at a high altitude, you may need to increase the cooking time. Start checking for tenderness after the initial 75 minutes, and add more time as needed.
- Clay Pot Option: Just like the source mentioned, a clay pot (like a Romertopf) can be used for even gentler cooking. Pre-soak the clay pot according to the manufacturer’s instructions before using.
Serving & Storage Suggestions
These perfectly cooked beans are incredibly versatile. Use them in your favorite chili recipe, add them to soups and stews, toss them with pasta, or mash them into a delicious dip.
- Serving: Serve the beans warm as a side dish, or incorporate them into your favorite recipes. Garnish with fresh herbs, a drizzle of olive oil, or a squeeze of lemon juice for added flavor.
- Storage: Leftover beans can be stored in an airtight container in the refrigerator for up to 5 days.
- Freezing: For longer storage, freeze the beans in airtight containers for up to 3 months. Thaw them overnight in the refrigerator before using.
- Reheating: Reheat the beans gently on the stovetop or in the microwave, adding a little water if necessary to prevent them from drying out.
Nutritional Information
(Note: Nutritional information is an estimate and may vary based on the specific type of bean used.)
| Nutrient | Amount per Serving | % Daily Value |
|---|---|---|
| Calories | 210 kcal | 11% |
| Total Fat | 1g | 1% |
| Saturated Fat | 0g | 0% |
| Cholesterol | 0mg | 0% |
| Sodium | 475mg | 20% |
| Total Carbohydrate | 38g | 14% |
| Dietary Fiber | 15g | 54% |
| Sugars | 2g | |
| Protein | 14g | 28% |
Variations & Substitutions
- Spice It Up: Add a bay leaf, a sprig of thyme, or a clove of garlic to the pot for extra flavor.
- Smoked Flavor: Include a smoked ham hock or a few slices of bacon for a smoky flavor. (Not vegan)
- Vegetarian Variation: Add vegetable broth instead of water for a richer, more flavorful result.
- Type of Bean: Feel free to experiment with different types of beans – kidney beans for a heartier texture, pinto beans for a Southwestern flair, or black beans for a Mexican-inspired dish.
- Different Herbs: Rosemary and sage are also good herb choices.
- Chili Powder: Adding a teaspoon or two of chili powder will add a great depth of flavor.
FAQs (Frequently Asked Questions)
Q: Do I really not need to pre-soak the beans?
A: That’s the beauty of this oven-baking method! The low, slow cooking helps to break down the beans without pre-soaking.
Q: Can I use a different type of pot if I don’t have a Dutch oven?
A: Yes, any large, oven-safe pot with a tight-fitting lid will work. A ceramic or enamel-coated cast iron pot is also a good option.
Q: How do I know when the beans are done?
A: The beans are done when they are tender and easily pierced with a fork. They should have a creamy texture when you bite into them.
Q: What if the beans are still hard after 2 hours of cooking?
A: Some beans may take longer to cook, depending on their age and variety. Continue baking in 15-minute intervals, checking for tenderness each time. Make sure there is enough water in the pot, and that the lid is tightly sealed.
Q: Can I add other vegetables to the pot?
A: Yes, you can add vegetables such as onions, carrots, and celery to the pot for extra flavor. Add them during the last hour of cooking, so they don’t become too mushy.
Final Thoughts
This oven-baked bean method is a game-changer for anyone who loves the taste and health benefits of beans but doesn’t want to spend hours babysitting a pot on the stovetop. It’s a forgiving, hands-off technique that consistently delivers perfectly cooked, creamy beans. Try it with your favorite type of bean and let me know what you think! Serve these delectable beans alongside a grilled steak or a vibrant vegetable salad for a complete and satisfying meal. Bon appétit!