
Pan Release, Professional Pan Coating (Better Than Pam Spray!)
I still remember the frustration of perfectly crafted cakes sticking stubbornly to the pan. My grandmother, a seasoned baker, always had a secret weapon – a simple mixture she whipped up herself. It wasn’t fancy, but it was foolproof. No more scraping, no more crumbling edges, just clean releases every time. The aroma of her kitchen, filled with the sweet scent of baking and the comforting knowledge of baking success, is a memory I cherish. This pan release recipe brings back that feeling, offering a simple solution to a common baking woe.
Recipe Overview:
- Prep Time: 5 minutes
- Yields: 1 1/2 cups
Ingredients:
- ½ cup canola oil or vegetable oil
- ½ cup vegetable shortening, room temperature (Crisco shortening is good)
- ½ cup all-purpose flour
Equipment Needed:
- Mixing bowl
- Electric mixer
- Container with a lid
- Pastry brush or paper towel
Instructions:
-
In a mixing bowl, combine the canola oil (or vegetable oil), vegetable shortening, and all-purpose flour.
-
Using an electric mixer, beat the ingredients together until the mixture has increased slightly in volume and resembles marshmallow cream. The consistency should be smooth and easily spreadable.
-
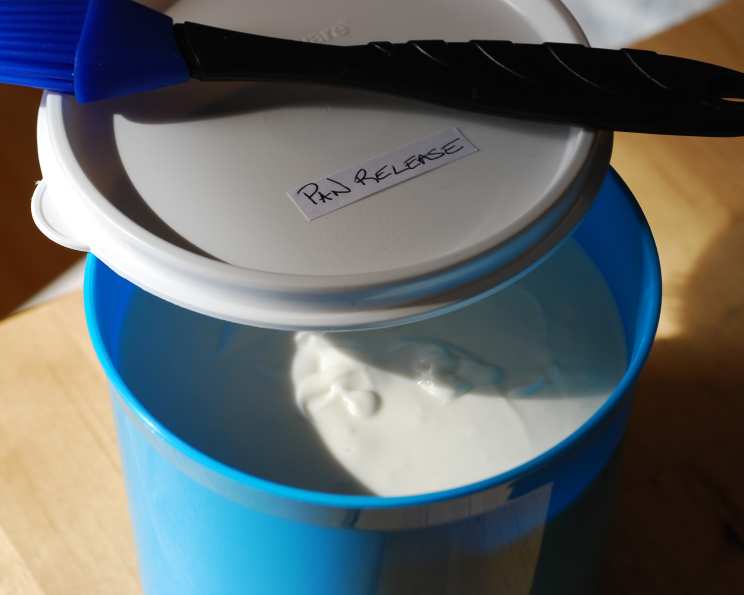
Transfer the prepared pan release to a container with a lid.
-
Store the container on the counter or in a cupboard. In hot weather, refrigeration is recommended to prevent separation.
-
Before each use, stir the mixture well to recombine any separated ingredients.
-
Using a pastry brush or a clean paper towel, brush a thin, even layer of the pan release onto the bottom and sides of your baking pans. Ensure all surfaces are lightly coated.
Expert Tips & Tricks:
-
Room Temperature is Key: Make sure your shortening is at room temperature. This allows it to cream properly with the oil and flour, creating a smooth and emulsified mixture. If the shortening is too cold, it will clump and be difficult to incorporate fully.
-
Whisking is Optional: If you don’t have an electric mixer, you can still make this pan release! Use a whisk and some elbow grease. It will take a little longer and require more effort, but you can achieve the same results with a bit of patience. Just make sure everything is thoroughly combined and the mixture is smooth.
-
Don’t Overmix: Overmixing can develop the gluten in the flour, resulting in a slightly tougher pan release. Mix until just combined and the mixture resembles marshmallow cream.
-
Cocoa Powder Variation: For baking recipes using chocolate, consider substituting part of the flour with unsweetened cocoa powder. Replace up to ½ cup of the flour with cocoa powder, or use ¼ cup of each. This will prevent any white residue from appearing on your chocolate baked goods. Be certain that all three ingredients are the same amounts or the mixture will not work as well.
-
Storage is Crucial: While this pan release is shelf-stable, proper storage is important. Make sure the container is tightly sealed to prevent it from drying out or absorbing odors from the cupboard. In warmer climates, refrigerating it is the best option to maintain its consistency and prevent separation.
-
Thin is In: A thin, even coat is all you need. Applying too much pan release can lead to a greasy residue on your baked goods. Use a light hand and ensure all surfaces are lightly coated.
-
For Intricate Pans: For bundt pans or pans with intricate designs, use a pastry brush to get into all the nooks and crannies. A paper towel might not be as effective in reaching those hard-to-reach areas.
-
Preventing Seperation: A slight seperation is normal during storage. However, if the mixture separates significantly and becomes difficult to recombine, it could indicate that the ingredients weren’t fully emulsified during the initial mixing or that the storage conditions are not ideal. Always ensure the mixture is thoroughly combined when you first make it, and store it in a cool, dark place, or in the refrigerator, to help prevent excessive separation.
Serving & Storage Suggestions:
This pan release is not for serving! It’s strictly for prepping your pans for baking. Store it in an airtight container on your countertop for up to several months. If you live in a warm climate, refrigerate it to extend its shelf life and prevent separation. Be sure to stir well before each use, regardless of storage location.
Nutritional Information:
| Nutrient | Amount per Serving | % Daily Value |
|---|---|---|
| Calories | 1398.1 kcal | N/A |
| Calories from Fat | 1272 g | 91% |
| Total Fat | 141.4 g | 217% |
| Saturated Fat | 29.2 g | 145% |
| Cholesterol | 0 mg | 0% |
| Sodium | 0.8 mg | 0% |
| Total Carbohydrate | 31.8 g | 10% |
| Dietary Fiber | 1.1 g | 4% |
| Sugars | 0.1 g | 0% |
| Protein | 4.3 g | 8% |
Note: Nutritional information is an estimate and may vary based on specific ingredients and measurements.
Variations & Substitutions:
-
Gluten-Free: Substitute the all-purpose flour with a gluten-free all-purpose blend. Ensure the blend contains xanthan gum or another binding agent for the best results.
-
Different Oils: While canola or vegetable oil are recommended for their neutral flavor, you can experiment with other oils like melted coconut oil (ensure it is melted for proper incorporation) or even light olive oil. Keep in mind that these oils may impart a slight flavor to your baked goods.
-
Vegan Option: This recipe is already vegan-friendly as long as you’re using a plant-based shortening.
-
Herbed Pan Release: For savory baking, consider adding dried herbs to the mixture. Rosemary, thyme, or oregano would be excellent additions for breads or savory cakes. Add about 1-2 teaspoons of dried herbs to the mixture when you are initially combining the ingredients.
FAQs (Frequently Asked Questions):
Q: Why is my pan release separating?
A: Separation is natural. Just stir well before each use to recombine the ingredients. Storing in the refrigerator can help minimize separation, especially in warm weather.
Q: Can I use this on non-stick pans?
A: While non-stick pans are designed to prevent sticking, using this pan release can further guarantee a clean release, especially for delicate or intricate baked goods.
Q: How long does this pan release last?
A: Stored properly, this pan release can last for several months on the counter or even longer in the refrigerator. If it develops an unusual odor or discoloration, discard it.
Q: Can I use this for high-sugar recipes like caramel?
A: Yes, this pan release works well for high-sugar recipes that are prone to sticking. Ensure the pan is thoroughly coated before adding the ingredients.
Q: What if I don’t have shortening? Can I substitute it?
A: While shortening provides a specific texture and consistency, you could try substituting it with an equal amount of softened butter or coconut oil. Keep in mind that this may slightly alter the final result.
Final Thoughts:
Now, armed with this simple yet powerful recipe, go forth and bake with confidence! Say goodbye to frustrating sticking and hello to perfectly released cakes, muffins, and breads. Don’t be afraid to experiment with variations to suit your specific baking needs. Share your baking triumphs with friends and family, and let them marvel at your flawlessly released creations. If you have any tricks or tips of your own, please share them – happy baking!