
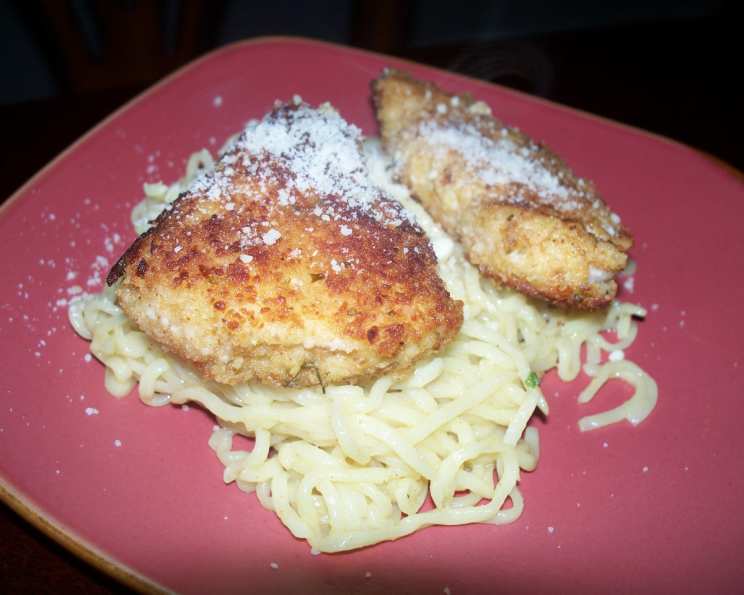
Parmesan Chicken Strips: A Crispy, Cheesy Delight
The memory is so vivid: my little brother, all of maybe six years old, meticulously lining up his Parmesan chicken strips on his plate, each one perfectly spaced like tiny golden soldiers. He’d then dip each strip, one by one, into a tiny pool of ketchup, savoring every single bite with an intensity only a child can muster. Even back then, I understood why he loved them so much – that satisfying crunch, the savory parmesan, and the juicy chicken hidden inside. This recipe brings me right back to those simple, joyful family dinners.
Recipe Overview
- Prep Time: 15 minutes
- Cook Time: 15 minutes
- Total Time: 30 minutes
- Servings: 4-6
- Dietary Type: Not Gluten-Free
Ingredients
- 1 1⁄2 lbs boneless, skinless chicken breasts
- 1 cup all-purpose flour
- 1 teaspoon kosher salt
- 1⁄2 teaspoon freshly ground black pepper
- 2 extra-large eggs
- 1 tablespoon water
- 1 cup seasoned bread crumbs
- 1⁄2 cup grated Parmesan cheese
- Unsalted butter
- Olive oil
Equipment Needed
- 3 shallow dishes or plates
- Whisk
- Large sauté pan or skillet
- Tongs
Instructions
-
Begin by preparing the chicken. Cut the chicken breasts into strips, about 1 inch wide and 3-4 inches long. This ensures even cooking and that perfect crispy exterior.
-
Set up your breading station. In a shallow dish or plate, combine the all-purpose flour, kosher salt, and freshly ground black pepper. Mix well with a fork to ensure the seasonings are evenly distributed. This seasoned flour is the first layer of flavor and helps the egg mixture adhere properly.
-
In a second shallow dish or pie plate, crack the two extra-large eggs. Add 1 tablespoon of water to the eggs. Whisk vigorously until the eggs and water are fully combined and slightly frothy. The water helps to thin the eggs, creating a lighter coating.
-
In a third shallow dish or plate, combine the seasoned bread crumbs and grated Parmesan cheese. Mix thoroughly. The Parmesan cheese adds a salty, nutty flavor and helps to create that golden-brown, crispy crust.
-
Now it’s time to bread the chicken strips. Take each chicken strip and dredge it thoroughly in the flour mixture, making sure to coat all sides. Shake off any excess flour.
-
Next, dip the flour-coated chicken strip into the egg mixture, ensuring it’s fully submerged. Allow any excess egg to drip off.
-
Finally, roll the egg-coated chicken strip in the bread crumb and Parmesan cheese mixture, pressing gently to ensure the crumbs adhere to all sides.
-
Heat a large sauté pan or skillet over medium-low heat. Add 1 tablespoon of unsalted butter and 1 tablespoon of olive oil to the pan. The combination of butter and olive oil provides both flavor and a higher smoke point, preventing the butter from burning.
-
Once the butter is melted and the oil is shimmering, carefully place the breaded chicken strips in the hot pan, making sure not to overcrowd it. Work in batches if necessary.
-
Cook the chicken strips for approximately 5-7 minutes per side, or until they are golden brown and cooked through. The internal temperature should reach 165°F (74°C). Use tongs to flip the chicken strips and ensure even cooking.
-
As the chicken strips cook, keep an eye on the pan. If the pan becomes dry, add more butter and olive oil as needed to prevent the chicken from sticking and burning.
-
Once the chicken strips are cooked through and golden brown, remove them from the pan and place them on a wire rack to drain any excess oil. This helps to maintain their crispy texture.
-
Serve immediately and enjoy!
Expert Tips & Tricks
- For extra crispy chicken, consider double-dredging. After the initial breading, dip the chicken back into the egg wash and then into the breadcrumb mixture again. This creates a thicker, crunchier coating.
- Don’t overcrowd the pan! Overcrowding lowers the pan temperature, leading to steamed, rather than crispy, chicken.
- Use a meat thermometer to ensure the chicken is cooked through. Inserting it into the thickest part of the strip will give you an accurate reading.
- If you want to prepare these ahead of time, bread the chicken and place it on a baking sheet lined with parchment paper. Cover with plastic wrap and refrigerate for up to 24 hours. Bring to room temperature for about 15 minutes before cooking.
- For even more flavor, add a pinch of garlic powder or dried Italian herbs to the breadcrumb mixture.
Serving & Storage Suggestions
Serve these Parmesan chicken strips hot, straight from the pan! They are fantastic as a main course with a side of roasted vegetables, mashed potatoes, or a simple salad. They also make a great appetizer or snack, served with your favorite dipping sauce like marinara, honey mustard, ranch, or barbecue sauce.
Leftover Parmesan chicken strips can be stored in an airtight container in the refrigerator for up to 3 days. To reheat, bake them in a preheated oven at 350°F (175°C) for about 10-15 minutes, or until heated through and crispy again. You can also reheat them in a skillet over medium heat, but be sure to watch them closely to prevent burning. Microwaving is not recommended as it can make them soggy. They can also be frozen, but the texture may change slightly upon thawing and reheating.
Nutritional Information
| Nutrient | Amount per Serving | % Daily Value |
|---|---|---|
| Calories | 513 kcal | N/A |
| Calories from Fat | 94 g | 18% |
| Total Fat | 10.5 g | 16% |
| Saturated Fat | 4.1 g | 20% |
| Cholesterol | 232.7 mg | 77% |
| Sodium | 1306.9 mg | 54% |
| Total Carbohydrate | 45.3 g | 15% |
| Dietary Fiber | 2.4 g | 9% |
| Sugars | 2.1 g | N/A |
| Protein | 55.3 g | 110% |
Note: Nutritional information is an estimate and may vary based on specific ingredients and portion sizes.
Variations & Substitutions
- Gluten-Free: Substitute the all-purpose flour and seasoned bread crumbs with gluten-free alternatives. Almond flour and gluten-free bread crumbs work well.
- Spicy: Add a pinch of cayenne pepper or red pepper flakes to the flour mixture or breadcrumb mixture for a spicy kick.
- Herbaceous: Mix in some dried herbs, such as thyme, rosemary, or oregano, into the breadcrumb mixture for added flavor.
- Air Fryer: For a healthier option, cook the breaded chicken strips in an air fryer at 400°F (200°C) for about 12-15 minutes, flipping halfway through. Spray with cooking oil for extra crispness.
- Different Cheese: Experiment with different types of cheese, such as Pecorino Romano, Asiago, or a blend of Italian cheeses.
FAQs (Frequently Asked Questions)
Q: Can I use dried bread crumbs instead of seasoned bread crumbs?
A: Yes, you can. Just be sure to add your own seasoning, such as salt, pepper, garlic powder, and Italian herbs, to the dried bread crumbs to enhance the flavor.
Q: How do I keep the breading from falling off the chicken?
A: Make sure the chicken strips are thoroughly coated in each layer – flour, egg, and bread crumbs. Press the bread crumbs gently onto the chicken to ensure they adhere well. Also, avoid overcrowding the pan, as this can cause the breading to loosen.
Q: Can I bake these chicken strips instead of frying them?
A: Yes, you can bake them. Place the breaded chicken strips on a baking sheet lined with parchment paper and bake at 400°F (200°C) for about 20-25 minutes, or until cooked through and golden brown, flipping halfway through.
Q: What is the best way to tell if the chicken is cooked through?
A: The best way is to use a meat thermometer. Insert it into the thickest part of the chicken strip. It should read 165°F (74°C).
Q: Can I freeze these chicken strips after they are cooked?
A: Yes, you can. Let them cool completely before placing them in a freezer-safe container or bag. They can be stored in the freezer for up to 2-3 months. Reheat them in the oven for best results.
Final Thoughts
These Parmesan Chicken Strips are more than just a meal; they’re a taste of comfort, a quick and easy way to bring joy to any dinner table. The simple combination of crispy breading, savory parmesan, and juicy chicken is a guaranteed crowd-pleaser. So, gather your ingredients, put on your apron, and prepare to create a dish that will have everyone asking for seconds. Don’t hesitate to experiment with different seasonings or dipping sauces to make it your own. And most importantly, enjoy the process and share your delicious creation with those you love!