
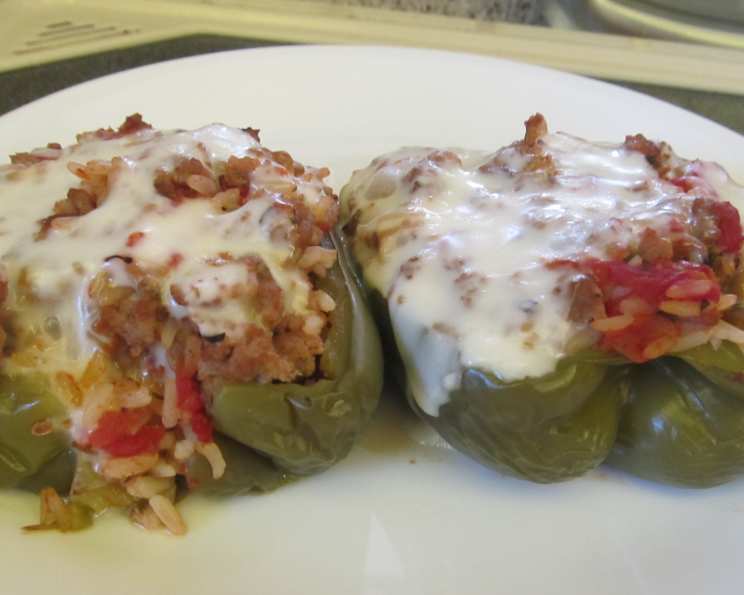
Parsley’s Stuffed Peppers: A Symphony of Savory Goodness
I can still remember the aroma wafting from my grandmother’s kitchen every fall. It was a tantalizing blend of sweet peppers, simmering tomatoes, and savory herbs – the unmistakable scent of her famous stuffed peppers. Each bite was a comforting hug, a taste of home and family. It wasn’t just a meal; it was a tradition, and one that I’m delighted to share with you today.
Recipe Overview
- Prep Time: 25 minutes
- Cook Time: 1 hour
- Total Time: 1 hour 25 minutes
- Servings: 6-7
- Yield: 6-7 peppers
- Dietary Type: Variable (can be made gluten-free)
Ingredients
- 6-7 large green bell peppers or 6-7 large red bell peppers, or a combination
- 1 lb ground sirloin
- 1 lb ground pork
- 1 large onion, finely chopped
- 4-6 garlic cloves, minced
- 1 (28 ounce) can crushed tomatoes
- 1 (16 ounce) can tomato sauce, DIVIDED
- 2 tablespoons chopped parsley
- 1 teaspoon oregano
- 1 teaspoon basil
- 1 teaspoon sugar
- ½ teaspoon marjoram
- ½ teaspoon pepper
- ¾ cup beef broth
- 1 cup instant brown rice
- Salt, to taste
- Mozzarella cheese (optional)
Equipment Needed
- Large, deep baking pan
- Large skillet
- Knife
- Cutting board
- Measuring cups and spoons
- Mixing spoon
- Aluminum foil
Instructions
-
Preheat your oven to 375°F (190°C). Lightly grease a large, deep baking pan to prevent sticking.
-
Prepare the bell peppers: Carefully cut the tops off each pepper. Remove and discard the seeds and membranes from inside the peppers, creating hollow shells.
-
Arrange the hollowed peppers cut-side up in the prepared baking dish. They should fit snugly but not be overcrowded.
-
In a large skillet over medium-high heat, brown and crumble the ground sirloin and ground pork with the finely chopped onion and minced garlic. Cook until the meat is no longer pink and the onions are translucent, usually about 8-10 minutes.
-
Carefully drain off any excess fat from the skillet. Return the cooked meat mixture to the skillet.
-
Add the crushed tomatoes, HALF of the tomato sauce (reserve the rest), chopped parsley, oregano, basil, sugar, marjoram, and pepper to the cooked meat mixture in the skillet. Stir well to combine.
-
Bring the mixture to a gentle simmer over medium heat, allowing the flavors to meld.
-
Add the beef broth and uncooked instant brown rice to the skillet. Stir well to ensure the rice is evenly distributed throughout the mixture.
-
Bring the mixture back to a soft boil, then immediately reduce the heat to low.
-
Cover the skillet tightly with a lid and simmer gently for 15 minutes, stirring occasionally (once or twice) to prevent sticking.
-
After 15 minutes, stir the filling mixture again and taste. Add salt to taste, adjusting the seasoning as needed.
-
Generously fill each hollowed bell pepper with the meat and rice filling. Pack the filling in firmly, but avoid overstuffing the peppers. If any leftover filling remains after stuffing the peppers, simply pour it over the top of the filled peppers in the baking dish.
-
Top each filled pepper with the RESERVED tomato sauce, distributing it evenly over the filling.
-
Loosely cover the baking dish with aluminum foil to prevent the peppers from drying out during baking.
-
Bake in the preheated oven for 45 minutes.
-
After 45 minutes, carefully remove the aluminum foil from the baking dish. If desired, sprinkle the tops of the stuffed peppers with mozzarella cheese.
-
Return the uncovered baking dish to the oven and bake for an additional 15 minutes, or until the cheese is melted and bubbly (if using) and the peppers are tender. You can add a bit more tomato sauce over the cheese at this point for extra moisture and flavor.
-
Remove from oven and let rest 5 minutes before serving.
Expert Tips & Tricks
- Pepper Selection: Choose peppers that are firm, brightly colored, and uniform in shape for easy stuffing. Green peppers have a slightly more bitter flavor than red or yellow peppers.
- Meat Mixture: For a leaner option, use ground turkey or chicken instead of pork. You can also add other vegetables like diced zucchini, carrots, or celery to the meat mixture for added flavor and nutrition.
- Rice Variation: While the recipe calls for instant brown rice, you can use regular brown rice if you adjust the cooking time accordingly. Pre-cook the rice before adding it to the filling.
- Spice It Up: Add a pinch of red pepper flakes or a dash of hot sauce to the meat mixture for a little extra heat.
- Make-Ahead: The stuffed peppers can be assembled ahead of time and stored in the refrigerator for up to 24 hours before baking. Add about 10 minutes to the baking time if baking from cold.
- Broiling for Color: For a more caramelized top, broil the peppers for the last few minutes of baking, keeping a close eye to prevent burning.
Serving & Storage Suggestions
Serve the stuffed peppers hot, directly from the oven. They pair well with a simple side salad or a crusty loaf of bread for soaking up the delicious sauce.
Leftover stuffed peppers can be stored in an airtight container in the refrigerator for up to 3-4 days. To reheat, microwave individual portions until heated through, or bake in a preheated oven at 350°F (175°C) until warmed through. You can also freeze them for longer storage (up to 2-3 months). Thaw completely before reheating.
Nutritional Information
| Nutrient | Amount per Serving | % Daily Value |
|---|---|---|
| Calories | 456.7 kcal | N/A |
| Calories from Fat | 218 g | 48% |
| Total Fat | 24.3 g | 37% |
| Saturated Fat | 9.2 g | 45% |
| Cholesterol | 90.2 mg | 30% |
| Sodium | 724.4 mg | 30% |
| Total Carbohydrate | 33 g | 11% |
| Dietary Fiber | 5.6 g | 22% |
| Sugars | 11.9 g | 47% |
| Protein | 27.9 g | 55% |
Nutritional information is an estimate and may vary based on specific ingredients and portion sizes.
Variations & Substitutions
- Vegetarian Stuffed Peppers: Replace the ground meat with lentils, quinoa, or crumbled tofu for a vegetarian-friendly option.
- Gluten-Free Stuffed Peppers: Ensure that the beef broth is gluten-free. The recipe is naturally gluten-free as long as the broth and any other additions do not contain gluten.
- Different Peppers: Experiment with different types of peppers, such as poblano or Anaheim peppers, for a unique flavor and heat level.
- Cheese Variations: Use different types of cheese, such as cheddar, Monterey Jack, or provolone, instead of mozzarella.
- Mediterranean Twist: Add chopped olives, feta cheese, and a squeeze of lemon juice to the filling for a Mediterranean-inspired flavor.
FAQs (Frequently Asked Questions)
Q: Can I use pre-cooked rice instead of instant rice?
A: Yes, but you will need to reduce the amount of beef broth, as the pre-cooked rice won’t absorb as much liquid during the simmering process. Start with about 1/2 cup of broth and add more as needed to keep the filling moist.
Q: Can I freeze the stuffed peppers after they are cooked?
A: Absolutely! Allow the cooked peppers to cool completely before wrapping them individually in plastic wrap and then placing them in a freezer-safe bag or container. They can be frozen for up to 2-3 months.
Q: My filling is too dry. What can I do?
A: Add a little more tomato sauce or beef broth to the filling to moisten it. Stir well and continue simmering for a few more minutes until the sauce is absorbed.
Q: Can I use different herbs in the filling?
A: Of course! Feel free to experiment with different herbs to create your own unique flavor profile. Thyme, rosemary, and sage are all great options.
Q: How do I prevent the peppers from becoming soggy?
A: Be sure to drain off any excess fat from the meat mixture before adding the other ingredients. Also, avoid overfilling the peppers, as this can cause them to become soggy during baking. Covering the baking dish with foil for part of the baking time helps to steam the peppers and make them tender without becoming waterlogged.
Final Thoughts
Stuffed peppers are a fantastic canvas for culinary creativity, and this recipe is a wonderful starting point. Don’t be afraid to experiment with different ingredients and flavors to create your own signature version. Gather your loved ones, share the aroma, and enjoy the warmth and comfort of this timeless dish. I hope this recipe becomes a cherished tradition in your home, just as it has in mine. And please, share your feedback and variations – I’m always eager to learn from fellow cooks!