
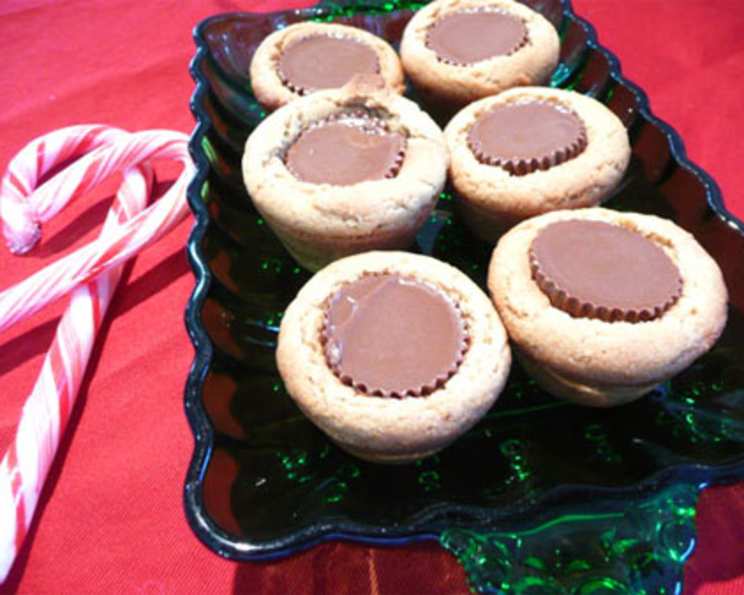
Peanut Butter Cup Cookies: A Sweet Symphony of Flavors
The aroma of warm peanut butter and chocolate mingling in the oven – it instantly transports me back to my childhood. My grandmother, a woman whose kitchen was always filled with love and delicious experiments, would often surprise us with these little nuggets of joy. They weren’t just cookies; they were tiny edible hugs, each bite a reminder of her warmth and the simple pleasures of life. That’s the magic I hope to share with you today with this recipe for Peanut Butter Cup Cookies.
Recipe Overview
- Prep Time: 15 minutes
- Cook Time: 8 minutes
- Total Time: 23 minutes
- Servings: 40 cookies
- Yield: 40 cookies
- Dietary Type: Vegetarian
Ingredients
- 1 3/4 cups all-purpose flour
- 1/2 teaspoon salt
- 1 teaspoon baking soda
- 1/2 cup (1 stick) butter, softened
- 1/2 cup white sugar
- 1/2 cup peanut butter (creamy or chunky, your preference!)
- 1/2 cup brown sugar, packed
- 1 egg, beaten
- 1 teaspoon vanilla extract
- 2 tablespoons milk
- 40 miniature peanut butter cups, unwrapped
Equipment Needed
- Measuring cups and spoons
- Mixing bowls
- Electric mixer (optional, but recommended)
- Sifter (optional)
- Mini muffin pan (ungreased)
- Cooling rack
Instructions
- Preheat your oven to 375 degrees F (190 degrees C). This is crucial to ensure the cookies bake evenly.
- In a medium bowl, sift together the flour, salt, and baking soda. Sifting ensures there are no lumps and everything is evenly distributed. Set this dry mixture aside.
- In a large bowl, cream together the softened butter, white sugar, peanut butter, and packed brown sugar until the mixture is light and fluffy. This is where an electric mixer comes in handy, but you can certainly do it by hand with a little elbow grease. Creaming the butter and sugars creates air pockets that contribute to the cookies’ soft texture.
- Beat in the egg, vanilla extract, and milk until well combined. The egg adds richness and helps bind the ingredients, while the vanilla enhances the overall flavor profile. The milk provides moisture, keeping the cookies tender.
- Gradually add the dry flour mixture to the wet ingredients, mixing until just combined. Be careful not to overmix, as this can lead to tough cookies. Mix until you see no more streaks of flour.
- Shape the dough into 40 small balls, each approximately 3/4 inch in diameter. A small cookie scoop can help ensure uniform size, which is important for even baking.
- Place each ball into an ungreased mini muffin pan. The mini muffin pan helps the cookies maintain a uniform shape and prevents them from spreading too much.
- Bake at 375 degrees F (190 degrees C) for about 8 minutes. Keep a close eye on them; you want them to be lightly golden brown around the edges.
- Remove the pan from the oven and immediately press a miniature peanut butter cup into the center of each cookie. The heat from the cookie will slightly melt the peanut butter cup, creating a gooey, delicious center.
- Allow the cookies to cool slightly in the pan before carefully removing them and placing them on a cooling rack to cool completely. This prevents them from breaking apart while still warm and soft.
Expert Tips & Tricks
- Soft Butter is Key: Ensure your butter is truly softened (not melted!) for optimal creaming. Take it out of the fridge at least an hour before you start baking.
- Don’t Overbake: These cookies are best when they’re slightly soft in the center. Overbaking will result in dry, crumbly cookies.
- Chill the Dough: If your dough is too sticky to handle, chill it in the refrigerator for 30 minutes before shaping the balls.
- Get Creative with Peanut Butter: Experiment with different types of peanut butter. Creamy peanut butter will yield a smoother cookie, while chunky peanut butter will add a delightful textural element.
- Elevate the Flavor: A pinch of flaky sea salt sprinkled on top of the finished cookies enhances the sweet and salty flavor profile.
Serving & Storage Suggestions
These Peanut Butter Cup Cookies are best enjoyed slightly warm, when the peanut butter cups are still melty and the cookies are soft. They make a wonderful addition to any dessert platter, a delightful treat for after-school snacks, or a thoughtful homemade gift.
To store, place cooled cookies in an airtight container at room temperature. They will stay fresh for up to 3-4 days. For longer storage, you can freeze them for up to 2 months. Thaw them at room temperature before serving.
Nutritional Information
Here is an approximation of the nutritional information per cookie:
| Nutrient | Amount per Serving | % Daily Value |
|---|---|---|
| Calories | 118 kcal | 6% |
| Total Fat | 6.3 g | 8% |
| Saturated Fat | 2.6 g | 13% |
| Cholesterol | 11.3 mg | 4% |
| Sodium | 123.7 mg | 5% |
| Total Carbohydrate | 13.9 g | 5% |
| Dietary Fiber | 0.6 g | 2% |
| Sugars | 8.8 g | N/A |
| Protein | 2.3 g | 5% |
Note: Nutritional information is an estimate and may vary based on specific ingredients and portion sizes.
Variations & Substitutions
- Gluten-Free: Substitute the all-purpose flour with a gluten-free blend. Be sure to use a blend that contains xanthan gum for binding.
- Different Nut Butters: Try using almond butter, cashew butter, or even sunflower seed butter for a unique twist.
- Chocolate Variations: Use different types of miniature chocolate cups, such as dark chocolate or white chocolate, instead of peanut butter cups.
- Add Sprinkles: Before baking, sprinkle the cookie dough balls with colorful sprinkles for a festive touch.
- Make them bigger: Use a regular sized muffin pan instead of a mini muffin pan and increase the baking time.
FAQs (Frequently Asked Questions)
Q: Can I use shortening instead of butter?
A: Yes, shortening can be used as a substitute for butter, but the cookies may have a slightly different texture. Butter contributes to the flavor and tenderness of the cookies.
Q: My cookies are spreading too much. What am I doing wrong?
A: This could be due to several factors, such as using butter that is too soft, overmixing the dough, or not chilling the dough sufficiently.
Q: Can I make the dough ahead of time?
A: Yes, you can make the dough ahead of time and store it in the refrigerator for up to 2 days. Allow the dough to come to room temperature slightly before shaping the cookies.
Q: How do I keep the peanut butter cups from melting too much?
A: Make sure to press the peanut butter cups into the cookies immediately after removing them from the oven. Also, avoid overbaking the cookies.
Q: My cookies are dry. What went wrong?
A: You may have overbaked the cookies or added too much flour. Be sure to measure the flour accurately and avoid overbaking.
Final Thoughts
These Peanut Butter Cup Cookies are more than just a recipe; they’re a chance to create sweet memories and share a little bit of happiness with those you love. I encourage you to try this recipe, experiment with different variations, and make it your own. Don’t be afraid to add your personal touch and share your creations with the world! And if you’re feeling extra decadent, pair them with a cold glass of milk or a warm cup of coffee. Happy baking!