
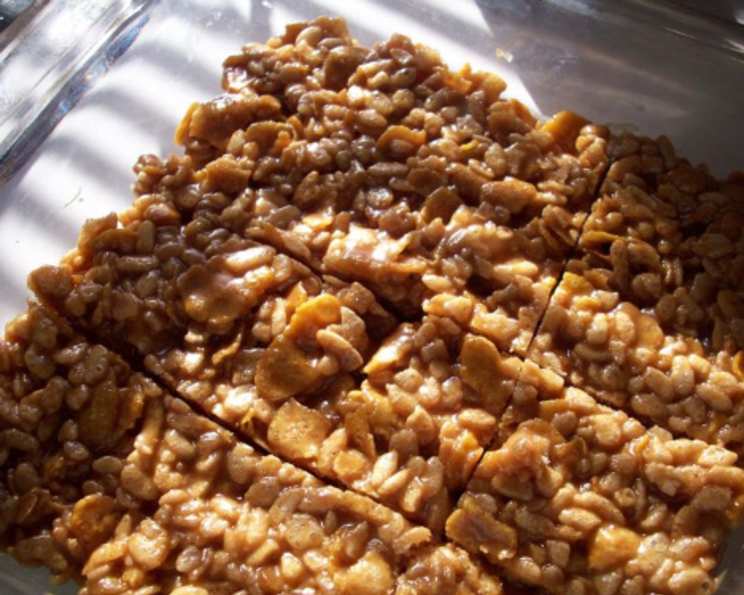
Peanut Butter Roll: A Nostalgic No-Bake Treat
There’s something truly magical about the simplest of recipes, the ones that transport you back to childhood with just one bite. For me, this Peanut Butter Roll is precisely that. I remember countless afternoons spent in my grandmother’s kitchen, eagerly watching her stir together the sticky, sweet mixture. The aroma of peanut butter and toasted cereal filled the air, a comforting scent that signaled an impending sugary delight. We’d patiently wait for it to cool just enough to handle, then gleefully grease our hands and help her form the perfect log, ready to be sliced and devoured. Those moments, filled with laughter and shared anticipation, are what make this recipe so much more than just a sweet treat; it’s a tangible connection to cherished memories.
Recipe Overview
- Prep Time: 10 minutes
- Cook Time: 2 minutes
- Total Time: 12 minutes
- Servings: 24
- Yield: 1 roll
- Dietary Type: Vegetarian
Ingredients
- 1 cup brown sugar
- 1 cup peanut butter (creamy or chunky, your preference!)
- 1 cup corn syrup
- 2 cups corn flakes
- 2 cups Rice Krispies
Equipment Needed
- Medium saucepan
- Mixing spoon
- Wax paper or parchment paper
- Measuring cups
Instructions
- In a medium saucepan, combine the brown sugar, peanut butter, and corn syrup.
- Place the saucepan over medium heat and bring the mixture to a boil, stirring constantly to prevent burning.
- Once boiling, continue to boil for about 1 minute, still stirring continuously. It’s crucial to keep a close eye on the mixture during this step as it can burn easily. Remove from heat immediately after the minute is up.
- In a large bowl, combine the corn flakes and Rice Krispies.
- Pour the hot peanut butter mixture over the cereal and stir quickly and thoroughly until all of the cereal is evenly coated. Ensure no dry cereal remains at the bottom of the bowl.
- Lay out a large sheet of wax paper or parchment paper. Grease your hands lightly with butter or cooking spray to prevent sticking.
- Transfer the mixture onto the wax paper. While it’s still warm (but cool enough to handle), form the mixture into a long, even roll about 2-3 inches in diameter. You can use the wax paper to help shape it.
- Wrap the roll tightly in the wax paper and refrigerate for at least 30 minutes to allow it to firm up.
- Once chilled and firm, unwrap the roll and slice into approximately ½-inch thick pieces.
- Serve immediately and enjoy!
Expert Tips & Tricks
- Preventing Burns: The peanut butter mixture can burn easily. Use medium heat and stir constantly while boiling. If you notice any scorching, immediately remove the pan from the heat and transfer the mixture to a clean pan.
- Peanut Butter Choice: Creamy peanut butter will yield a smoother roll, while chunky peanut butter will add a delightful texture. Experiment to find your preferred style.
- Cereal Consistency: If you prefer a softer roll, lightly crush the corn flakes before adding them to the mixture. This will prevent them from being too crunchy.
- Shaping the Roll: Greasing your hands is key to preventing the mixture from sticking. You can also use a lightly greased spatula or the wax paper itself to help shape the roll.
- Even Slices: For neat, even slices, use a sharp, thin knife. You can also dip the knife in warm water between slices to prevent sticking.
Serving & Storage Suggestions
The Peanut Butter Roll is best served chilled. Arrange the slices on a platter for a simple yet satisfying dessert. It’s perfect for parties, potlucks, or a quick after-school treat.
Store leftover slices in an airtight container in the refrigerator. They will keep for up to a week. You can also freeze the Peanut Butter Roll for longer storage. Wrap the entire roll tightly in plastic wrap and then place it in a freezer bag. It will keep in the freezer for up to 2 months. To thaw, simply transfer the roll to the refrigerator overnight.
Nutritional Information
| Nutrient | Amount per Serving | % Daily Value |
|---|---|---|
| Calories | 152 kcal | – |
| Calories from Fat | 49 kcal | – |
| Total Fat | 5.5g | 8% |
| Saturated Fat | 1.1g | 5% |
| Cholesterol | 0mg | 0% |
| Sodium | 92.2mg | 3% |
| Total Carbohydrate | 24.9g | 8% |
| Dietary Fiber | 0.7g | 2% |
| Sugars | 13.7g | – |
| Protein | 3g | – |
Note: Nutritional information is an estimate and may vary based on specific ingredients used.
Variations & Substitutions
- Nut-Free Version: Substitute the peanut butter with sunflower seed butter (sunbutter) for a nut-free alternative.
- Different Cereals: Experiment with different types of cereal, such as puffed rice or shredded wheat, for a unique flavor and texture.
- Chocolate Chips: Add ½ cup of semi-sweet chocolate chips to the cereal mixture for a chocolatey twist.
- Marshmallows: Stir in 1 cup of miniature marshmallows after adding the cereal for a gooey and sweet variation.
- Extracts: Enhance the flavor with a few drops of vanilla extract or almond extract.
- Spices: Add a dash of cinnamon or nutmeg to the peanut butter mixture for a warm and spicy flavor.
FAQs (Frequently Asked Questions)
Q: Can I use natural peanut butter?
A: Yes, you can use natural peanut butter, but be aware that it may result in a slightly drier roll. You might need to add a tablespoon or two more of corn syrup to achieve the desired consistency.
Q: How do I prevent the mixture from sticking to my hands?
A: Lightly grease your hands with butter or cooking spray before shaping the roll. You can reapply as needed.
Q: Can I make this ahead of time?
A: Absolutely! The Peanut Butter Roll is a great make-ahead dessert. Simply prepare it as directed and store it in the refrigerator until ready to serve.
Q: What if my roll is too soft?
A: If your roll is too soft, simply place it back in the refrigerator for a longer period of time to allow it to firm up further.
Q: Can I freeze this?
A: Yes, you can freeze the Peanut Butter Roll for up to 2 months. Wrap it tightly in plastic wrap and then place it in a freezer bag. Thaw in the refrigerator overnight before slicing and serving.
Final Thoughts
This Peanut Butter Roll is more than just a recipe; it’s a journey back to simpler times, a celebration of family, and a testament to the magic of simple ingredients. Whether you’re looking for a quick and easy dessert for a party, a nostalgic treat to share with loved ones, or simply a sweet indulgence for yourself, this recipe is sure to please. Don’t be afraid to experiment with variations and make it your own. Most importantly, have fun and enjoy the process! I encourage you to try this recipe and create your own memories with this classic treat. Share your creations and feedback – I’d love to hear how it turns out! Perhaps pair it with a glass of cold milk for the ultimate comfort food experience.