
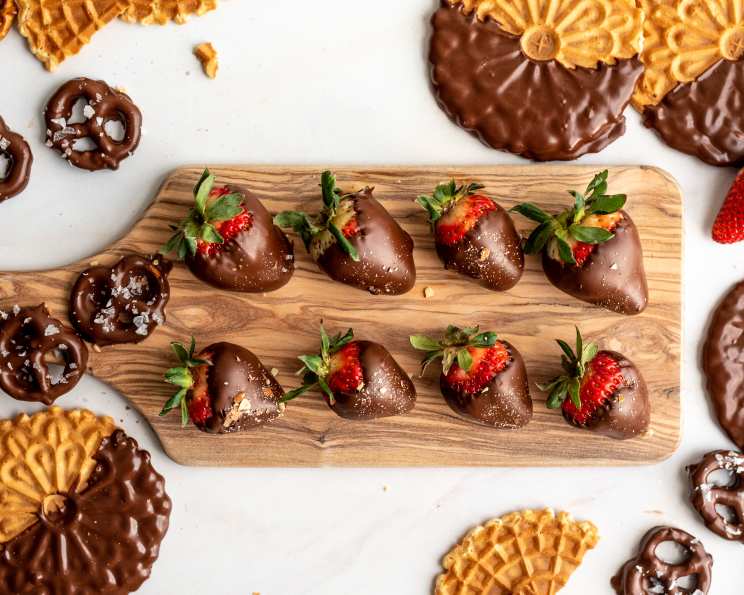
The Art of Perfect Dipping Chocolate: A Silky Smooth Indulgence
I still remember the first time I attempted to make chocolate-covered strawberries for a Valentine’s Day dessert. The chocolate was a clumpy, grainy mess, a far cry from the glossy, smooth coating I envisioned. Determined to master the technique, I embarked on a quest to create the perfect dipping chocolate – a quest that led me to discover the simple secret of using shortening and patiently coaxing the chocolate to its ideal consistency. Now, years later, I’m thrilled to share this foolproof method that guarantees a flawlessly smooth and luscious chocolate coating every time.
Recipe Overview
- Prep Time: 5 minutes
- Cook Time: 18-21 minutes
- Total Time: 23-26 minutes
- Yields: Approximately 30 candies
- Dietary Type: Vegetarian, Gluten-Free (depending on dipped items)
Ingredients
- 1 1/2 cups miniature semisweet chocolate chips (use pure chocolate chips, not chocolate flavored chips)
- 2 tablespoons Crisco shortening
Equipment Needed
- 2-cup measuring bowl
- Larger bowl
- Small spatula
- Two-pronged fork (dipping fork)
- Baking sheet
- Waxed paper
Instructions
- Begin by preparing your dipping items. If using refrigerated items like strawberries or chilled candies, remove them from the refrigerator about 10 minutes before coating. Dipping cold centers can sometimes result in the coating cracking.
- In a 2-cup measuring bowl, combine the miniature semisweet chocolate chips and the Crisco shortening.
- Find a larger bowl that will comfortably hold the 2-cup measuring bowl. Place the larger bowl on a stable surface and fill it with very warm water (approximately 100-110°F). The water level should reach only halfway up the sides of the smaller bowl containing the chocolate. It is crucial not to let even a single drop of water mix with the chocolate.
- Carefully place the 2-cup bowl with the chocolate and shortening into the bowl of warm water.
- Using a small spatula, stir the mixture constantly until the chocolate is completely melted and the mixture is smooth. This melting process should take approximately 16-18 minutes. Avoid the temptation to rush the melting process, as gentle heat is key to achieving a perfectly tempered chocolate.
- If the water in the larger bowl cools down significantly during the melting process, replace it with more very warm water to maintain a consistent temperature.
- Once the chocolate is fully melted and smooth, remove the 2-cup bowl from the water bath. Continue to stir the melted chocolate until it has cooled slightly, about 2-3 minutes. This slight cooling helps the chocolate set properly.
- Take one candy (or strawberry, pretzel, etc.) and carefully set it onto a two-pronged fork.
- Completely dip the candy into the melted chocolate, ensuring it’s fully coated.
- Gently tap the fork against the side of the bowl to remove any excess melted chocolate. This will help prevent drips and ensure a neater finish.
- Place the chocolate-covered candy onto a baking sheet lined with waxed paper.
- Repeat steps 8-11 with the remaining candy.
- If the chocolate becomes too thick for dipping at any point during the process, place the bowl containing the chocolate back into the bowl with warm water until it returns to the desired consistency.
Expert Tips & Tricks
- The Importance of Shortening: Only use shortening for this recipe. Butter, margarine, or oil will not provide the same smooth, stable results. Shortening helps to keep the chocolate fluid and prevents it from seizing.
- Avoiding Moisture: Moisture is the enemy of melted chocolate. Even a tiny bit of steam or a drop of water can cause the mixture to seize, becoming very firm, crumbly, and grainy. If this happens, don’t despair! You can often correct it by stirring in 1 teaspoon of shortening for each 2 ounces of melted chocolate.
- Double Boiler Method: As an alternative to the bowl-in-bowl method, you can also melt the chocolate over low heat in a double boiler.
- Tempering (Optional): For a truly professional-looking chocolate coating with a beautiful shine and snap, consider tempering the chocolate. This involves carefully controlling the temperature of the chocolate to stabilize the cocoa butter crystals. While this recipe doesn’t require tempering, it’s a worthwhile technique to explore for advanced chocolate work.
Serving & Storage Suggestions
Once the chocolate has set, you can serve your dipped treats immediately. They look beautiful arranged on a platter or packaged in decorative boxes for gifts.
To store leftover chocolate-covered items, place them in an airtight container and keep them in a cool, dry place. Avoid refrigerating them, as this can cause the chocolate to bloom (develop a white, powdery coating). Properly stored, they should last for several days at room temperature.
Nutritional Information
Here’s an approximate nutritional breakdown per candy. Note that this will vary based on the size of the candy and the amount of chocolate used.
| Nutrient | Amount per Serving | % Daily Value |
|---|---|---|
| Calories | 49 kcal | 2% |
| Calories from Fat | 31 kcal | N/A |
| Total Fat | 3.5 g | 5% |
| Saturated Fat | 1.8 g | 8% |
| Cholesterol | 0 mg | 0% |
| Sodium | 0.9 mg | 0% |
| Total Carbohydrate | 5.5 g | 1% |
| Dietary Fiber | 0.5 g | 2% |
| Sugars | 4.7 g | 18% |
| Protein | 0.4 g | 0% |
Variations & Substitutions
- Different Chocolate Types: Experiment with different types of chocolate, such as dark chocolate, milk chocolate, or white chocolate. Keep in mind that each type may melt slightly differently, so adjust the melting time accordingly.
- Flavor Extracts: Add a few drops of your favorite flavor extract, such as vanilla, almond, or peppermint, to the melted chocolate for a unique twist.
- Toppings: Before the chocolate sets, sprinkle on chopped nuts, shredded coconut, sprinkles, or sea salt for added flavor and texture.
FAQs (Frequently Asked Questions)
Q: Why is shortening used instead of butter or oil?
A: Shortening has a higher fat content and is more stable than butter or oil, which helps create a smooth, glossy, and easily workable dipping chocolate. Butter contains water and milk solids that can interfere with the chocolate’s texture.
Q: What if my chocolate seizes and becomes grainy?
A: Seizing is usually caused by moisture. Try stirring in 1 teaspoon of shortening for every 2 ounces of chocolate. This can sometimes help re-emulsify the chocolate.
Q: Can I use this chocolate for making chocolate bark?
A: Yes, this chocolate is perfect for making chocolate bark. Simply spread the melted chocolate onto a parchment-lined baking sheet, add your favorite toppings, and let it set.
Q: How long does it take for the chocolate to set?
A: The chocolate will typically set in about 30-60 minutes at room temperature, or faster in the refrigerator. However, avoid refrigerating if possible, as it can cause blooming.
Q: Can I reuse leftover melted chocolate?
A: Yes, you can reuse leftover melted chocolate. Allow it to cool completely, then store it in an airtight container at room temperature. To remelt, use the same method as before, but watch it carefully to avoid overheating.
Final Thoughts
Creating perfect dipping chocolate doesn’t have to be intimidating. With this simple recipe and a few key tips, you can transform ordinary treats into extraordinary indulgences. Whether you’re dipping strawberries for a romantic dessert, pretzels for a salty-sweet snack, or candies for a festive celebration, this foolproof method guarantees a smooth, glossy, and irresistible chocolate coating every time. So, gather your ingredients, embrace the process, and prepare to delight in the art of dipping! Don’t hesitate to experiment with variations and toppings to create your own signature chocolate creations. And please, share your experiences and any delightful variations you discover – happy dipping!